Application templates
Applications module File main menu / New application Templates
1. Basic application
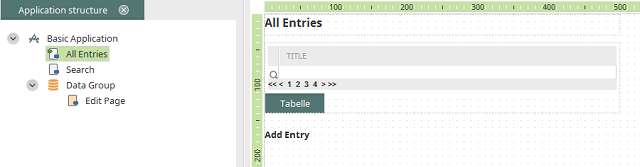
1.1 All entries
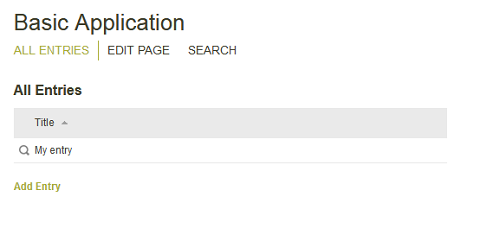
On the All entries page, all data records will be listed in a table. Existing data records can be viewed and edited by clicking on
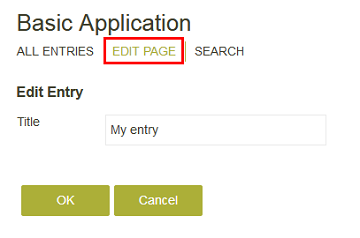
1.2. Edit page
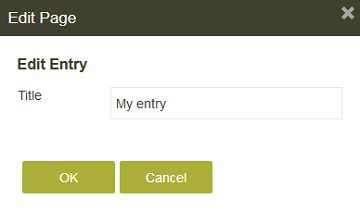
A new data record can be entered here. The edit page can also be reached from the application menu.
1.3. Search
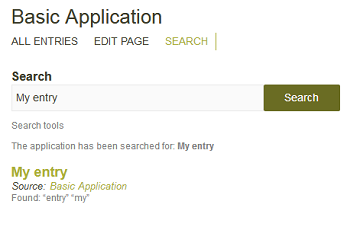
Like in all Intrexx applications, a Search page is available here. This allows you to search for data record values.
2. Empty application
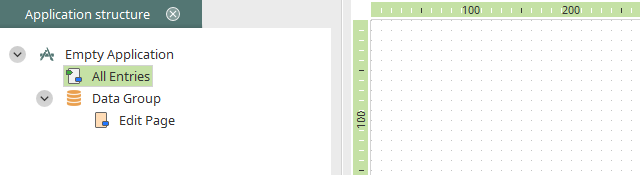
The empty application has the same structure as the basic application, but contains no edit field, no buttons and no view table on the All entries page.
3. Empty application - Tree structure
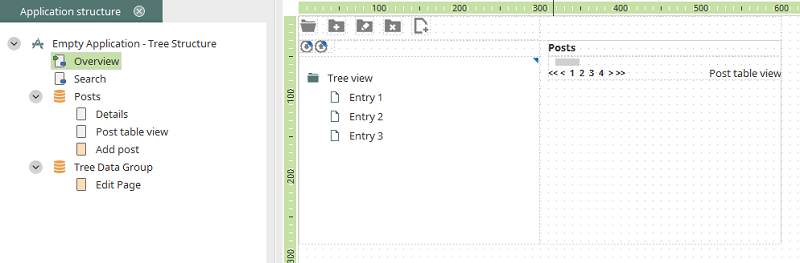
The Tree element is used here to depict a hierachical structure with folders.
3.1. Create root folder
Creates a folder at the top level that can contain further folders.
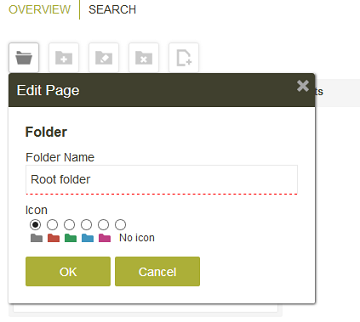
Folder name
Enter a Folder name here.Icon
If you'd like, you can select a folder color here. Save the new folder by clicking OK.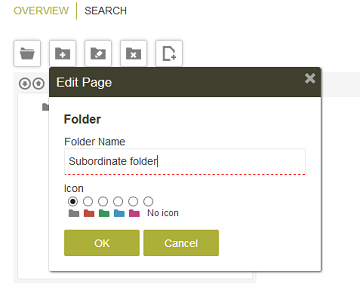
To create a subordinate folder, the corresponding root folder must be selected first. The icons above the tree structure provide the following functions:
3.2. Add post
Opens the Add post page.
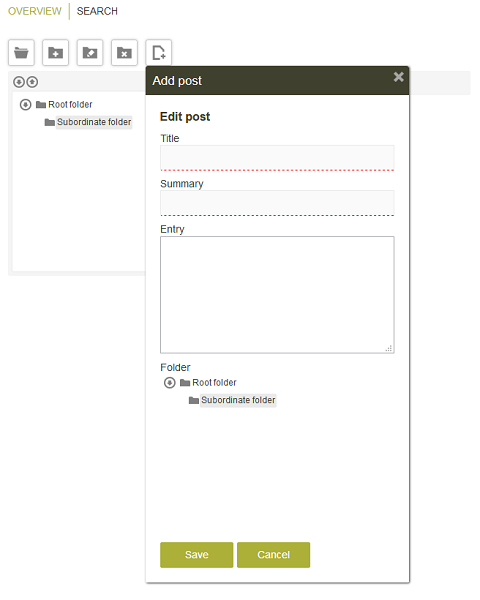
Title
Enter a title for the post.Summary
Enter a short description here.Entry
Enter the post's text here.Folder
The current folder structure is depicted here. Select the folder that should contain the post. Confirm your entries with Save to create the new post.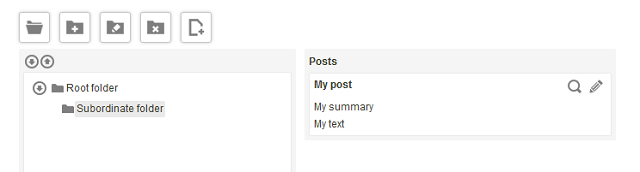
If you select a folder that contains an entry, the entry will be shown to the right of the folder structure. All folders can be moved within the structure via drag & drop.
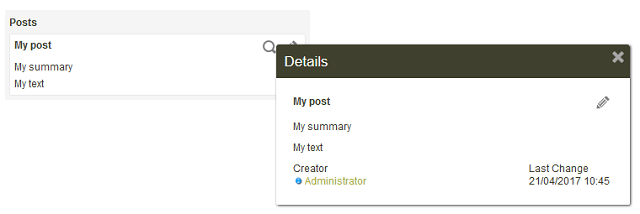
Opens a tooltip where post's creator and Last change date are shown alongside its information.
Opens the Add post page for editing.
4. Wiki

With the Wiki application template, a comprehensive collection of pages can be made available. In doing so, the structure of the entire contents will result from the interlinking between individual pages. No hierarchies for the ordering of articles will be used. For formatting and linking, a simple syntax will be used. The template allows for versioning and reverting to previous editing steps of an article.
4.1. Homepage
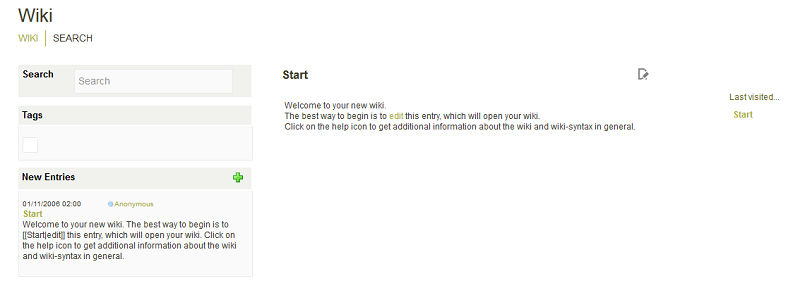
Search
Here, you can search for terms that appear in the title, summary or text of the wiki articles. The results list is shown beneath the search field. From there, the found article can be opened by clicking on the title.Tags
Here, all Tags defined for artciles are shown. Click on a tag to see a list of the corresponding articles.New entries
The 10 latest entries are shown here.Edit article
The Start article can be modified by clicking on the Edit link.Opens the Edit page where you can edit the article.
Last visited
This link appears on various pages in the Wiki application. Click on it to see a list of the articles that you've recently viewed. The articles can be opened from here by clicking on them.4.2. New article
Opens the Edit page where you can write an article.
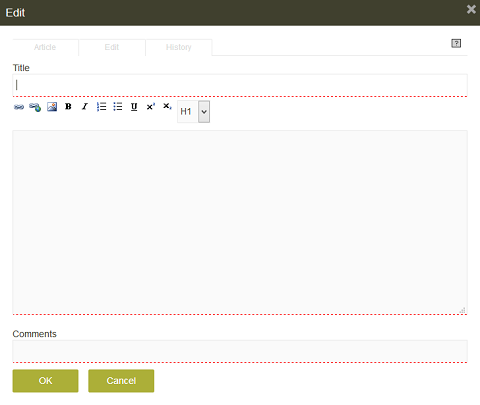
Click on OK to save the article.
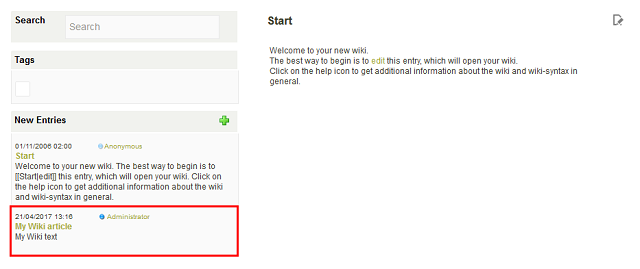
The article will now be shown in the New entries area. Clicking on the title will open the article for further editing.
4.3 Edit article - Article tab
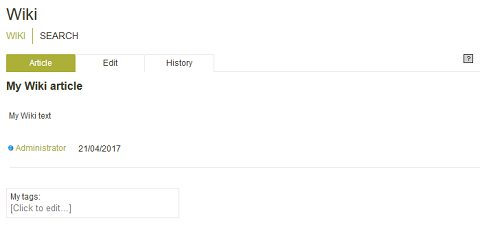
Displays information about linking and formatting the article.
My tags
A Tag can be defined here. Just enter a tag of your choice.
4.4 Edit article - Edit tab
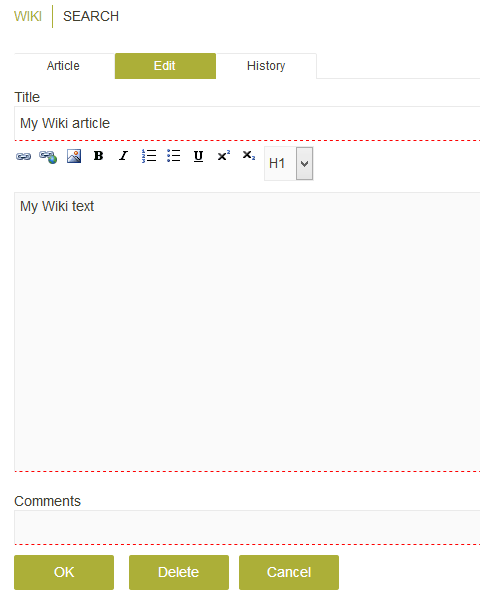
Comments
Is shown in the history of the changes made to the article.4.5 Edit article - History tab
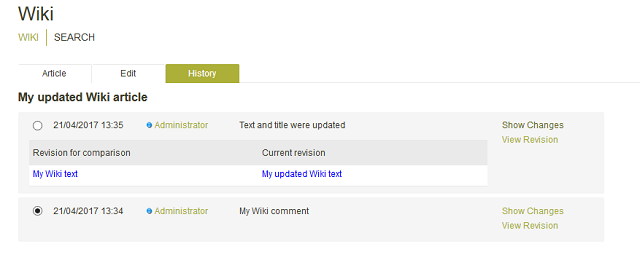
The changes made to the article are documented here.
Show changes
Compares an article with another version. Activate the radio button to the left of the version with which you'd to compare the version where you click on the Show changes link.View revision
Displays the article's current state in a new window.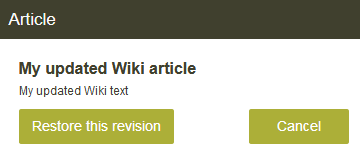
Restore this revision
Click on this button to restore the article state that is currently selected.5. Frequently asked questions
This template allows answers to be provided for frequently occurring questions.
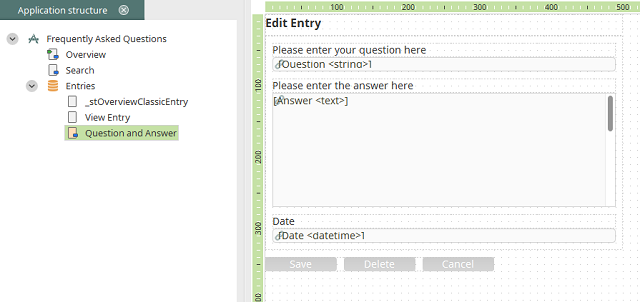
5.1. Question and answer
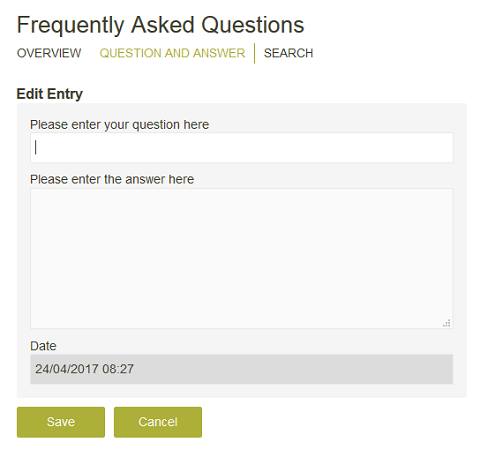
New questions and answers can be entered on this page. Enter the question and your answer and save them by clicking on Save. If you click on an entry on the page Overview, the answer will be shown.
5.2. Overview
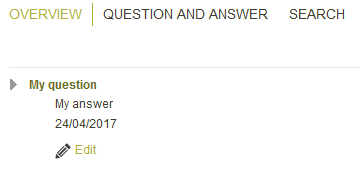
If you click on an entry here, the answer will be shown.
Opens the edit page where the entry can be modified or deleted.
6. Documents
The Documents template allows you to create an easy-to-use document management system. Each document entered here will be saved on the Intrexx portal server. For searches, each document can have any number of search terms assigned to it. A check-in and check-out function allows for secure administration of various release versions. The search engine will also search for search terms inside of documents of type PDF, DOC, XLS, PPT, or ZIP.
6.1 Add new document
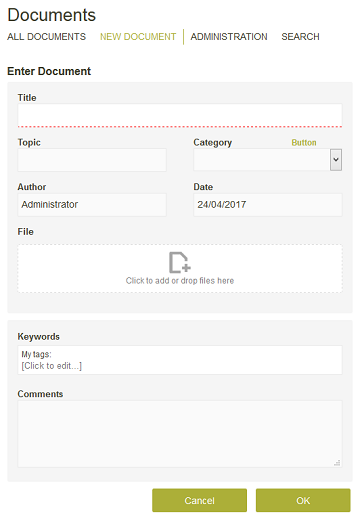
Title
Enter the title for the document here.Topic
Enter the topic for the document here.Author
The current user is automatically entered as the user.Category
Select a category here that the document should be assigned to. New categories can be created by clicking on the button link next to the field label.Date
The current Date is automatically entered as the date for the document.Datei
Select the document file here. The file is uploaded and then shown beneath the File selection element. Click onKeywords
A Tag can be defined here. Just enter your tag.Comments
A comment, e.g. about changes made to the document, can be entered here.Click on OK to save the new entry.
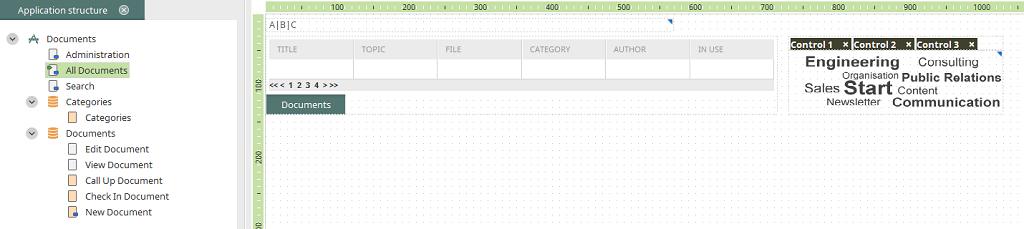
6.2. All documents
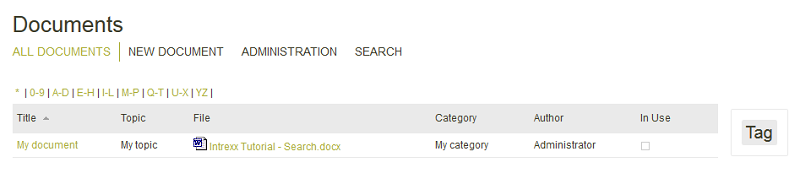
Alpha-index filter
All added documents are listed in a table here. Using the Alpha-index above the table you can select specific groups of letters. Based on your selection, only the entries will be shown in the table whose title begins with one of the letters from the group.Title column
Displays the document's title.Topic column
Displays the document's topic.File column
A file can be opened here directlyCategory column
Displays the document's category.Author column
Displays the document's author.In use
Shows whether the document is in process. If this is the case, the checkbox will be shown as active here.Keyword/Tag
To the right of the table all tags will be shown that have been entered. Click on a tag to filter the table based on this tag.By clicking on a document's title, another page is opened where, among other things, the document's status can be modified.
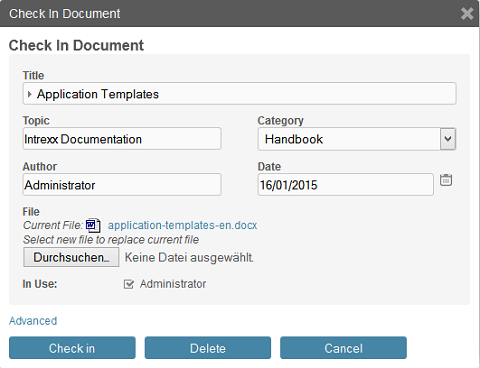
6.3. Edit document
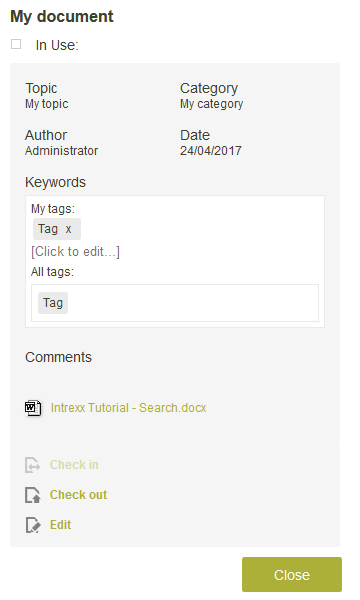
In use
If the document is currently in use (checked-out), the checkbox will be shown as active.Check in
Click on Check in to open the same page where documents are added. In this case, you have the ability to upload the updated document as well as edit the document information. The In use will automatically be deactivated when the document is checked in.Check out
To check a document out, so that it can be edited, it needs to be saved on the local computer first. This ensures that the individual versions of the documents remain intact.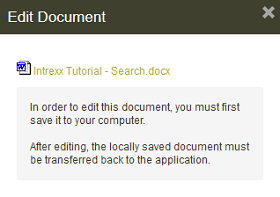
Download the document via the link at the top of the page and save it locally or in your network. The document is now denoted accordingly on the All documents.

If you have finished editing the document, simply click on the title link of the document on the All documents page.
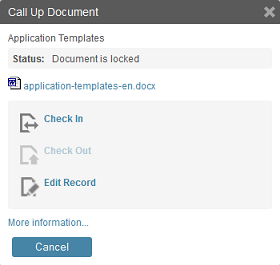
Click on Check In.
Load the edited document by clicking the Browse button. If you click on Check In, the status will be changed from Document is being edited to Document is not being edited.
7. Resource
This template is designed for creating, for example, a reservation system for meeting rooms or company vehicles. Schedules can also be created with it.
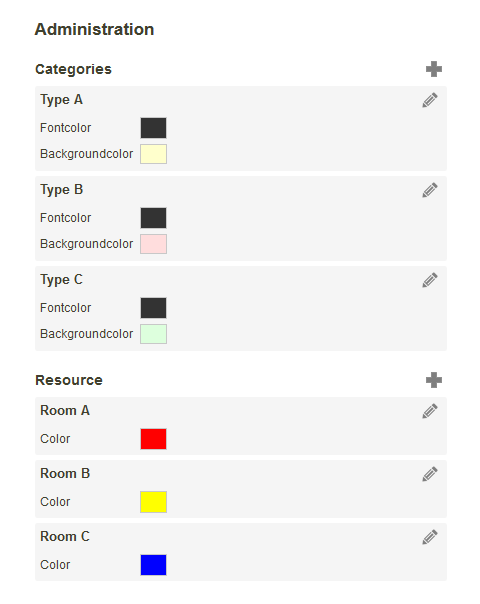
7.1 Administration
Categories
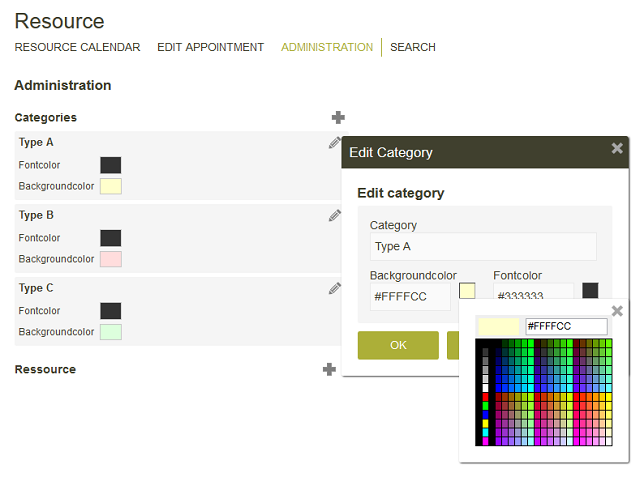
You can define types for the resources here. These could be the type of appointment (meeting, seminar, holiday etc.) for a schedule, for example.
When you click on the field Background color or Font color, a color palette will be shown where you can select the color.
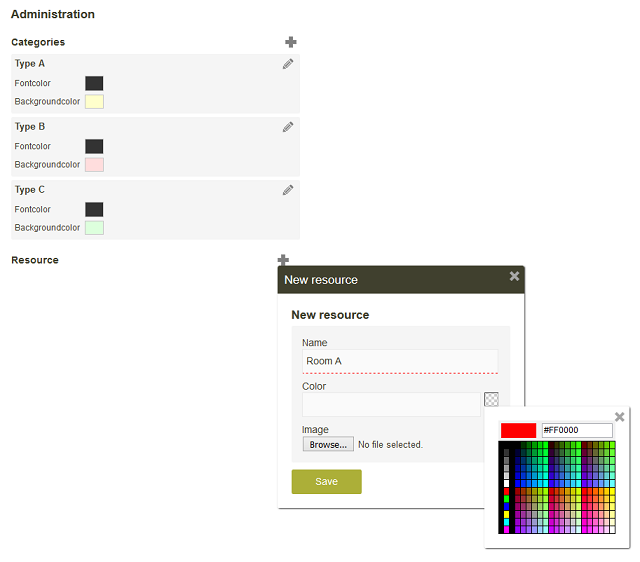
Resources
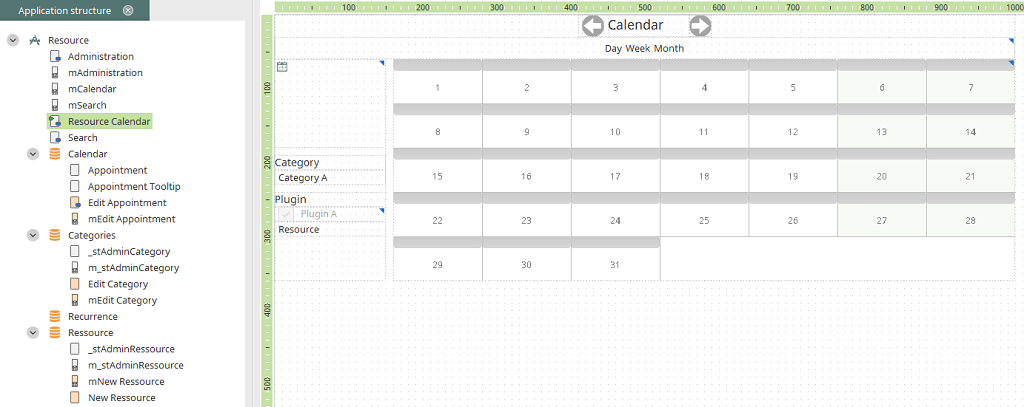
7.2. Resource calendar
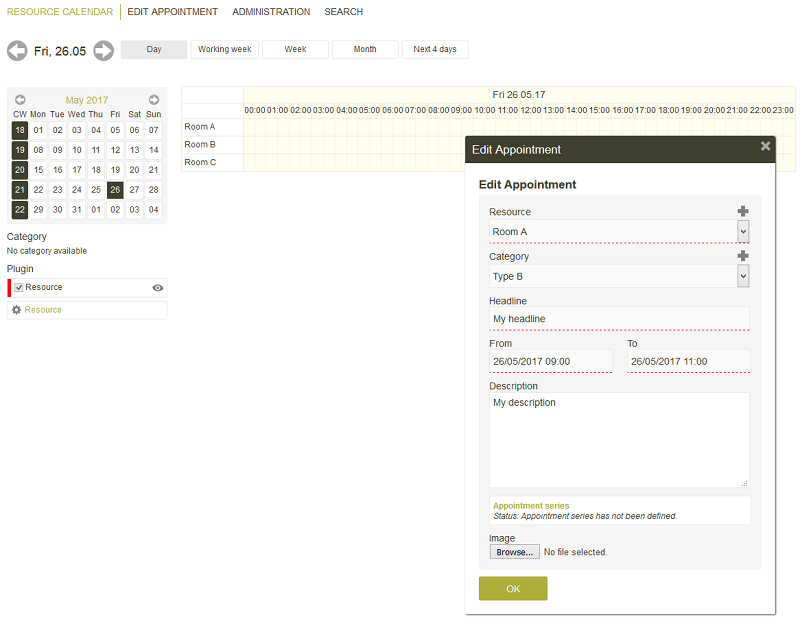
Appointments can be created on this page. To do that, just click on the required date and resource type in the resource diagram. The edit page will be loaded with the selected resource and date. You can also access this page by clicking on Edit appointment in the application menu.
Resource
You can select a different resource for the reservation here. Every resource is listed here that has been created in the administration.Category
Assign a type to the reservation here.Headline
Provide the reservation with a title.From / To
Define the beginning and end date/time of the reservation here.Description
Provide the reservation with a description.Appointment series
The reservation can be created as a reoccuring reservation by clicking on the Appointment series link.Image
An image can be selected here that is shown in the resource calendar for this appointment.Click on OK to create the reservation. The resource management checks whether the resource has already been reserved in the time period entered. If this is the case, a notification will appear automatically.
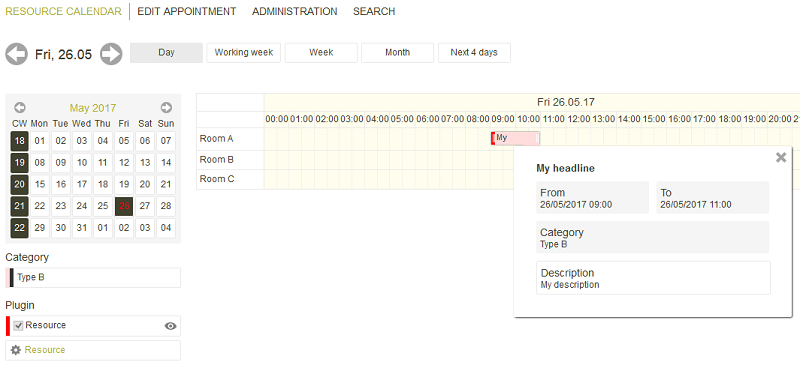
The reservation is now shown in the diagram. The background color of the reservation type will be used. On the left-hand side of the entry, a bar will be shown with the background color of the resource. More information about the settings and functions on this page can be found here.
8. Forum
A forum can be created with this template.8.1 Settings
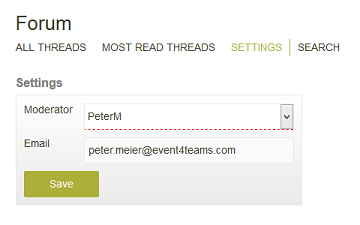
The forum moderator can be defined here. Every portal user will be available in the list. The email address will be automatically entered into the field below.
8.2 All threads
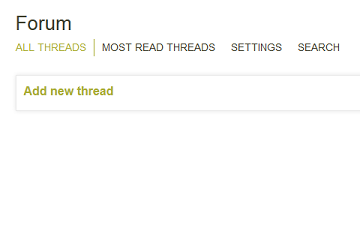
The forum threads will be shown on the All threads. Click on the link Add new thread to create a new thread.
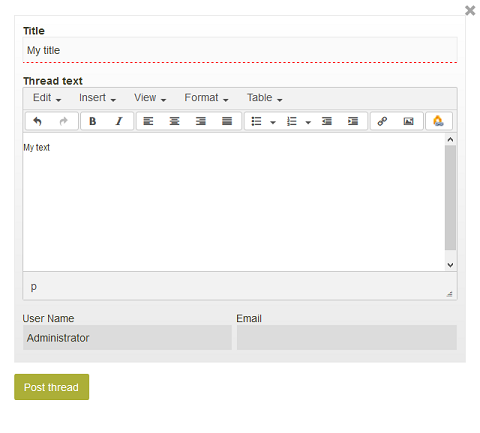
Title
Enter a title for the thread here.Thread text
Enter the text for the thread here.User name / Email
The user name and email address of the current user will be entered automatically. Then click on Post thread. This button can be configured in the Applications module to send a notification via email. Once it has been saved, the entry will be shown on the All threads page.
Title
The thread's title is shown here.From
The thread's author is shown here.Date
The date shown here is when the last change was made.Replies
The total number of replies is shown here.Views
The total number of times the thread was viewed is shown here.Latest reply
Shows the date and time of the latest reply.From
The name of the user who last replied is shown here.Deletes the thread.
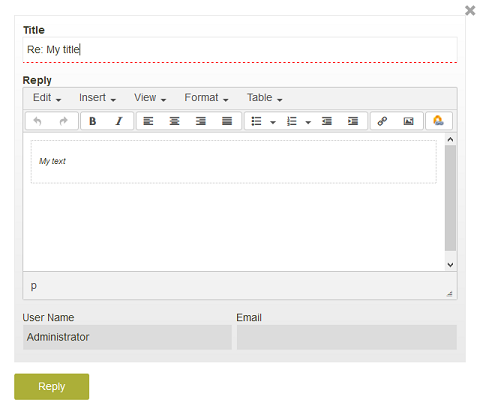
8.3. New post
Click on the thread's title to post a reply.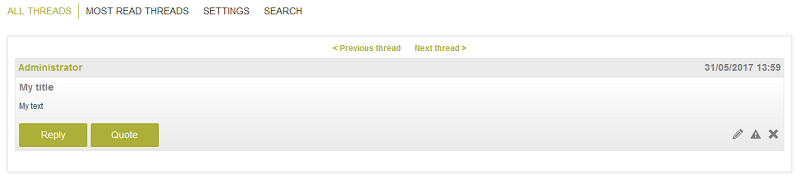
Previous thread / Next thread
You can navigate through the threads with these buttons.Title bar
The name of the current user and the current date and time are shown in the title bar. The title and text of the thread/post, which you've selected, are shown beneath the title bar.Deletes the current thread.
Opens an edit page where the current thread can be edited.
Opens a page where the thread can be reported.

View thread in forum
This button can be configured in the Applications module to send a notification via email.
Reply
Opens a page where you can enter your reply.
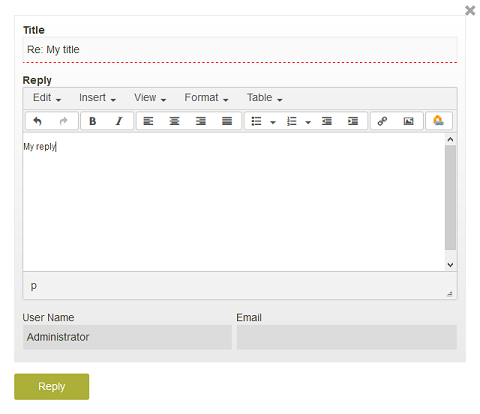
Enter your reply here.
Reply
Saves the reply.
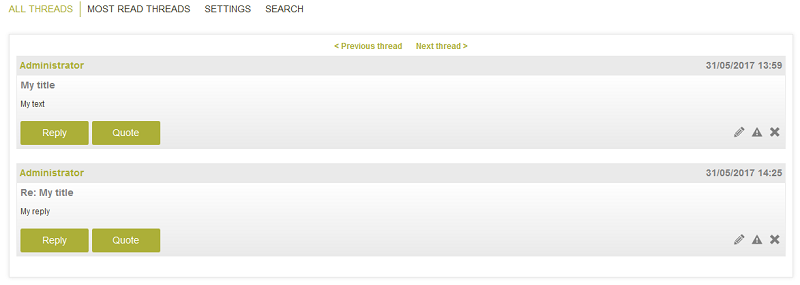
Quote
Can be used for replying. The text from the previous reply or thread will be added to the reply and formatted accordingly.
8.4 Most read threads

On this page, the hits list for individual threads will be displayed. Clicking on a thread link will open the view page for the thread.
8.5 Permissions
-
To access threads and replies, the following
page permissions
are required:
- All threads
- View thread
- All replies
- View reply
-
In order to create threads and replies, the following
page permissions
are required:
- New thread
- New reply
-
To access the search, the following
page permissions
are required:
- Search
- Search replies
- In most cases, users of the forums must be able to add new topics and replies, but not be allowed to edit or delete existing entries. In the data groups Threads and Replies, only the permissions to Read data record and Add data record will be assigned. As, when a reply is sent, the number of replies in the Threads data group is raised and saved, users must be given the permission to Edit in this data group as well. In order to not display the Edit thread/reply icons, permissions to the Edit reply and Edit thread pages should not be given.
- All users require the permissions to Read, Add, and Edit the data groups UserInfos and ThreadsPerUser. It will be noted here when a user has last visited the forum and/or a specific thread. Based on this data, the user will be notified of how many new threads and replies were entered since his or her last visit to the forum.
- As a notification via email will be sent by clicking the icon to Report to a moderator, permissions to the pages Report thread and Report reply must be given.
9. Newsletter
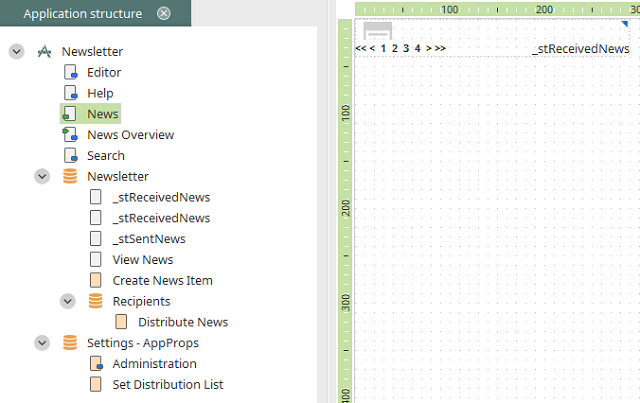
With this template, current news items can be written in the portal and then published to a group of users that is freely definable. The news items are shown in a portlet on portal pages.
9.1. Administration
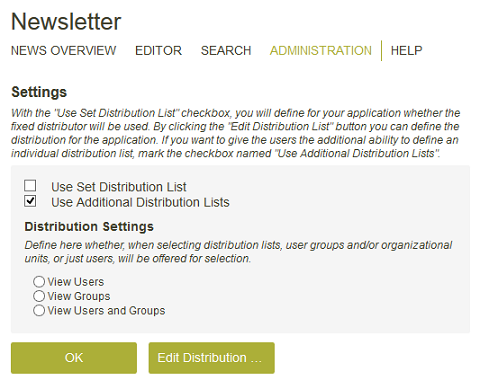
Use set distribution list
When the newsletter is published, this setting means that the set distribution list is used.Use additional distribution list
With this setting, users can add additional recipients to the distribution list.Distribution settings
Here, you can define whether users, groups or users and groups from the Portal User Manager should be available when the user is selecting the newsletter recipients in the browser.Edit distribution list
Opens a dialog where the set distribution list can be defined.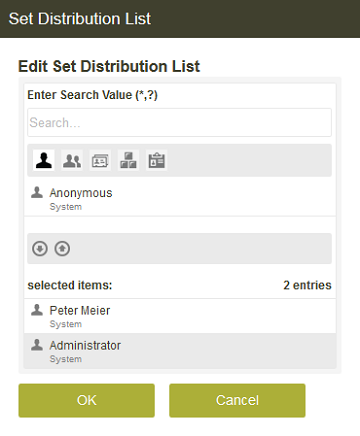
You can search for the name of a user or user group here. When you double-click on a user or user group, it will be moved from one list to the other. Every user or user group in the Selected list belong to the set distribution list.
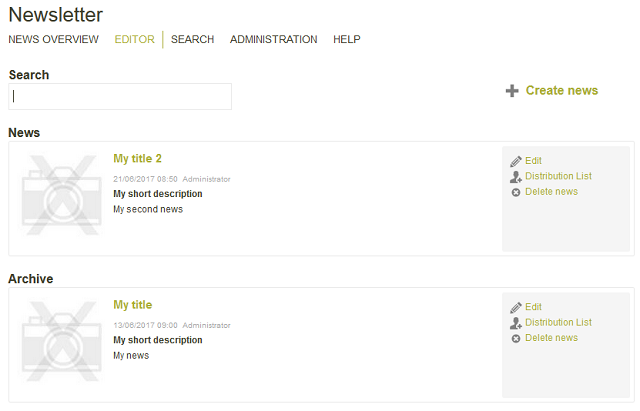
9.2. Editors
Search
You can search through the text of existing newsletters here.News
All of the current newsletters are listed here.Archive
All of the newsletters that are no longer valid are listed here.Opens a page where the newsletter data can be edited.
Opens a page where the distribution list can be edited.
Deletes the newsletter.
Opens a page where a newsletter can be created.
9.3. Create news
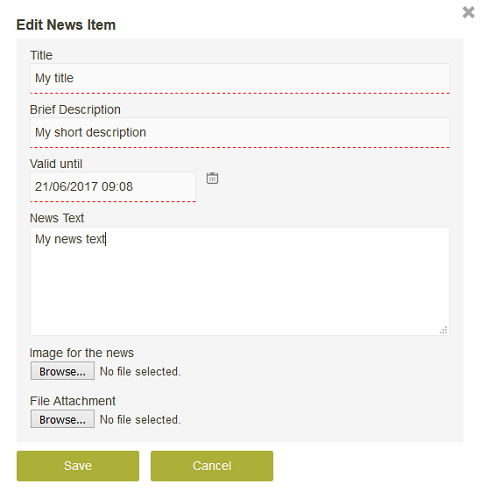
Title
Enter a title here.Brief description
Enter a brief description here.Valid until
Once the date specified here is reached, the newsletter will no longer be shown in the News portlet. The newsletter will be moved to the Archive list on the Editors page.News text
The actual newsletter text is entered here.Image / Attachment
You can add an image or file attachment to every newsletter.When you click on Save, a dialog will open where you can select the distribution list, provided the corresponding setting is active on the Administration page.
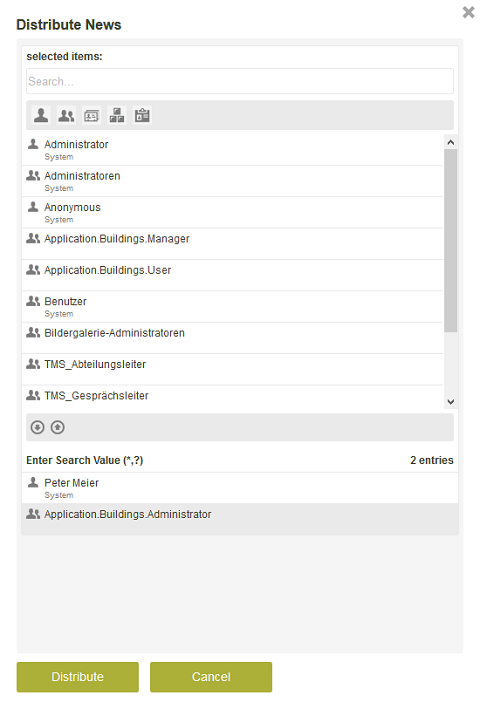
You can search for the name of a user or user group here. When you double-click on a user or user group, it will be moved from one list to the other. Every user or user group in the Selected list will see the newsletter in their News portlet. The newsletter is published when you click on Distribute. If a newsletter isn't sown, make sure it's still valid. If its date has been exceeded, it will no longer be shown in the portlet. Valid permissions are another requirement for seeing the newsletter.
9.4. News overview
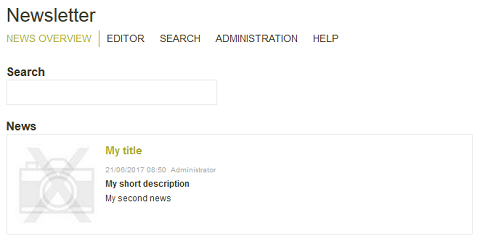
Every newsletter is listed on the News overview page.
10. Weblog
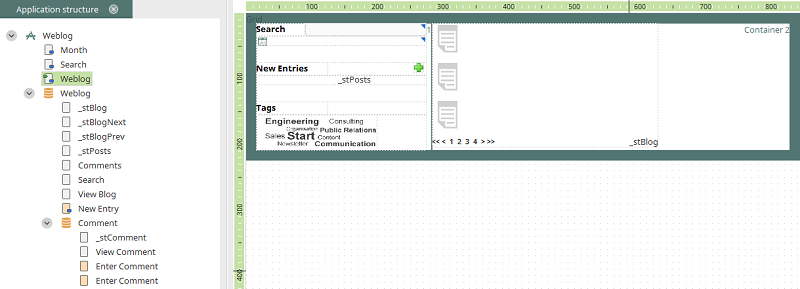
With the Weblog template, you can create journals for product managers, IT administrators (server logbook), interns, etc.
10.1. New entry
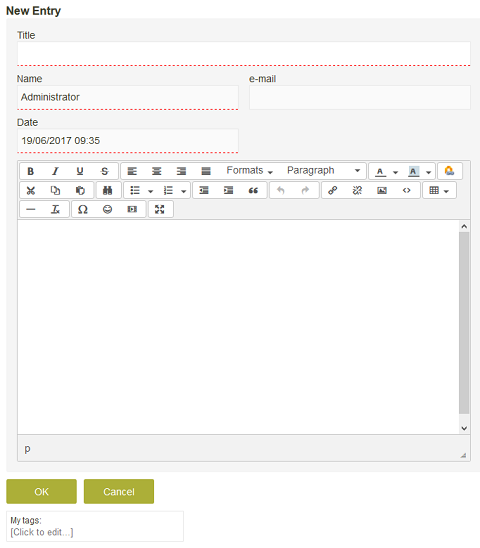
Title
Enter the title here.Name
The name of the current user is automatically entered here.Date
The current date is automatically entered here.Text field
Enter the text for your weblog entry here.My tags
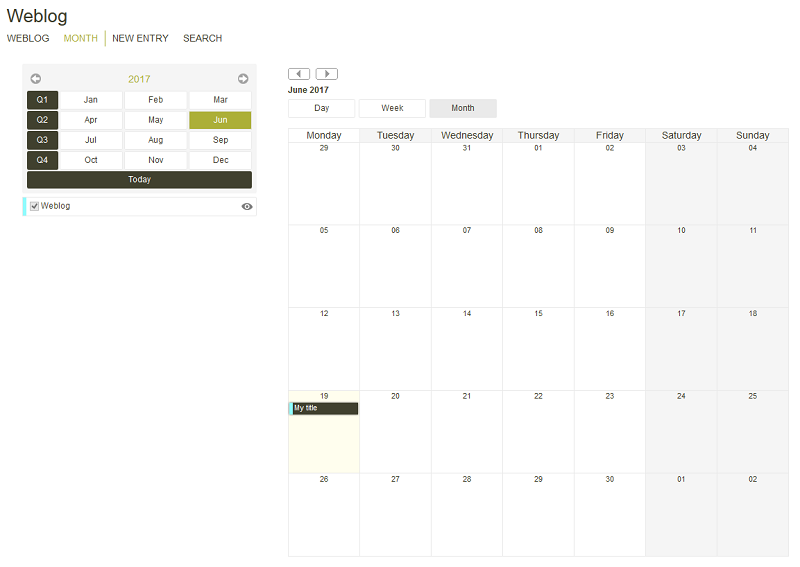
Tags can be added to the entry here. Simply enter a tag by clicking on the Edit link.10.2. Weblog page
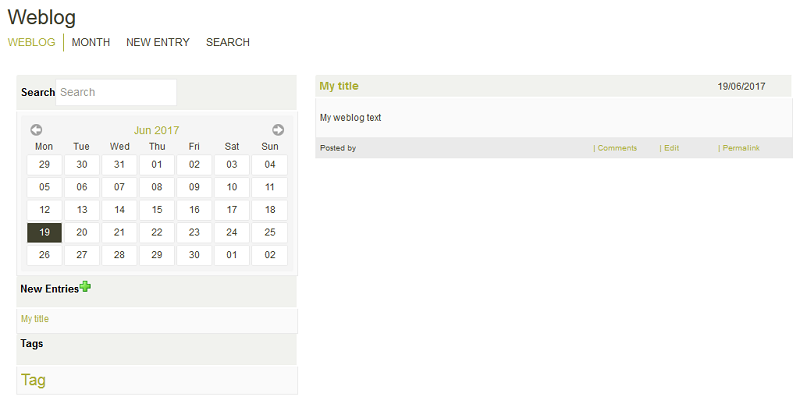
Search
You can search for terms in the weblog entries here. The list of weblog entries on the right will be filtered accordingly.Calendar
The list of weblog entries on the right will be filtered based on the date selected in the calendar. Click here for more information about the functions of the calendar.New entries
The five latest weblog entries are shown in the list, these can be opened by clicking on the title.Tags
The tags entered for the weblog entries are shown here.List of weblog entries
The filtered weblog entries are shown on the right. Click on the heading to open an entry.Comments
Opens a page where comments can be made.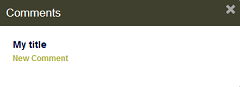
Click on the New comment link.
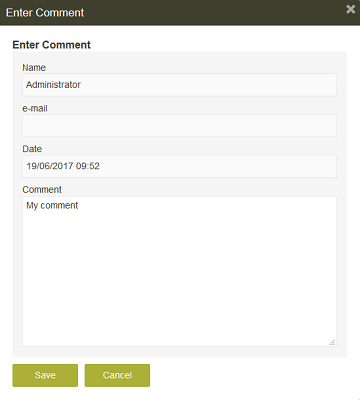
The name and email address of the current user as well as the current date are entered automatically. All you need to do is enter your comment and then click on OK. The comment is shown when you open the weblog entry.
Edit
Opens a page where the weblog entry can be edited.Permalink
By clicking on this, a small window will open at the bottom right of the portal from which you can copy the URL of the current weblog entry. The entry can be opened directly using this URL.10.3. Month overview
All of the weblog entries from the selected month are shown here. Click here for more information about the functions of the calendar.
11. Calendar
The Calendar template is suitable for entering and managing every time-dependent events (e.g. birthdays, anniversaries, trade fairs, leave and absence calendars, visits, product date etc.).
11.1. Administration
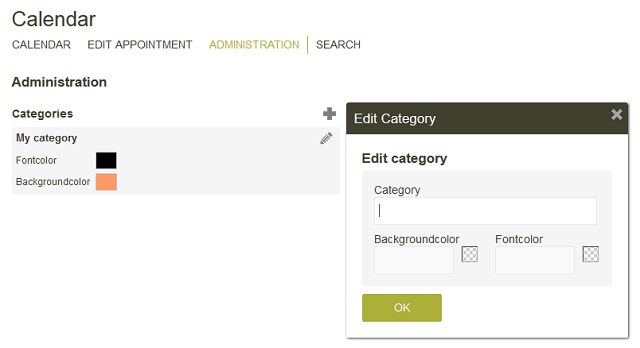
Categories can be used assign a color different appointment types, e.g. meetings, seminars or holidays - making it easier to tell the difference.
Category
Enter the name of the category here.Background and font color
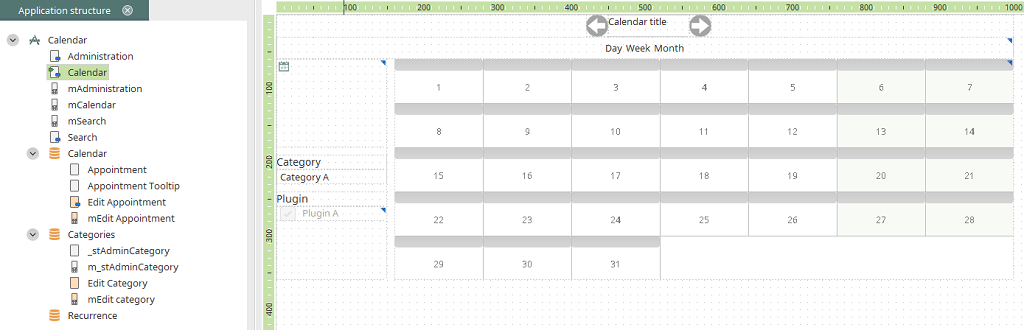
Fades a color palette in with which you can select the color for the background and font, respectively.11.2. Calendar page
11.2.1. Navigation calendar
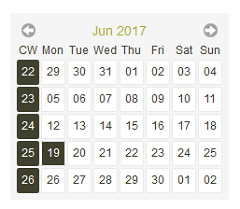
You'll find the small navigation calendar on the left. This is used to control the diagram.
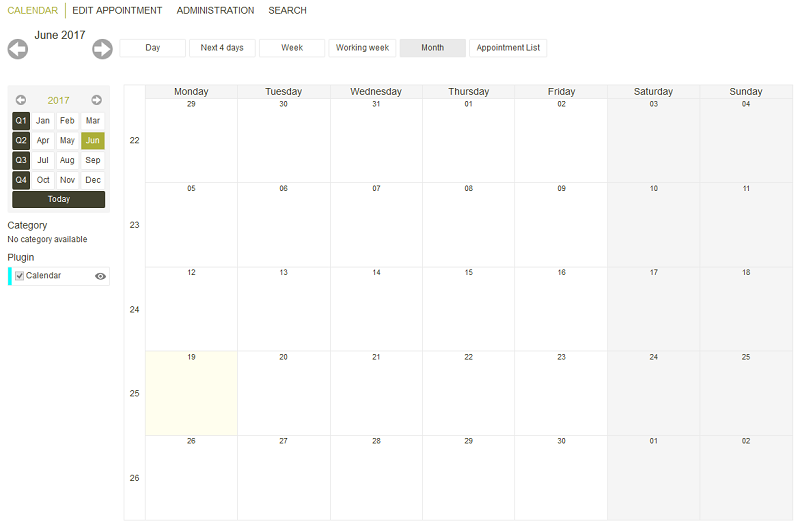
11.2.2. Diagram
The individual appointments are presented in the diagram. They can be opened for editing from here. New appointments can also be created from here.
11.2.3. View
The appearance of the navigation calendar and the diagram depends on which view is selected with the buttons above the diagram.
Day
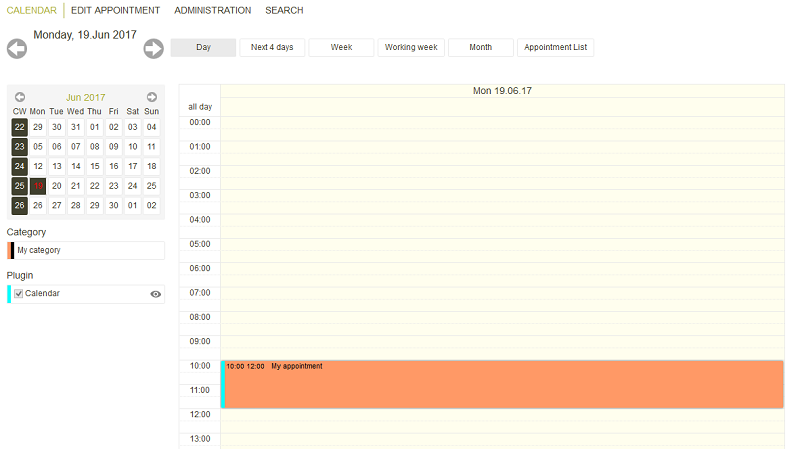
The current date is automatically selected in the navigation calendar and filters the diagram accordingly. The diagram displays the hours.
Next 4 days
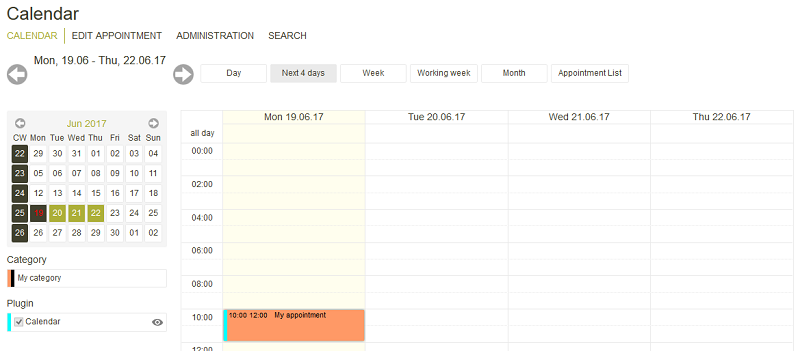
The next 4 days - including the current date - are automatically selected in the navigation calendar. The diagram is filtered and presented accordingly.
Week
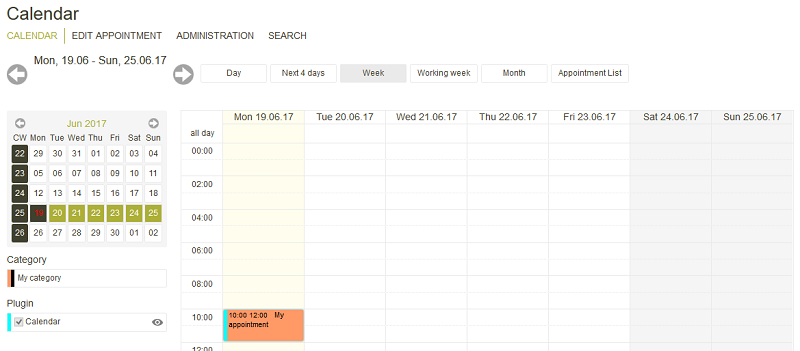
The current week is automatically selected in the navigation calendar. The diagram is filtered and presented accordingly.
Working week
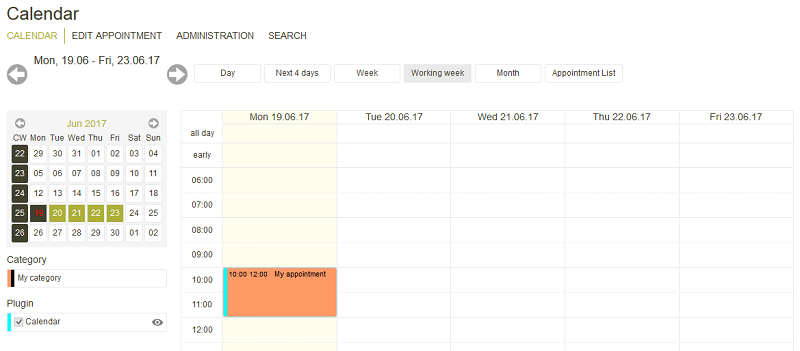
The days of the current working week are automatically selected in the navigation calendar. The diagram is filtered and presented accordingly.
Month
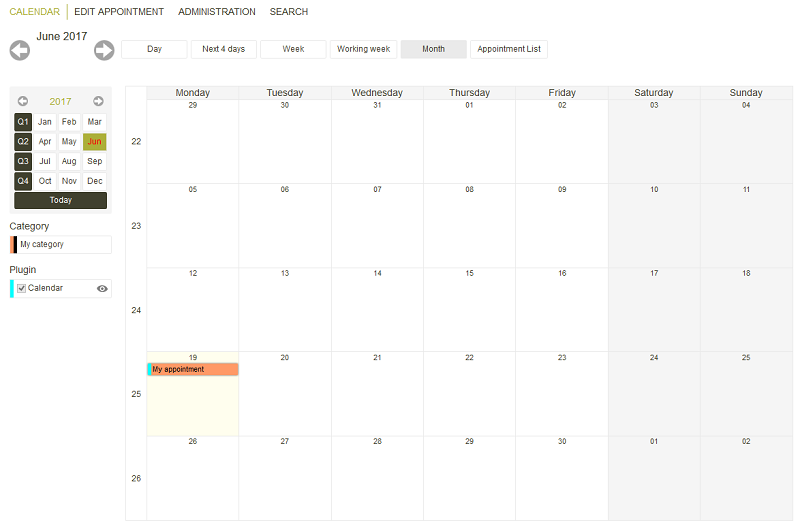
The current month is automatically selected in the navigation calendar. The diagram is filtered and presented accordingly.
Appointment overview
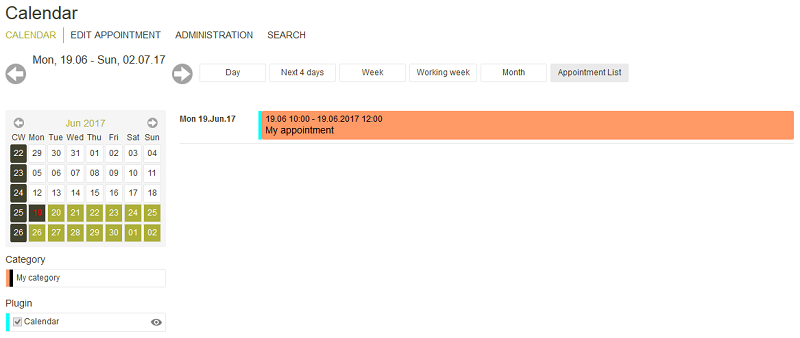
Instead of displaying the diagram, a list of appointments of shown. The list begins from the current date.
11.2.4. Navigation calendar - Functions
Select date
A date of your choice can be selected by clicking on it in the navigation calendar. The current date is always highlighted with a color - in this case red. You can also select an area, e.g. multiple days of the current month, by holding down the left mouse button in the navigation calendar.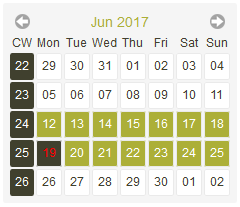
The diagram is then filtered accordingly.
Scroll
By clicking on theYear view
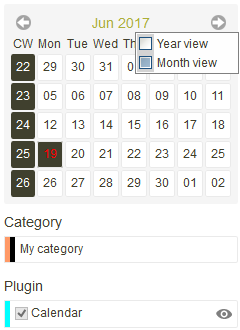
You can switch between the month and year view via the context menu. Simply right-click on the month or year in the header of the navigation calendar.
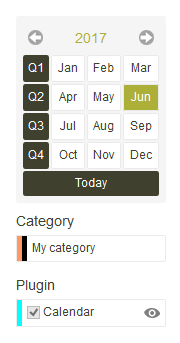
You can select entire months or quarters in the year view. Click on Today to select the current month.
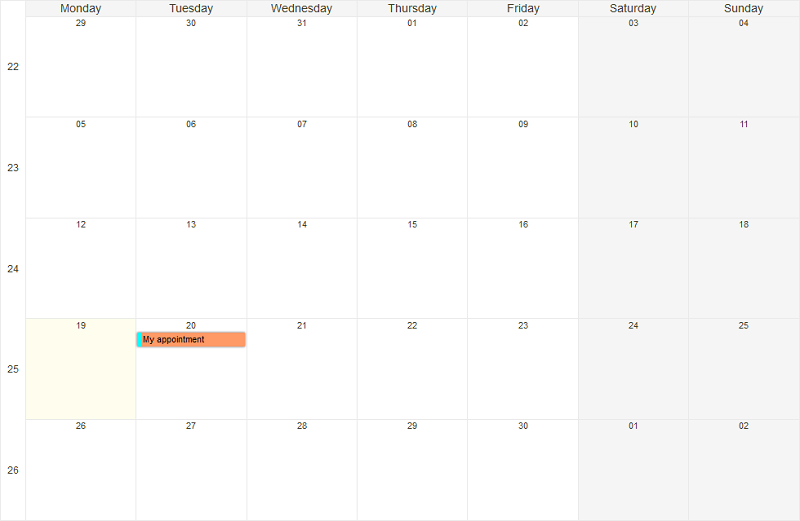
11.2.5. Diagram - Functions
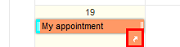
Appointment details
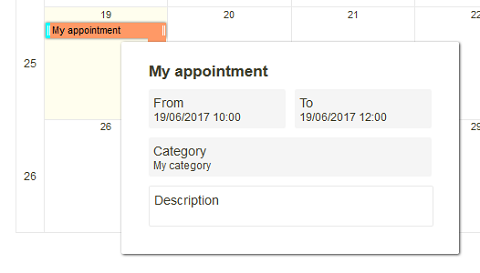
If you move the mouse over the title of an appointment in the diagram, the appointment details will be shown.
Appointment origin
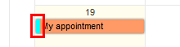
The color of the plugin which is the appointments source is shown to the left of the appointment.
Extend appointment
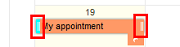
When you move the mouse over an appointment, bars will appear to the right and left of the appointment. You can extend the appointment on the timeline accordingly via drag & drop.
Move appointment
An appointment can be moved via drag & frop in the diagram.Edit appointment
Click on an appointment to open the edit page where the appointment can be edited.Export appointment
When you move the mouse over an appointment, an arrow symbol will appear. This can used to export the appointment as a *.ics file which can opened or imported in Outlook.
11.2.6. Categories
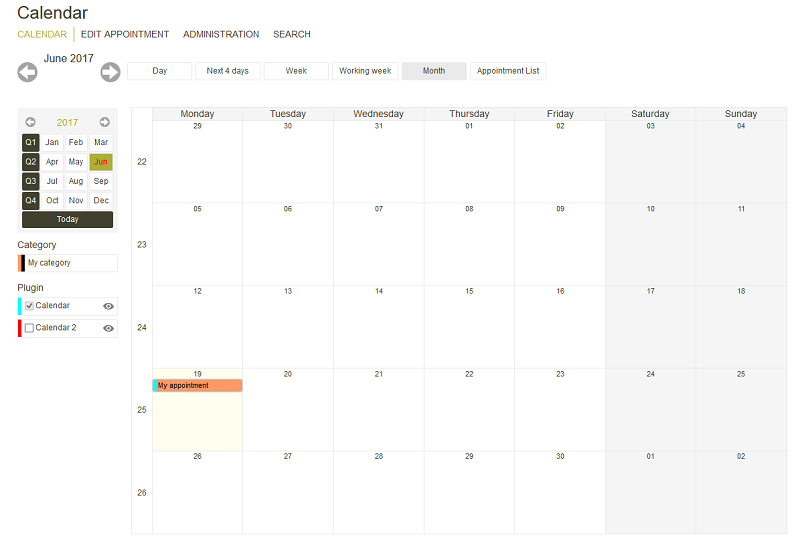
The categories, which have been created on the Administration page, are shown beneath the navigation calendar.11.2.7. Plugins
In the Applications, plugins can be defined in the Calendar or Resource element properties, these display appointments from the same or other calendar/resource applications in the current calendar. How that's done is described in this Advanced Techniques post.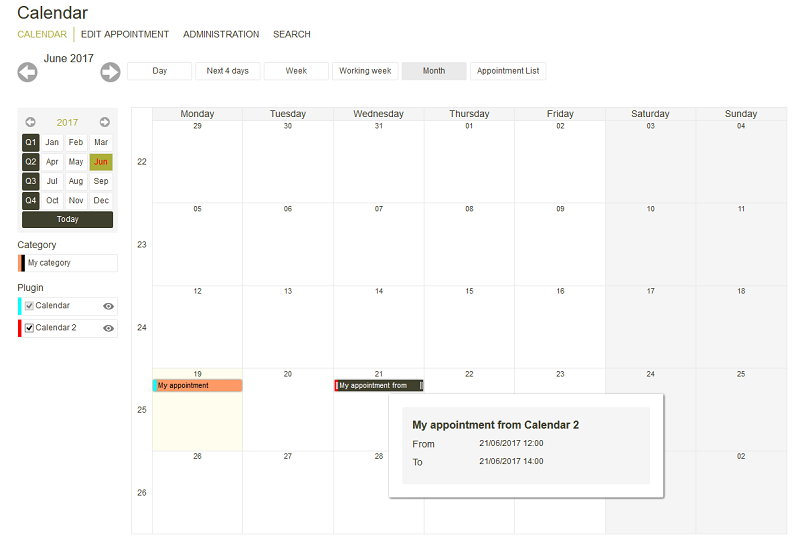
Integrated plugins are shown on the left-hand side underneath the categories. If you deactivate the checkbox next to a calendar plugin, the corresponding appointments will be hidden.
11.3. Add appointment
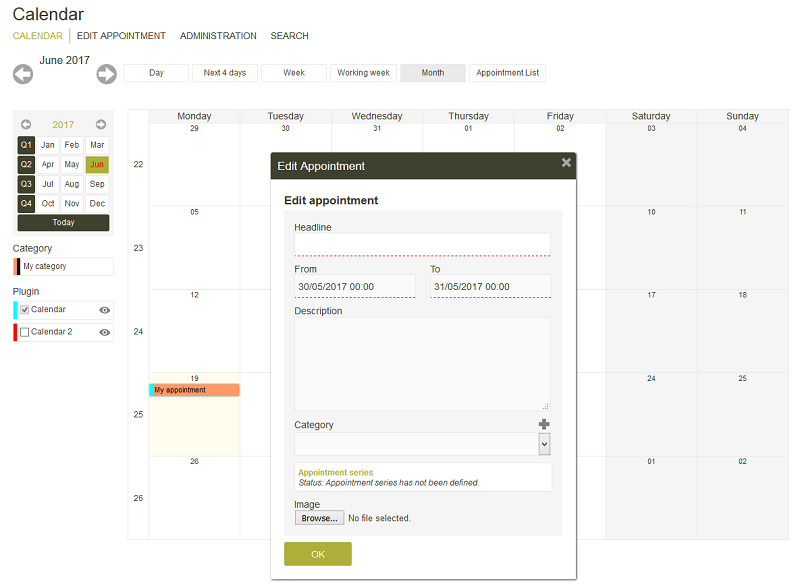
New appointments can be created by clicking on the cell with the required date in the diagram. You can also create longer appointments by holding down the left mouse button and highlighting the corresponding length. The appointment length is shown in a different color and the edit page is shown automatically. The beginning and end of the appointment is entered automatically based on your selection. Alternatively, you can also create an appointment by clicking on Edit appointment in the menu.
Headline
Enter a headline for the appointment here.From / To
Enter the start and end date of the appointment here.Description
Enter a description for the appointment here.Category
Select the appropriate category.Alternatively, you can create a new category directly from this page instead of creating it on the Administration page.
Appointment series
Click here for more information about this topic.Image
An image can be selected which should be shown for the appointment. The image is automatically reduced to the right size in the diagram.11.4. Appointment series
When you create or edit an appoitment, you'll see the Appointment series link towards the bottom of the edit page. Click on this link to open a dialog where you can create a recurring appointment based on the current appointment.
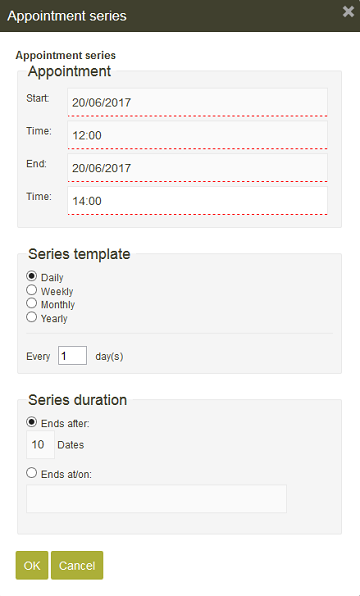
Start / End
The start and end are taken from the appointment, provided they've been entered on the Edit appointment page.Series template
Here, specify whether the appointment recurs on a daily, weekly, monthly or yearly basis.Every ... Day(s)
If you select the Daily option, you can also define how often the appointment should recur in days.Series duration
Defines when the series should end. Here, you can either decide how many times the appointment should recur or specify an end date.Delete series
This button can be found on existing appointment series. This changes the series back into a single appointment.12. Poll
With this template, you can create polls and conduct them in either a personalized or anonymous manner – with graphical analysis.
12.1. Administration

12.1.1. New poll
Click on this link to open a page where a new poll can be created.
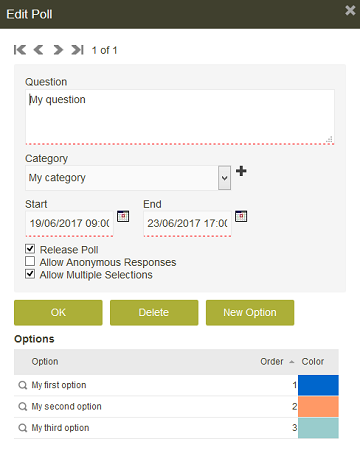
Question
Enter your question here.Category
Select a category for your poll.Opens a page where a new category can be created. The new category can be selected immediately. Categories can also be created via the Categories tab on the Administration page.
Start / End
Specify a beginning and end for your poll.Release poll
With this setting, the poll is released to every authorized user once it is saved.Allow anonymous responses
If this setting is active, users, who haven't logged in, can take part in the poll.Allow multiple selections
With this setting, multiple responses can be selected. Click on Next.
Any number of options can be entered here. Click on Save option once a possible option has been entered in full. The option will then be shown in the table at the bottom of the page.
Option
Enter the text for the option here.Order
Defines the order the options are shown in.Color
Assign a color to the option here.Finish poll
Once all of the options have been entered, click on this button to save the poll. The poll is now shown on the Administration page.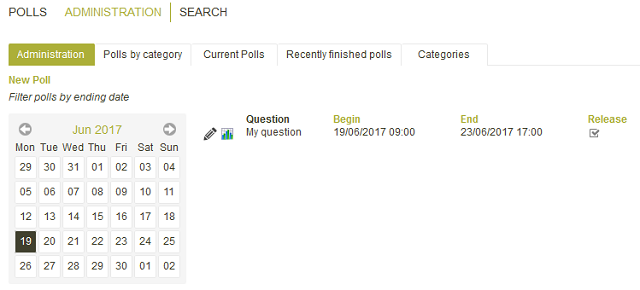
12.1.2. Filter polls
The list of polls can be filtered by date by using the navigation calendar. Expired polls will also be shown here. If you'd like to shown every poll, just click on the Administration tab.Opens the page where the poll data can be modified.
New option
Opens a page where a new option can be entered. Click on OK to save your changes.
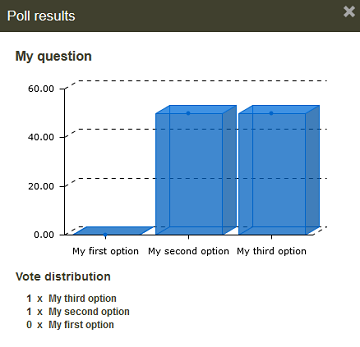
Opens a page that displays the poll results.
On the other tabs in the Administration menu, you can filter the polls with the following options: Polls by category, Current polls and Recently finished polls.
12.2. Polls page
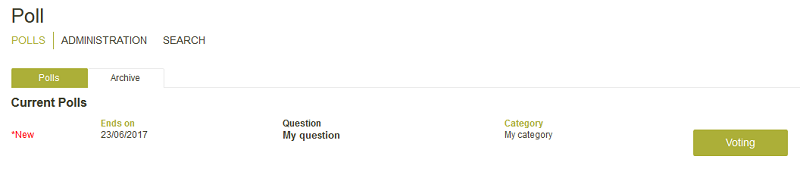
Voting on the polls is done here. If polls have been created, released and haven't expired, they will be shown to all authorized users on this page. Expired polls can be viewed on the Archive page. The poll will only be shown as long as the currently logged-in user hasn't voted. Click on Votes to open the response page.
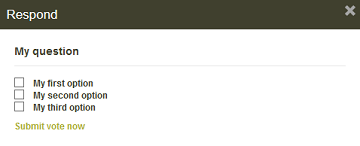
Select your response or responses, if multiple selections are allowed. Then click on Submit vote now.
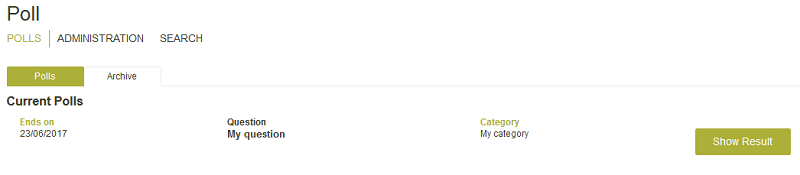
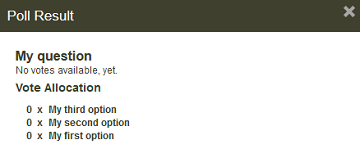
On the Polls page, the button Voting will be replaced with the Show result button. Click on this button to view the current result in the form of a chart.
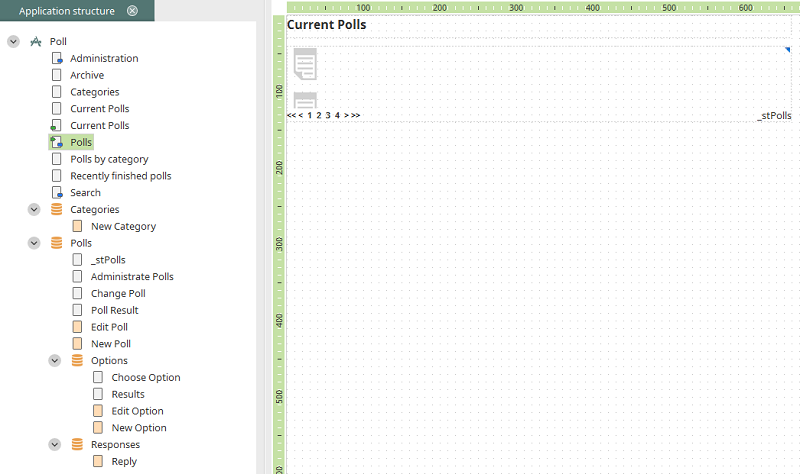
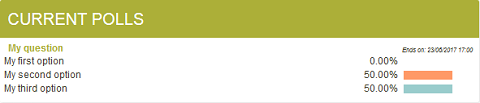
12.3. Current polls portlet
The Current polls portlet is predefined in the Polls application. This can be added on the portal page.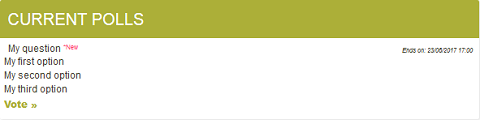
This can be used to draw the attention of every authorized user, when they log in to the portal. They can vote and view the poll results from this portlet.
13. Knowledge database
With this template, a large amount of information can be made available subdivided into areas, topics, chapters and subchapters.
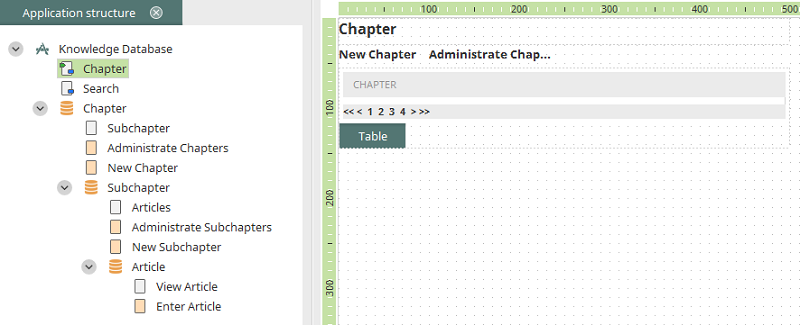
Chapter page
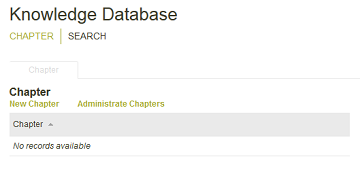
New chapter
Click on this link to open the page where a new chapter can be created.
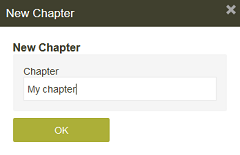
Click on OK to save the new chapter.
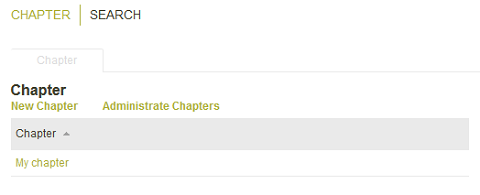
If a chapter has been created, it can be renamed or deleted via the Administrate chapter link. To create a subchapter, click on an existing chapter.
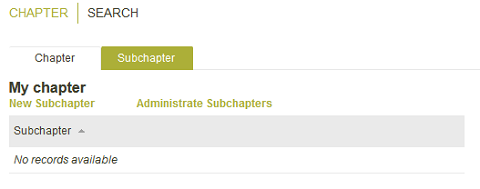
The second tab, Subchapters, will be shown. Click on New subchapter in order to create a new subchapter.
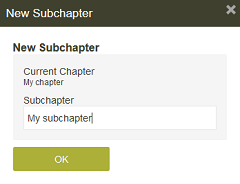
Click on OK to save the new subchapter.
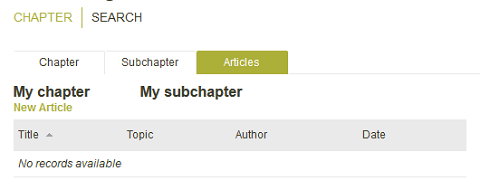
Click on New article.
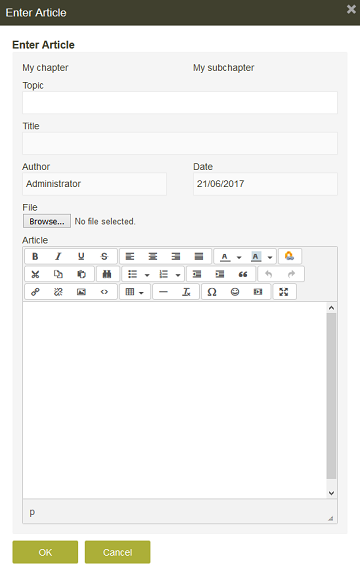
Topic
Enter the topic here.Title
Enter the title here.Author
The current user is automatically entered here.Date
The current date is automatically entered here.File
A file can be attached here.Article
Compose the article text here. Click on OK to save your article.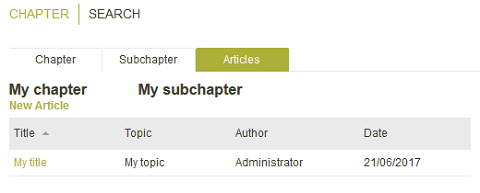
14. Minutes
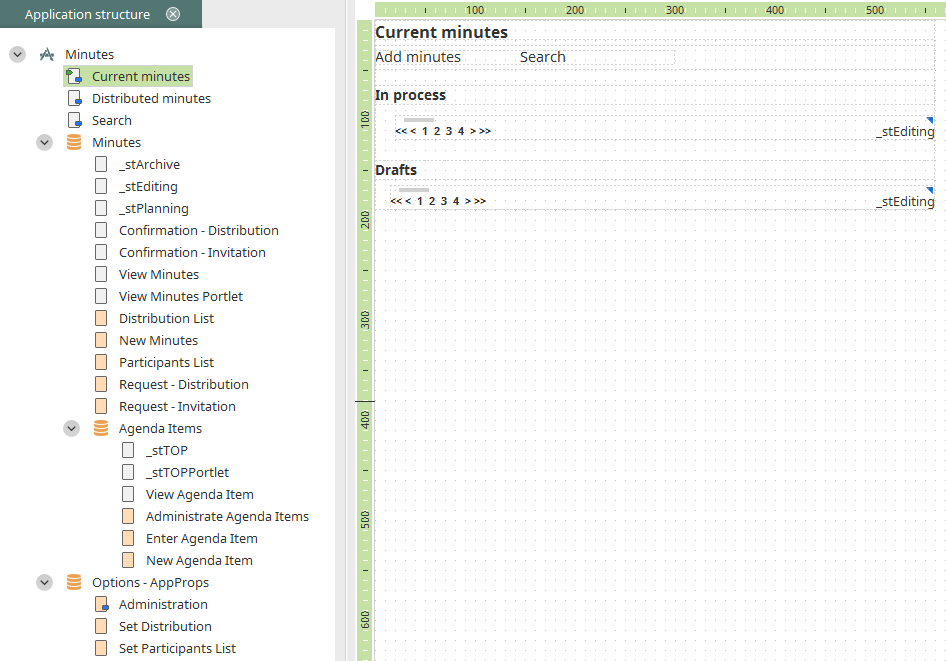
With this template, you can create minutes from meetings and also invite colleagues to the meeting.
14.1. Define participants
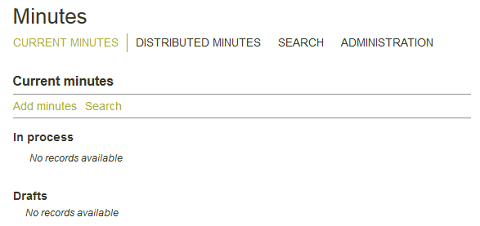
Add minutes
Click on this link to add minutes.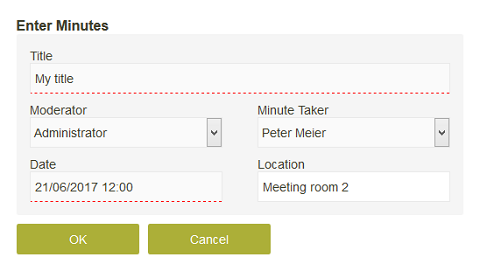
Title
Enter the meeting title here.Moderator
Select the meeting moderator here.Minute taker
Select who will take the minutes in the meeting.Date
The meeting date can be entered here.Location
Enter the location where the meeting will take place here. Save your entries by clicking on OK.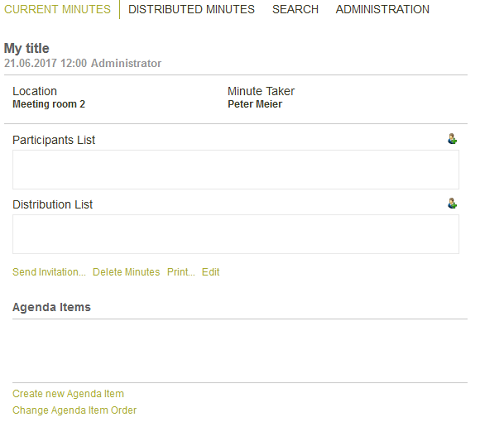
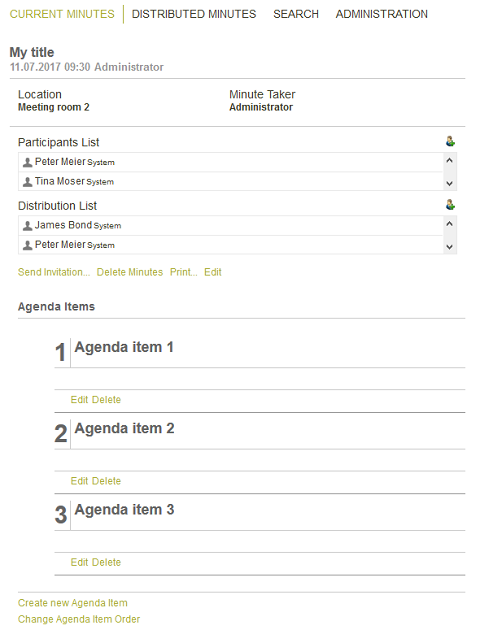
Participants list
Opens a page where the meeting participants can be selected.
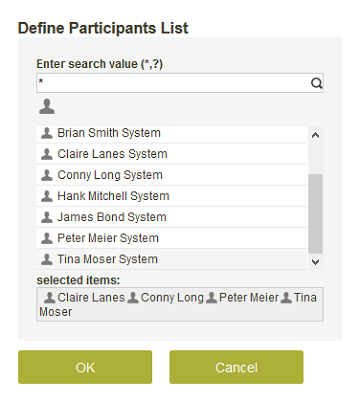
Enter search value (*,?)
You can search for users in this field. Enter * to show all users. Users can be moved to the Selected list by double-clicking on them. This means they are added to the participants list. Click on OK to save the list.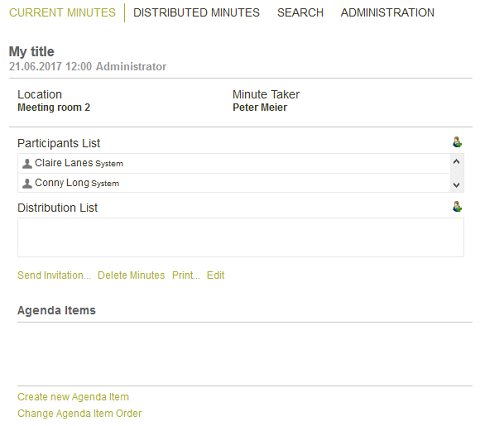
Distribution list
Opens a page where the distribution list for the minutes can be defined.
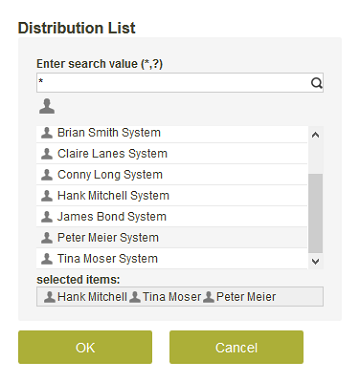
Click on OK to save the distribution list.
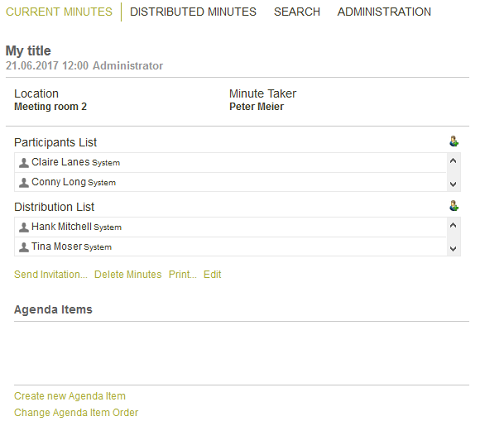
Send invitation
Click on this link to open a page where you can send the meeting invitation.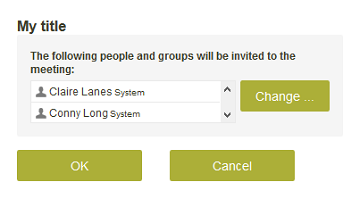
If needed, the distribution list can be modified here. If you click on OK, every defined participant will receive an invitation to the meeting in the Minutes portlet, provided they have sufficient permision. You can find out how to add this portal to the portal page here.

In the application, the minutes will now be shown with the status Draft.
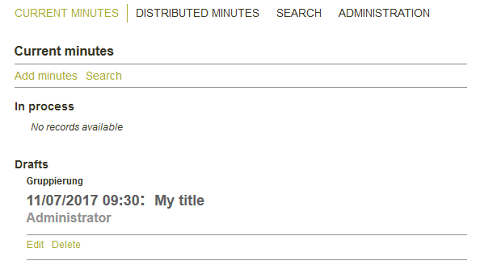
Edit
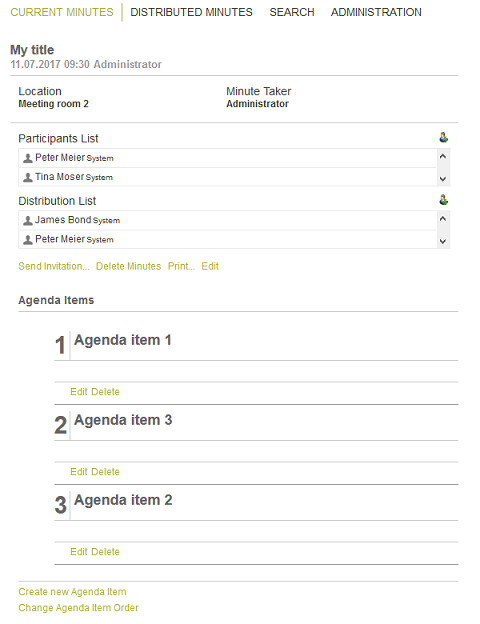
Click on this link to edit the minutes.14.2. Agenda items
Create new agenda item
By clicking on this link, a page will open where the agenda items can be defined.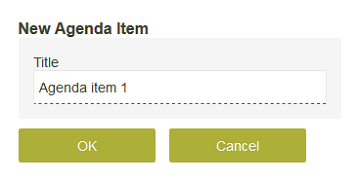
Enter the agenda item here and then click on OK.
Any number of agenda items can be defined.
Change agenda item order
By clicking on this link, a page will open where the order of the agenda items can be modified.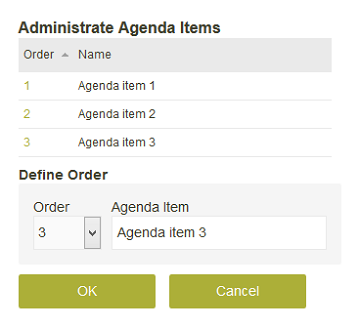
Click on the link in the Order column and enter the select the right position in the Order drop-down list. Click on OK to apply the settings.
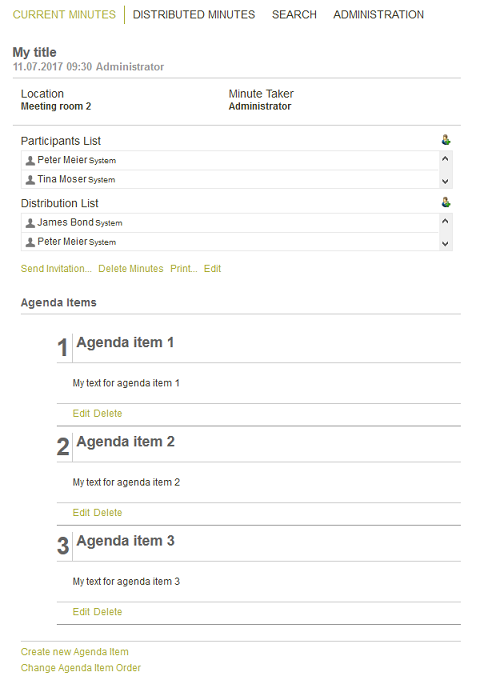
Edit
Each agenda item can be recorded by clicking on Edit.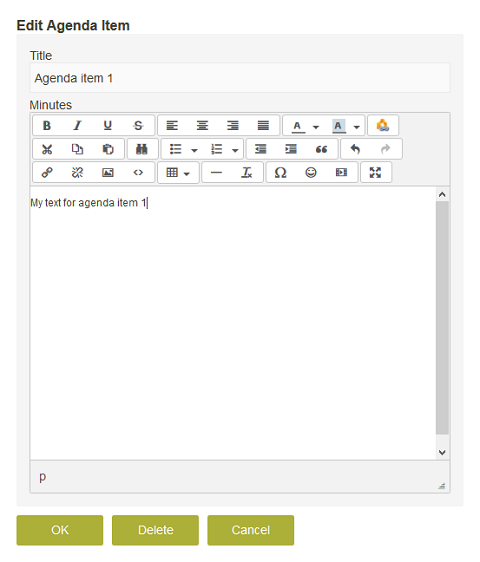
Click on OK.
Distribute minutes
Distributes the minutes.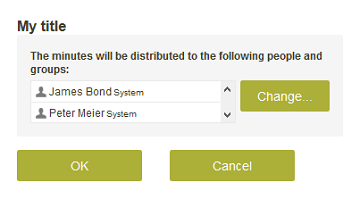
Delete minutes
Deletes the minutes.Edit
Opens the edit page for the minutes.When you click on OK, everyone in the distribution list will see the distribution in their Minutes portlet, provided they have sufficient permision. The minutes can be opened from here by clicking on the title link. You can find out how to add this portal to the portal page here.
14.3. Distributed minutes
All of the archived minutes are shown here.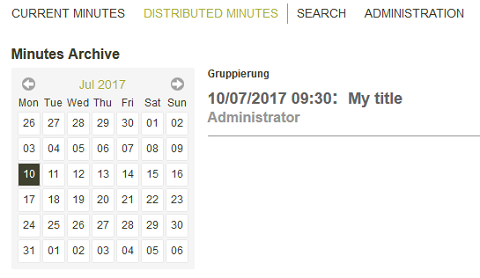
Use the navigation calendar to filter the list of minutes.
14.4. Administration
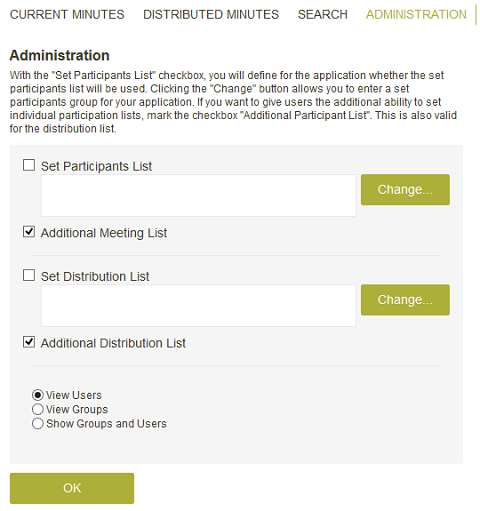
Set participants list
With this setting, the participants list defined here will be used for every invitation. The list can be defined by clicking on Change.Additional meeting list
Allows users to define the list for invitations when they create minutes.Set distribution list
With this setting, the distribution list defined here will be used when minutes are distributed. The list can be defined by clicking on Change.Additional distribution list
Allows users to define the distribution list for created minutes.With the options:
- Show users
- Show groups
- Show users and groups
15. Bulletin board
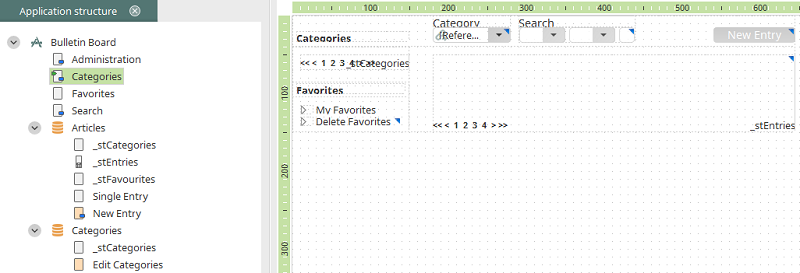
With this template, you can create bulletin boards for all areas of the business.
15.1. Administration
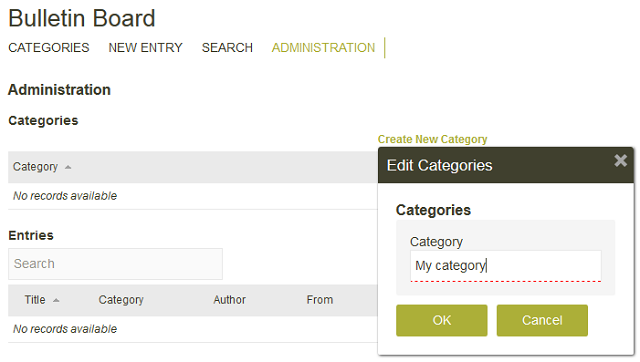
Create new category
This link opens a page where a category can be defined. The entries on the bulletin board can be categorized with these.15.2 New entry
New entries can be created here, on the category selection page or on the New entry page - this is accessible via the application menu.Create new entry
By clicking on this link, an edit page is opened where a new entry can be created.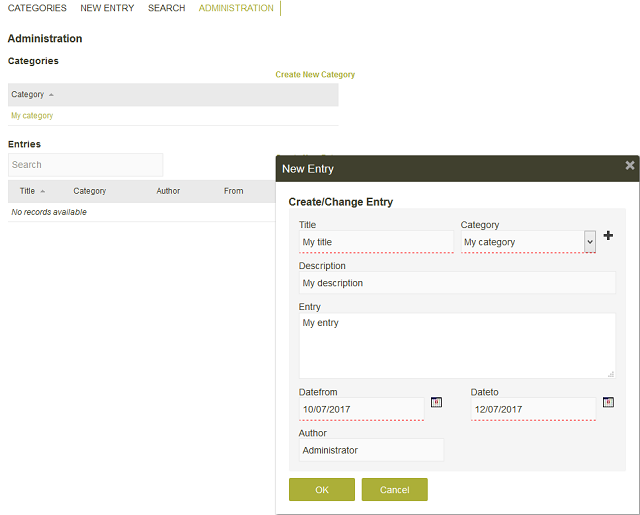
Title
Enter a title for the entry.Category
A category for the post can be selected here.Click on this button to create a new category from here.
Description
Enter a short description for your entry.Entry
The actual text for the entry is entered here.Valid from / to
Define how long the entry will be shown here. Then click on OK.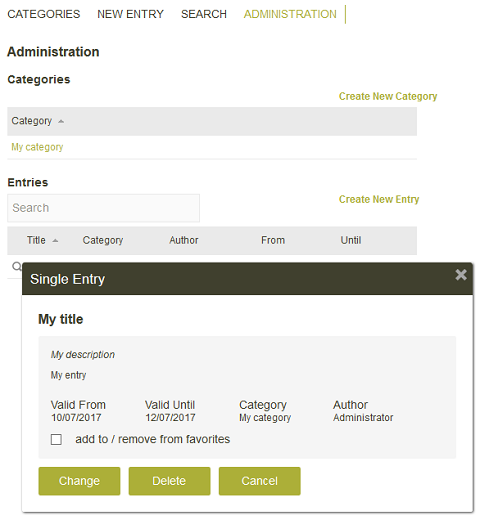
The entry will be shown at the bottom of the page. All of the created entries are listed here.
Opens the view page for the entry.
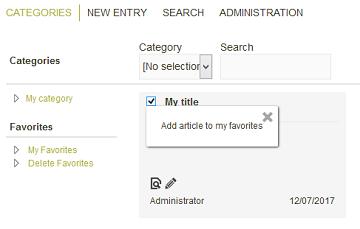
Add to favorites
If this checkbox is activated, the entry will be shown in the Favorites.15.3. Categories page
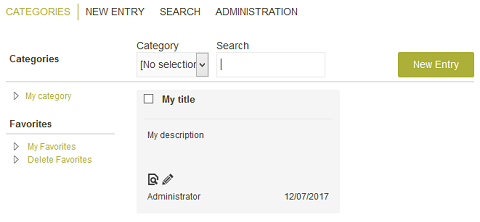
Category
A category can be selected here. The entries will be filtered based on the category selected.Search
A search term can be entered here. The entries will be shown that contain the term.Categories
Every category is shown as a link on the left-hand side. Click on one of the links to view the entries that belong to that category.Add to favorites
You'll find a checkbox to the left of the entry's title. If you activate this, the entry is added to your list of favorites.
My favories
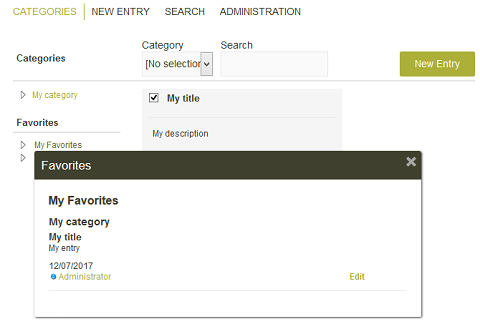
All entries, which have been marked as a favorite, are shown on this page.