Intrexx Share 2.1 - Groups
With groups you can share content that is related to particular topics with other Intrexx Share users. Via the privacy settings you can specify precisely which people can see the group and its posts.
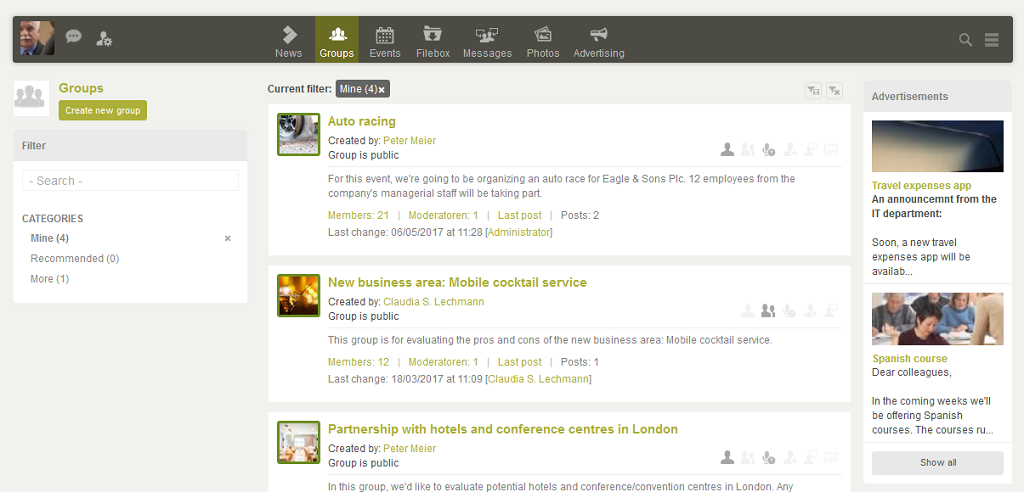
If you click on the groups icon in the left column, the middle column, which lists all of the groups, will be refreshed.
Here, you can see when and by whom the latest change in the group was made. By clicking on the name of the colleague, who made the most recent change, you will switch to their personal page. The following actions are considered to be changes to a group:
- Create, edit, delete post
- Create, delete comment

The can see four different symbols at the top-right:
 You are the creator
 You are a member
 You are the moderator
 Group was recommended to you
 You have made an application
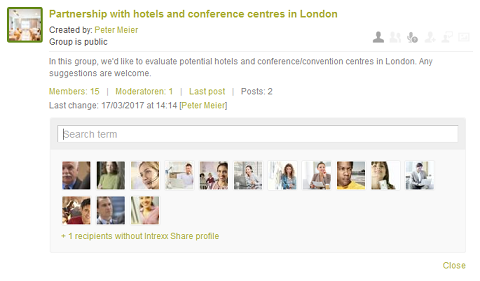
1. Create group
Click on the button Create new group.
Title / Description
Here, you can provide the group with a title and description.Privacy settings
Intrexx Share differentiates between three different group types:- Public groups
A public group can be see by every Intrexx Share user. All posts written by group members are also visible to non-members of the group. Writing posts or Actions, such as Like, Remind me or Share, can, however, only be performed by group members. - Groups with restricted visibility
The description of a group with restricted visibility is visible to all Intrexx Share users. The members and posts are not shown to non-members. - Private groups
The group, and its members and posts will only be shown to members and people to whom the group was recommended.
Activate membership requests
For public groups, you can decide whether users can participate in the group without a member request or whether they need to apply for group members. Even if this option is activated, all Intrexx Share users can see the group and its members and posts.Add a post to News that the group was created
For public groups and groups with limited visibiliy, you can activate this option to create a post on News drawing other users' attention to the new group.Members can send recommendations
With this setting, group members can recommend the group to other Intrexx Share users.Close group
Neither posts nor comments can be entered in closed groups. Furthermore, actions, such as Like, Remind me or Share, will be switched off.Members are allowed to create connections
All information regarding this topic can be found here.Members
Select the group members from the Available list and move them to the Selected list by clicking on2. Manage group
Click on the image or the group's title to open the group.
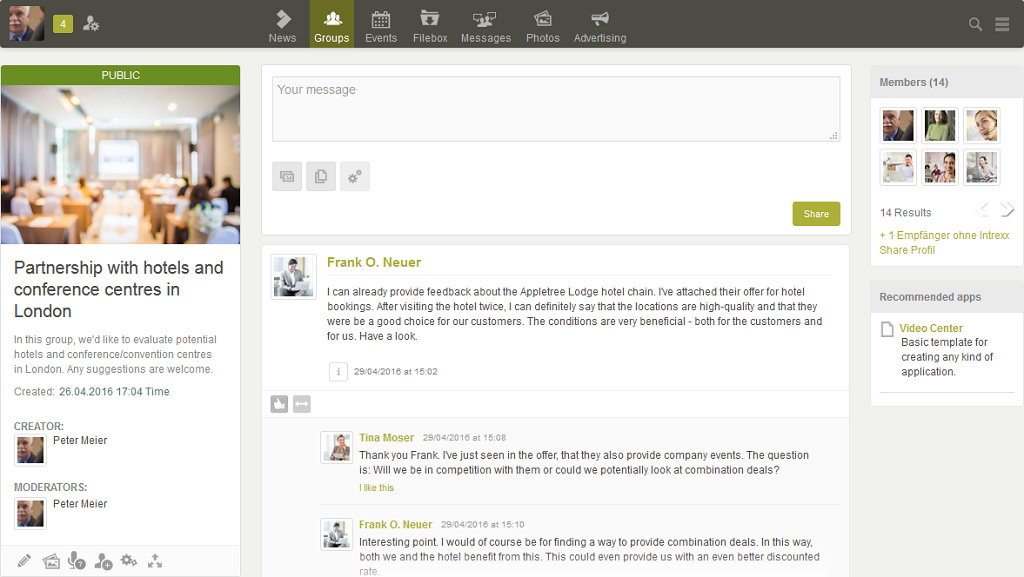
The group's type is shown above the group image on the left-hand side. Beneath the image, you'll see the title, description, creation date, creator and moderators. Click on the group image to refresh the middle column which contains the posts. When you click on the name or picture of a moderator, you'll switch to their personal page. As usual, you can also create posts for the group directly in the middle of the display area, which, depending on the privacy settings of the group, will then be available to all Intrexx Share users or just for the members of the group.
3. Master data

As moderator of the group, you can edit the group by clicking on
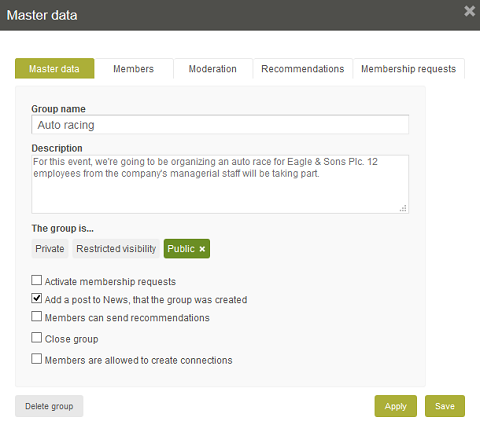
In many ways, this page corresponds to the edit page used to create a new group. By clicking on Delete group, the group can be deleted. The group members will not be information when a group is deleted. Click on Apply to save any changes made and then you can make any necessary changes on the other tabs. Save also applies the changes made but then closes the dialog.
4. Group image

The group's preview image can be modified here.
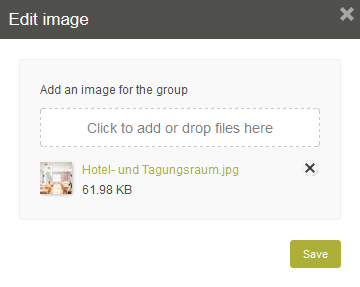
Drag the image file to the marked field or click on it to select the image from a directory. Once an image has been uploaded, it will be shown in the bottom area as a thumbnail. Click on
5. Moderators

This button opens a page where the group's moderators can be selected.
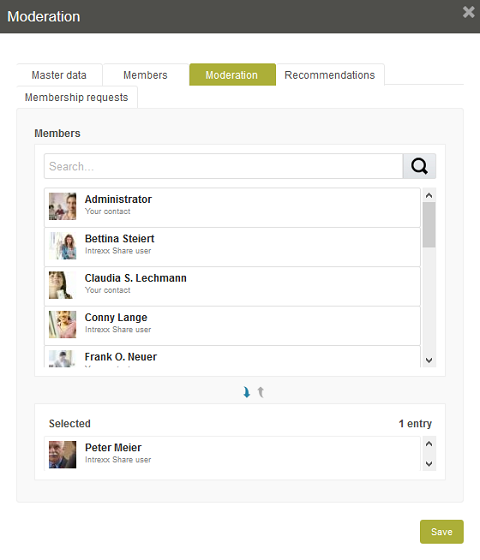
This page can also be reached when editing the group's master data. You can search through the group's members at the top. The members list will automatically be filtered based on this. Move the members, who should become moderatos, to the Selected list by selecting them and then clicking on
| When you create a new group, you will automatically become one of the group's moderators. |
In both cases, the user, who offered the moderation to you, will receive a notification as to whether you have accepted or declined the moderation, and, depending on the configuration of the Email settings, they will also receive an email regarding this.
6. Members

This button is available to the group's moderators. This button will open a page where the members of the group can be selected.
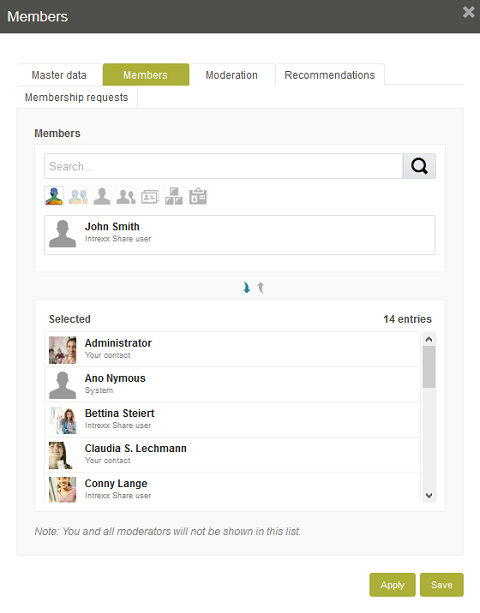
This page can also be reached when editing the group's master data. Selecting the members is done in the same way as selecting the . For each individual user, you can see their status with regards to Intrexx Share, yourself or the group, e.g. Your contact, Recommended. Users who are added to or removed from the group here will receive a notification and, depending on the configuration of the Email settings, an email informing them about their changed membership status. Users, to whom the group was recommended or who have applied for a membership (but aren't yet members) are also listed here. These users cannot be immediately added to the group.
Request membership
Deactivate the filter Mine to view all potential groups. Open the group where you'd like to be a member.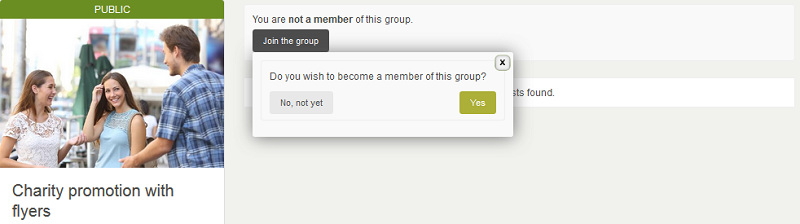
If membership requests are not activated, you'll see the button Join the group in the middle column. Clicking on this button makes you a member of the group.
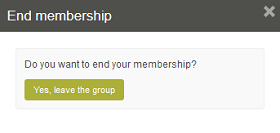
7. Leave group

If you no longer wish to be a member of a group, you can leave the group using
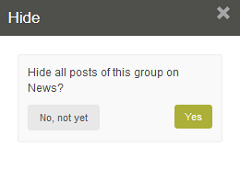
8. Settings

Here, you can decide whether posts from this group should be hidden on the News page.
9. Connections

All information regarding this topic can be found here.
10. Recommendations
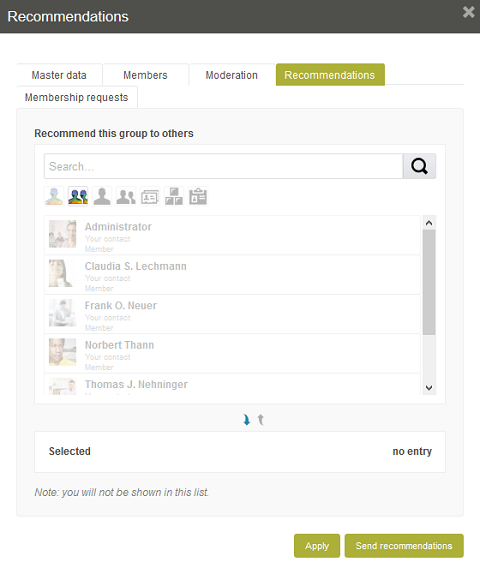
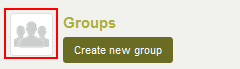
Here, members and moderators can draw the attention of other Intrexx Share user's to the group. This page can be reached, for example, when editing the group's master data and then by clicking on the Recommendations tab. Selecting the members is done in the same way as selecting the moderators. After making your selection, click on Apply or Send recommendations, depending on whether you'd just like to define the recipients for the recommendation first of all or if you'd like to send the notification immediately. When you click on Send recommendations, the recipients will receive a notification and, depending on the configuration of the Email settings, an email. Users without an Intrexx Share profile will be informed via email.

The link

| Please note that, at this point, you can only select users who are not already members of the group, have not already applied for membership and have not already had the group recommended to them. |
If you receive a recommendation for a group, you will receive a notification depending on your Settings. In both cases, you can conveniently switch to the group directly via a link. Also, when the application process is activated for the group, in this case you do not need to separately apply for membership but you have the opportunity to join the group immediately.
11. Membership requests
In the group settings, membership requests. Moderators are provided with the ability to decide whether users should become a member of the group or not. In private groups or groups with limited visibility, users can only become members after having applied.
If you switch to such a group and are not yet a member, you will be offered the button Apply for membership in the central area of the display, from which you can apply for membership of the group. Enter a short explanation and then click on Send request.
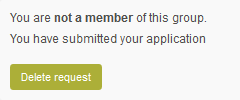
Afterwards, the current status will be shown. The applicant has the option to delete their application provided it hasn't already been processed by a moderator. The group moderator will not be informed that the application was withdrawn.
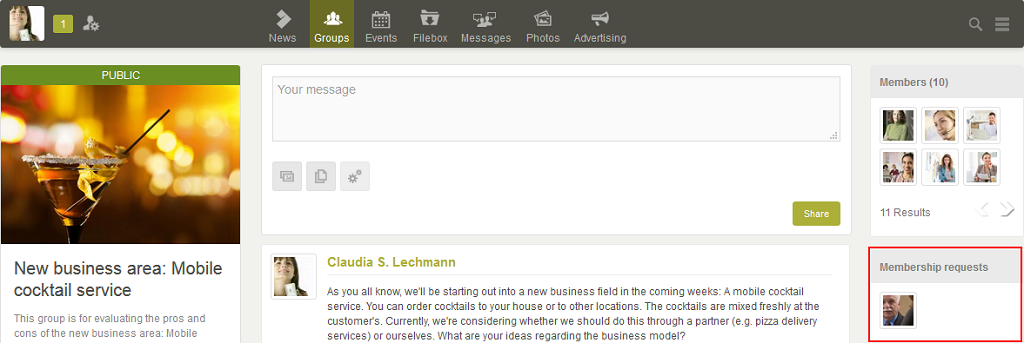
The moderator of the group will be informed of your application depending on the configuration of their settings. Additionally, the element Membership requests will be shown on the group page. The membership request can be processed by clicking on the profile picture.

The application can be accepted or declined here.
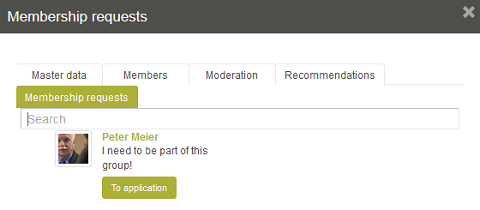
Membership requests can also be edited on the Membership requests tab, which is reached by editing the group's Master data. Once a moderator has processed the request, the applicant will be informed, whether their request was accepted or declined based on their settings.
12. Elements
In the right hand column of the display there are several elements which help to give you an overview of the current constellation of the group.
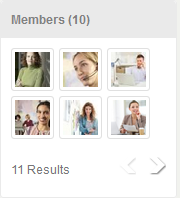
Members
Displays the group's membersMembership requests
Displays the users who would like to join the group. The request of these users haven't been processed yet.Recommendations
The people to whom you or other members of the group have sent recommendations can be seen in the Recommendations element. These people can also join the group by actively applying for membership. The people to whom the group has been recommended will continue to be displayed in the Recommendations element until they join the group, or are declined membership.My recommendations
This element shows those people to whom you personally have recommended the group. Similarly here, the users concerned will be displayed until they have joined the group, or have been refused membership.| Visibility of the group | Element | |||
| Members | Membership requests | Recommendations | My recommendations | |
| visible to | ||||
| Public | Intrexx Share users | Moderator | Members | Members who have sent a recommendation |
| Restricted | Members | |||
| Private | Members People who have received a recommendation | Not applicable | ||
13. Filters
In accordance with a group's privacy settings and your membership status, the element Filter by category can be used to filter the groups in the middle.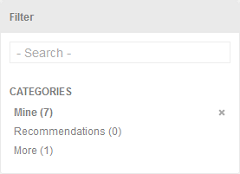
The category Mine will limit the groups in the overview to those where you are a moderator or a member.
| The Mine filter category is default, meaning you need to deactivate it if you want to see all groups, which you're allowed to see, in the overview. |
Recommended shows the groups, where you aren't already a member, for which you have received a recommendation from the respective group members. The category More shows the groups which are public or have restricted visibility and don't already fall into one of the other categories. If more than one category is chosen at once, the overview will show all of the groups that match at least one of the selected categories.