Import application permissions
Applications module Import application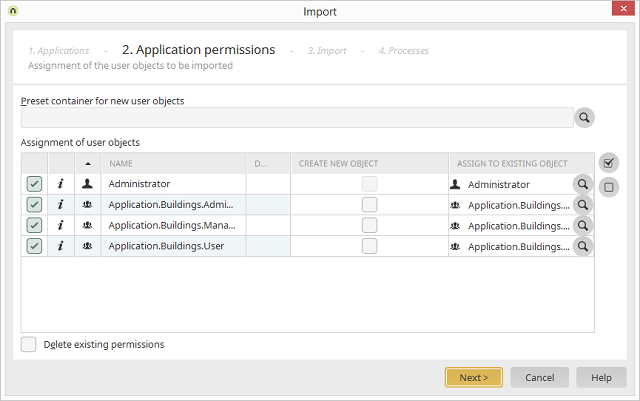
Preset container for new user groups
Shows the selected container with the path where the user objects defined in the imported application are transferred.Opens a dialog where you can select the container.
Assignment of user objects
1st column
If you want to assign user groups, select them by activating the corresponding checkbox in the first column on the left.2nd column
By mouse over3rd column
Here, symbols for the type of user object will be shown (e.g. individual user, user group etc.).Name column
Shows the name of the user object.Description column
Shows the description of the user object.Create new object
If a new user group should be created, activate the checkbox in this column. This means it will not be assigned to an existing user object.Assign to existing object
Shows which user group the imported object will be assigned to.Opens a dialog where the user group, to which the imported object should be assigned, can be selected.
Selects all user objects to be imported.
Deselects all user objects so that none are imported.
Delete existing permissions
With this setting, all currently available permissions of the application being overwritten will be deleted and then replaced by the permissions from the imported application.| Please note that this setting can effect menu points that link to the application. If you use the Content Management System application in your portal, permissions can be lost due to the import because the permissions set in the drop-down lists in the application are not contained in the imported application. |