Connector for dg hyparchive in applications
Application development- Data groups
- File fields
- Stamp fields - Assignment of Intrexx fields
- Stamp fields - Assignment of user defined values
- Stamp fields - Assignment of drop-down lists
- Stamp fields - View and edit pages
- Authentication
- dg hyparchive data group handler
- Regional settings
- Support of SAP documents
- Expert settings
- Authentication
- File operations in view tables
- File operations on view pages
- File operations on edit pages
- File operations in drop-down lists
- Updating stamp data
- Search in hyparchive documents - Possible search options
- Search in hyparchive documents - Intrexx search
- Search in hyparchive documents - Full-text search
- Search in hyparchive documents - Full-text search in Intrexx managed documents
- Search in hyparchive documents - Full-text search in files that are not managed by Intrexx
- Stamp search
How to configure a connection to dg hyparchive in Intrexx can be found here.
Information regarding dg hyparchive in Intrexx processes can be found here.
Application development
Data groups
To be able to save stamp data and documents in hyparchive via Intrexx, an Intrexx data group is required. External data groups are currently not supported by the adapter. The data group fields can then be connected to hyparchive stamp fields. A file field, which contains a special FileHandler class for hyparchive, is added to the data group for files.| It is fundamentally possible to create multiple hyparchive data fields, it is however recommended to use one per data group as the assignment of the stamp fields will otherwise become unclear. |
In the first step, the fields for the stamps, which will be connected to hyparchive, will be created.
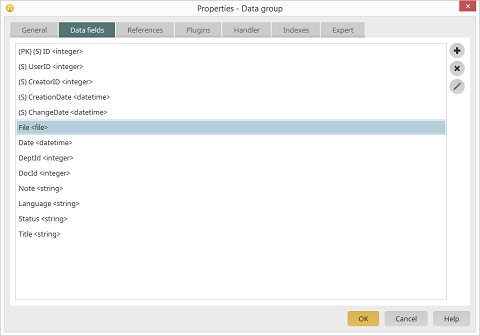
Create a data group for the hyparchive connection or select an existing one from your application. Add all necessary data fields, which should be linked to the fields in hyparchive, to the data group. At least the following fields are needed in the data group:
- Department ID
Create a field (type: Integer) for the Department ID in hyparchive. - Document ID
Create a field (type: Integer) for the Document ID in hyparchive. - Title/Name
A title or a name will be needed for a document or folder respectively. Create an appropriate field (type: String) in the data group.
File fields
After all of the fields for hyparchive documents and stamps have been created in the data group, the file field for hyparchive documents can be created.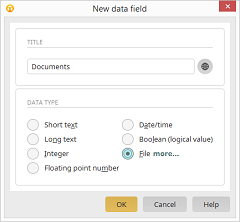
To do that, add a new field (type: File) to the data group and click on more…:
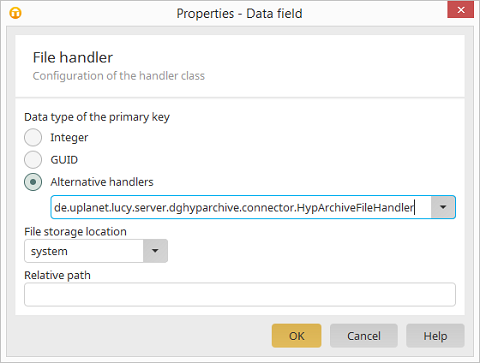
Under Data type of the primary key select the option Alternative handlers and select the following option from the drop-down list:
de.uplanet.lucy.server.dghyparchive.connector.HypArchiveFileHandler
Confirm this by clicking on OK.

By clicking on
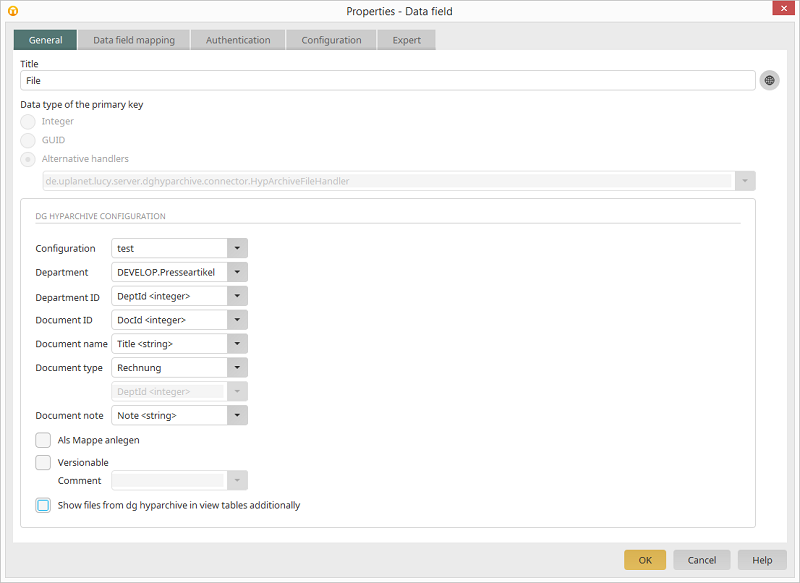
Under the tab General, the Title of the field as well as the selected Handler class is displayed. In addition, specific entries are needed:
- Configuration
Select hyparchive configuration that you created in the Integration module. The hyparchive server for the connection will be identified with this configuration. - Department
Based on the chosen configuration all available departments will be listed, for which the recorded users have access permission. Select the department for the documents. - ID-Inquiry
There must be a clear value, so that data sets in Intrexx can be linked with documents in hyparchive. For that, hyparchive Department ID and Document ID are saved in respective data group fields. Two fields (type: Integer) are needed for that, which refer to hyparchive Document ID and Department ID. - Document name
Select a data group field, in which the name of the document is saved or created. - Document type
A document type must be defined for the document. This can either be selected as a constant or defined dynamically via an Intrexx data field for the Type ID (type: Integer). - Record as a file folder
Determines whether files from Intrexx should be stored as a single document or as a folder in hyparchive. - Versionable
Activate whether documents in hyparchive are versionable. In addition a static comment for versions can be recorded or a data group, in which comments for versions can be recorded, can be selected.
| The option Show files from the dg hyparchive in view tables additionally can lead to a high server work load, because the documents must be ascertained per data set in hyparchive. We recommend that you only display documents on view pages of a data set. |
Stamp fields - Assignment of Intrexx fields
In the next step the Intrexx data fields, and with that the values, will be assigned to hyparchive stamp fields under the tab Data field mapping.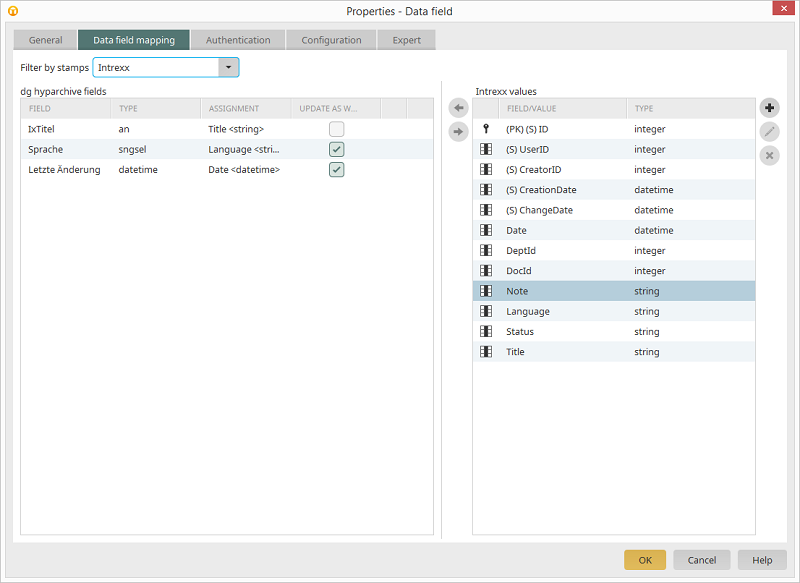
Hyparchive stamps from the previously selected hyparchive server will be listed on the left-hand side. On the right-hand side the Intrexx data groups, and when appropriate the fields of parent group and user defined values, are listed. Hyparchive fields can be filtered by stamp to enable a better overview. The
Stamp fields - Assignment of user defined values
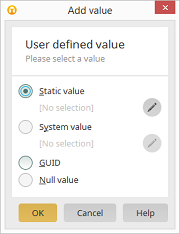
As well as data fields, hyparchive fields can also be assigned user defined values. Click on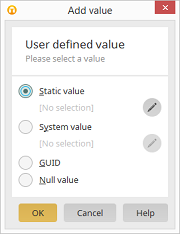
Select from the following options: Static value, System value, GUID or Null value. This is for example helpful, if the same value should always be used for a mandatory stamp field. In the same way calculated date values and system values, like the current Intrexx user for example, can be recorded. Another example would be the generation of a GUID at the current time as a clear data set ID for Intrexx and hyparchive. Calculated values are as standard not saved in Intrexx data fields, but rather in hyparchive fields.
For certain purposes it is necessary to save a static value in an Intrexx data field. As a result, you will be asked automatically if the value should be saved in an Intrexx data field, when assigning a value to a hyparchive field.
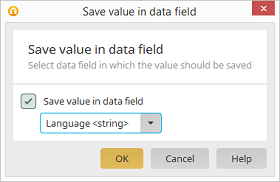
The setting Save value in data field can be activated here. Click on OK.
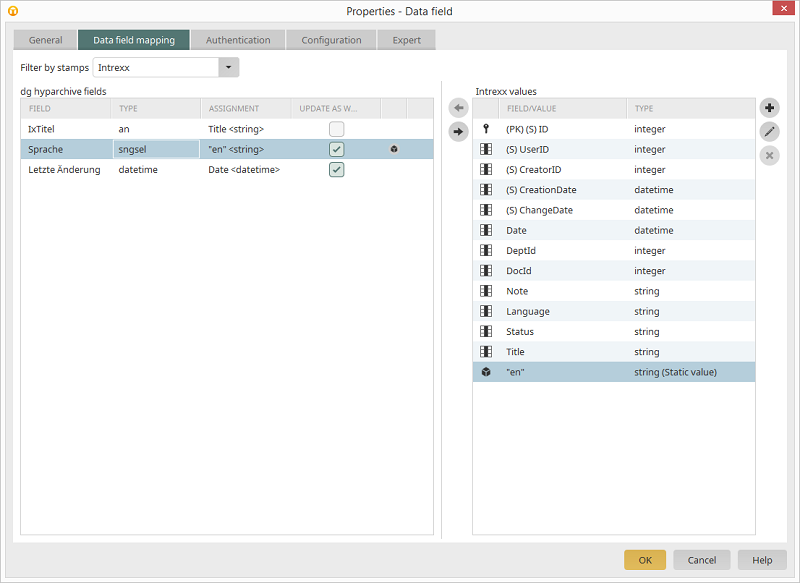
The setting Save value in data field can be edited in the Field assignment tab by clicking on
If you choose the option Static value, you can define the settings by clicking on
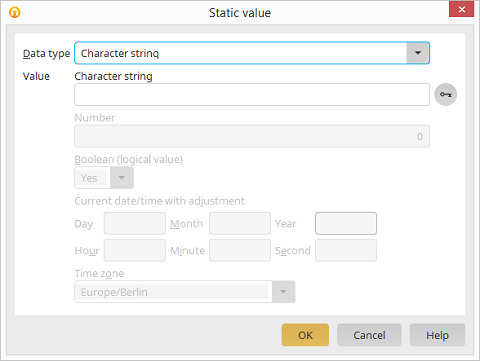
Select the desired Data type (Character string, integer, Boolean (logical value), date/time). In the area Value the constant value is entered. You do however have the option with a date/time data type to dynamically adjust the date. With the data type Character string, a distinct ID can be created by clicking on
Select the desired time zone under Time zone. Click on OK.

If you choose the option System value, you can adjust the settings by clicking on
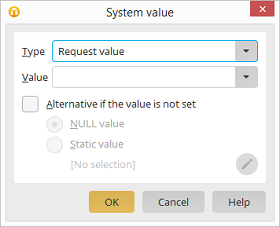
Select the desired Type. The option User allows you to choose from fields from the user management. With the options Request value, Session value and Processing context, the name of the variables will be entered in the field Value. In the lower area you can determine what will be entered as the system value, if a value is not set.
Stamp fields - Assignment of drop-down lists
Just like Intrexx, hyparchive offers the possibility to define drop-down lists for data fields. Fields that have drop-down lists have the file type sngsel or mltsel (for lists with multiple choices) in hyparchive.Drop-down lists in hyparchive can be assigned values from Intrexx data fields or static values. Please note that the corresponding drop-down list entry in hyparchive can be ascertained from the value in Intrexx. If an Intrexx data field with the type String is assigned to the list field, then the value, which is saved there, must correspond with a display value in the hyparchive drop-down list. And please note that this is case sensitive.
Stamp fields - View and edit pages
The usual data field controls on view and entry pages are available to view and edit the stamp fields. So that Intrexx can identify the document, which is linked to each data set, in hyparchive, it is necessary to place the fields for Department ID and Document ID on every view and entry page that is related to hyparchive. This can also be done in the hidden area, so that the fields are not visible to the users.If the stamp data of a document is directly edited in hyparchive, then it cannot be automatically and immediately synchronized in Intrexx. Therefore Intrexx updates the fields of a hyparchive stamp automatically, as soon as the data set is opened on a view or entry page. The user needs to click on Save to save the updated data in Intrexx.
Authentication
The final step of configuring the file field can be defined under the tab Authentication. Here you can decide which portal user should be identified for the authentication when accessing hyparchive.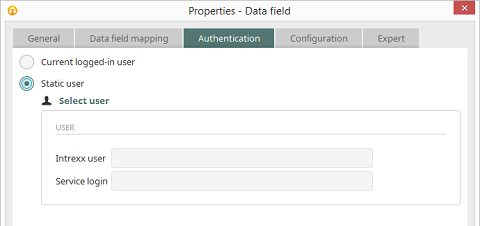
As a default the currently logged in portal user will be used. If there is not any hyparchive session for this user and the option Username/Password was selected as the authentication method in the configuration, then the portal user will be requested to login to hyparchive.
There are examples of application, where access to hyparchive should always be made with one user, irrespective of which portal user is currently logged in. This is for example the case if there is not a hyparchive user for every portal user or if documents from Intrexx should fundamentally be saved under the same user name in hyparchive.
To do that a so-called Static user can be selected in the dialog. This relates to an Intrexx user, to whom a hyparchive user account has been assigned in the hyparchive configuration. A static user can also be directly setup with this dialog. As soon as such a user is entered in the file field, then all access to hyparchive takes place with the data group of this hyparchive user account.
This means that an interactive login to hyparchive is no longer necessary in the portal. This also makes simple Single Sign-On scenarios possible without having to revert to the Kerberos authentication.
dg hyparchive data group handler
As soon as a data field for hyparchive is added to an Intrexx data group and then configured, then the data handler class will automatically be adjusted in the expert attributes of the data group at:de.uplanet.lucy.server.dghyparchive.connector.rtdata.RtDataGroupTableHypArchive
The hyparchive specific data group handler class is optional, but offers additional functionality in interaction between Intrexx and hyparchive. In this way an automatic synchronization of the stamp values from hyparchive is carried out as soon as a hyparchive data set is loaded on an Intrexx view or entry page.
In doing so it is guaranteed that an Intrexx portal user can constantly see the current stamp data. In some circumstances it can also occur that stamp data was edited in hyparchive but the previous value is still saved in Intrexx.
Regional settings
Date/time and currency fields are formatted by hyparchive with the format that was setup by the user under Regional settings. hyparchive requires the entire language/culture code (e.g. de-DE or en-US instead of de or en). The formats of the required languages can be defined in the Portal Manager under Portal - Portal properties - Regional settings. Alternatively you can determine a standard language for hyparchive in the configuration of the file field. In this case, the same language code will be used every time a file is recalled. Please note that you need to setup the format in Intrexx that hyparchive expects for the date/time and currency fields.Support of SAP documents
To support SAP ArchiveLink documents (availble from Intrexx 8 with Online Update 07), the following additional settings need to be made in the application:- A data field with the type Short text is required for the SAP Archive ID.
- In the properties dialog of the file field, the following settings
must be added on the Expert / Settings tab:
- hyparchive.sap.archive = true (Type: Boolean)
- hyparchive.sap.archive.id.field.guid = [GUID of the SAP ArchiveLink ID data field] (Type: GUID)
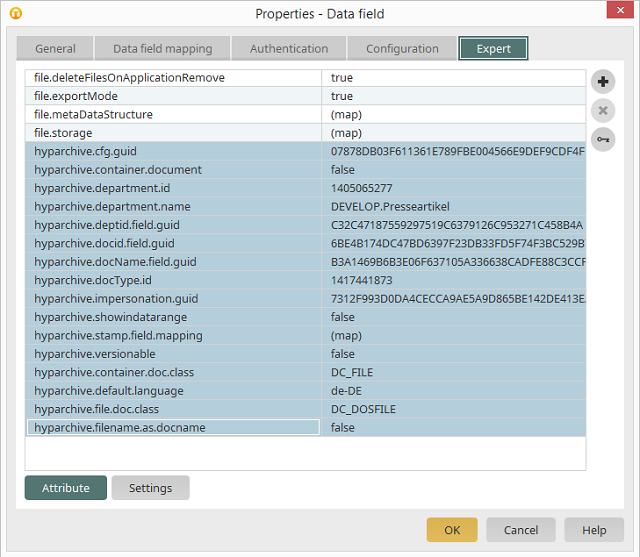
Expert settings
In the properties of the file field, it is possible to further configure the adapter by going to the tab Expert. The following settings are available here:- hyparchive.sap.archive
Flag whether documents should be archived with the SAP ArchiveLink - hyparchive.sap.archive.id.field.guid
GUID of the data field for the SAP ArchiveLink ID. - hyparchive.cfg.guid
The GUID of the dg hyparchive configuration. - hyparchive.container.doc.class
Class for archive documents (default is DC_FILE). - hyparchive.container.document
Determine whether the document is a single or archive file (True/False). - hyparchive.default.language
The default language to be used for hyparchive web service requests (e.g. de-DE, the default is the regional setting of the Intrexx user). - hyparchive.department.id
ID of the dg hyparchive department. - hyparchive.department.name
Name of the dg hyparchive department. - hyparchive.deptid.field.guid
Field GUID for the Department ID. - hyparchive.docid.field.guid
Field GUID for the Document ID. - hyparchive.docName.field.guid
Field GUID for the Document Name. - hyparchive.docType.id
hyparchive Document Type ID. - hyparchive.file.doc.class
Class for single files (default is DC_DOSFILE). - hyparchive.filename.as.docname
Determine whether the file name should be used as the document name. - hyparchive.impersonation.guid
Intrexx user GUID for the login as a static user. - hyparchive.showindatarange
Determine whether files should be displayed in view tables. - hyparchive.stamp.field.mapping
Stamp field assignment. - hyparchive.version.comment.field.guid
Field GUID for comments when a file is versioned. - hyparchive.versionable
Determine whether documents are versionable.
dg hyparchive in Portal applications
Authentication
When accessing a data group, which contains hyparchive file data fields, with a portal application for the first time, the user will be requested to login to hyparchive. This is only required once per session and hyparchive server. If Integrated Windows Authentication is activated then the user will automatically be logged in upon accessing hyparchive for the first time. A login is not required if a static user was entered in the file field of the data group for hyparchive authentication.The hyparchive data can then be accessed via the Intrexx application after successful authentication. The portal user has the same functions available to him with hyparchive data groups, as he does with the normal Intrexx data groups. In terms of the file operations there are however less special features to consider.
File operations in view tables
hyparchive file data fields can be placed in view tables to open files directly from tables. However, for performance reasons no files from hyparchive are by default displayed in file data fields, when they are displayed in a view table. To do that, activate the option Show files from the dg hyparchive in view tables additionally in the file data field configuration. If it should be possible to directly download documents from the table, then this needs to be activated in the options of the file data field in the view table.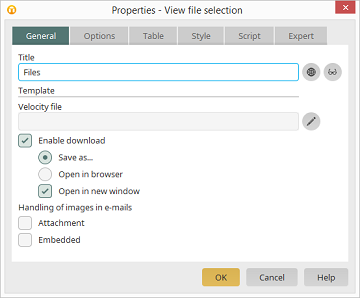
| Please note that thumbnails for hyparchive files cannot be displayed, because these are not stored on the Intrexx Portal Server but in hyparchive. Therefore preview pictures also cannot be generated by Intrexx. |
File operations on view pages
hyparchive files are displayed on view pages with the control View file selection.
It's also possible to enable the downloading of files here.
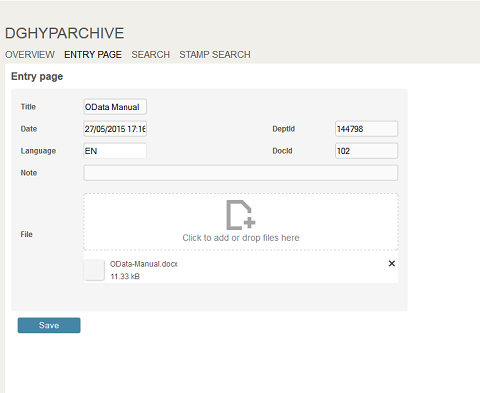
File operations on edit pages
The control Select file on entry pages allows you to upload and edit files and documents in Intrexx and then save them in hyparchive. All of the functions from the default Intrexx file data fields are available here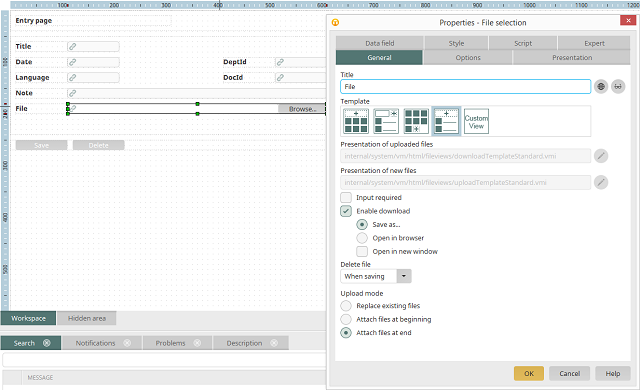
In addition to allowing downloads you can also determine what should happen when files are uploaded. In principle, new files will be added to the existing files in hyparchive document folders. It is however possible to replace the files.
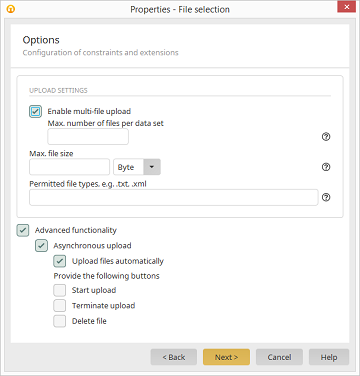
Additionally you can determine the maximum number of files per data set that can be saved. The maximum file size can also be specified here. There are also Advanced functionalities for uploading files, which have an effect on the behavior of the control in the portal.
Files can be moved onto the file control via drag & drop in the browser and with that they will be automatically uploaded to the Intrexx Server. When the entry page is saved, then the file as well as the information in the stamp fields will be transferred to the hyparchive server. The new Document ID will be saved in Intrexx. Existing files can be deleted in hyparchive by clicking on
| In terms of single file documents, files can be updated (in this case replaced), by first deleting the existing file and then uploading a new file. |
File operations in drop-down lists
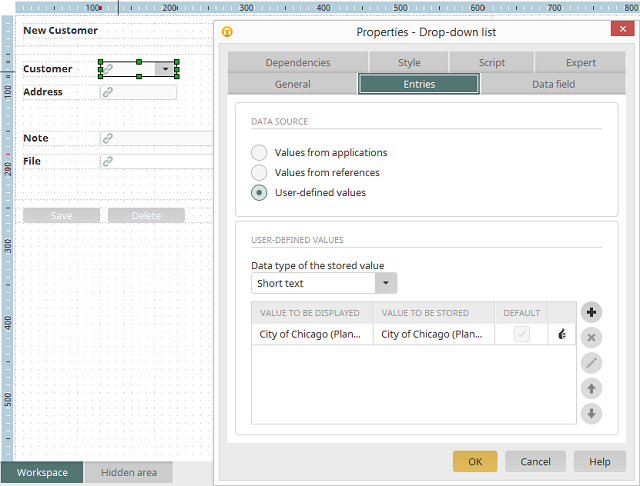
To make it as easy as possible for the portal users to be able to maintain hyparchive stamp fields, they can add identical drop-down lists on entry pages in Intrexx for the drop-down lists in hyparchive. The values from hyparchive drop-down lists can be identified with the hyparchive FormEdit Tool.On an entry page in Intrexx a drop-down list can be created, its entries reflect those of a hyparchive value list. The values can be defined from applications, references or user defined value.
The following example shows how the hyparchive value list Customer can be recreated on an Intrexx entry page. In this case the displayed values will be used as the saved values. This means that the assigned stamp field has to be of the type String in the data group.
Updating stamp data
Seeing as documents and files are only saved and available in hyparchive, they are constantly up-to-date, when they are accessed with Intrexx. The stamp data of a document behaves somewhat differently. This is saved in both the data fields of the Intrexx data group as well as in hyparchive. This has the advantage that you can search by stamp fields and access the data sets in Intrexx without having to access hyparchive server. The disadvantage of this method is that the metadata of a document in hyparchive can change over time, whilst the old values are saved in Intrexx.| As Intrexx cannot automatically be informed by hyparchive about changes to stamp fields, the stamp data in Intrexx is updated as soon as a data set on a view or entry page, which contains a hyparchive data field, is loaded. When the page is saved, the updated data will be resaved in Intrexx. |
Another method for keeping stamp data constantly in sync between Intrexx and hyparchive is made possible by using processes.
Search in hyparchive documents - Possible search options
Documents and files in hyparchive data fields are only stored on the hyparchive server. Therefore it is not possible for the Intrexx search engine to index the contents of the files, in order to make them available for search requests. Single data stamps, which are saved in Intrexx data groups, can be searched through with the Intrexx search function. The hyparchive web service interface offers the option to search for documents in hyparchive with hyparchive full-text search. The results must then be processed in a suitable way for Intrexx. Therefore clicking on a hit will open the document in the hyparchive Web Client or will open the corresponding data set, which has the link to the hyparchive document, via filters in Intrexx.Search in hyparchive documents - Intrexx search
To be able to search through the stamp fields of a document, which were saved in Intrexx, you can configure the Search function in an application as usual. To do that, create a search configuration and select the stamp fields in the hyparchive data group, which should be indexed by the search engine. Doing so, hyparchive data sets can be searched through by stamp fields using the search function in Intrexx.Another approach is to search using dynamic filters in Intrexx applications. Filters, which correspondingly filter data sets in accord with the values in the stamp fields of the Intrexx data groups, on view tables are defined to do that.
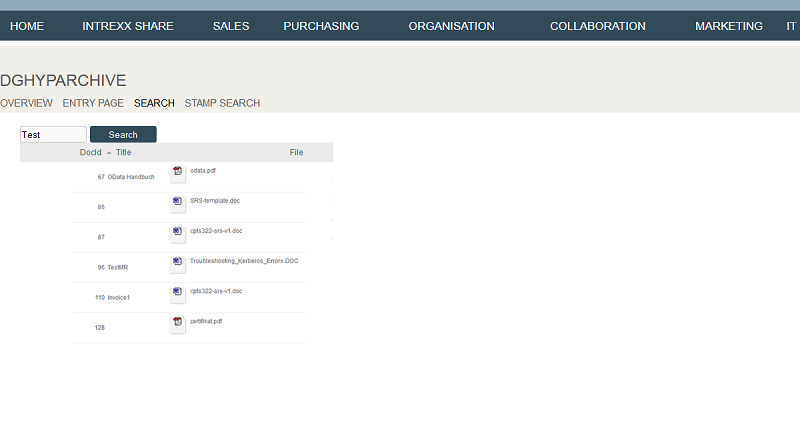
Search in hyparchive documents - Full-text search
Should the users be able to search for keywords in the documents – as well as stamp data –, then the hyparchive full-text is ideal for that. In Intrexx you can directly search through the hyparchive documents, which are managed in Intrexx, and display any hits. There is also the possibility to search for documents in hyparchive, which weren't created with Intrexx, in the portal. To do this the portal users need to also have access to the hyparchive WebClient as well as the hyparchive DocPresenter to open found documents there. The application of both methods will be described in the next section.Search in hyparchive documents - Full-text search in Intrexx managed documents
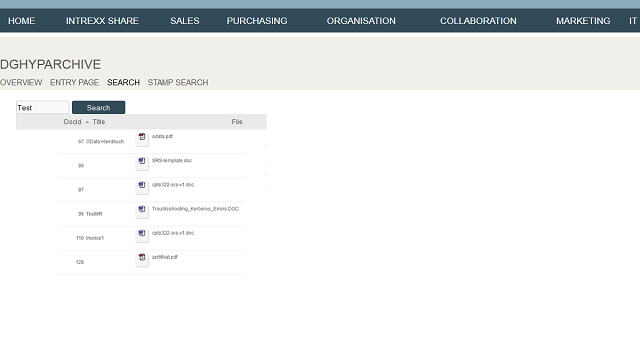
In the following example documents are to be searched for in hyparchive; these documents have a corresponding data set in a hyparchive data group. To begin with, create a view table in the hyparchive data group for the search results. An entry field for the search term is needed as well.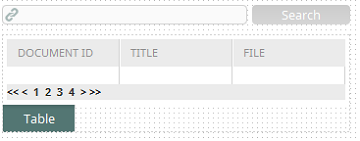
In the next step open the tab Dependencies in the properties of the view table. Click on
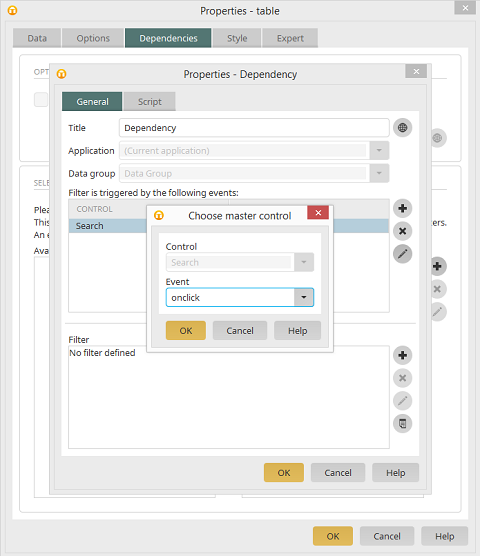
A filter is needed next, which can be edited by clicking on
<exp op="" type="in">
	<arg content="1414DAF1C286E4E92CC553C65615FE60D1500B15" type="fieldguid"/>
	<arg adapterGuid="8B74A66AB861FC2265829FB96D6985F07C5EBBBB" content="de.uplanet.lucy.server.dghyparchive.connector.rendering.HypArchiveFullTextSearchFilterHandler" searchControlName="textcontrol7D64D21B" singleton="false" type="handlerClass"/>
</exp>
- In the first <arg> element you can enter the data group field GUID, which corresponds to the Document ID in hyparchive, after content. The following entries relate to the attributes of the second <arg> element.
- adapterGuid:
The GUID of the hyparchive file field. - searchControlName:
Enter the name of the input control for the search term. - Domains (optional):
This tells the filter in which department it should search for documents. The various departments are separated by a comma.
Search in hyparchive documents - Full-text search in files that are not managed by Intrexx
With hyparchive web service interface it is possible to search for documents with Groovy action handlers and Velocity templates; the results can then be displayed in Intrexx. To do that you need to program the search selection and the results display yourself, as they are always subject to demand. Further information on how the hyparchive-API can be used for searches can be found in the dg Connect WCF user manual.Stamp search
Parallel to the full-text search it is also possible to search for documents using the stamp and system fields. You can follow the same process as with the full-text search. Only this time a different filter handler is used to search by stamp fields:<exp op="" type="in">
<arg content="1414DAF1C286E4E92CC553C65615FE60D1500B15" type="fieldguid"/>
<arg adapterGuid="8B74A66AB861FC2265829FB96D6985F07C5EBBBB" content="de.uplanet.lucy.server.dghyparchive.connector.rendering.HypArchiveQueryFilterHandler" singleton="false" stampControls="textcontrol3A8C3723" stampFields="IXTITLE" stampName="IX" systemStampControls="textcontrol38DDAF24" systemStampFields="TIMESTAMP" type="handlerClass"/>
</exp>
- In the first <arg> element you can enter the data group field GUID, which corresponds to the Document ID in hyparchive, after content. The following entries relate to the attributes of the second <arg> element.
- adapterGuid:
The GUID of hyparchive file field. - stampName:
Enter the name of the stamp that should be used in the search. - stampControls:
Enter the names (separated by a comma) of the input control for the search term. - stampFields:
Enter the names of the stamp fields (separated by a comma). The order needs to correspond to that of stampControls. - systemStampControls:
Enter the names (separated by a comma) of the input control for the system stamp fields. - systemStampFields:
Enter the names of the system stamp fields (separated by a comma). The order needs to correspond to that of systemStampControls. - Domains (optional):
This tells the filter in which department it should search for documents. The various departments are separated by a comma.