Application Store - Image gallery
1. Installation
1.1. ImageMagick
ImageMagick is used for improving performance when scaling images and can be installed as part of the Intrexx setup. You can install ImageMagick afterwards at any time when you modify the Intrexx installation via the system settings. Click on the link Click here to see important installation notices and then, in the second dialog, on the link to install it. Follow the instructions in the installation wizard from ImageMagick.1.2. IIS-settings
If you use an IIS web server, you can only upload and download smaller files in the browser to begin with. You therefore need to adjust the file size limitations (size specified in bytes) if required. This is achieved as follows:Open the Computer Management and there, "Services and Applications". In the Internet Information Services (IIS) Manager, please adjust the "ASP Limit Properties":
For uploads: Maximum Requesting Entity Body Limit
For downloads: Response Buffering Limit
The changes take effect without restarting the WWW Publishing Service. In addition to these settings, that enable file transfers up to about 60MB, larger file transfers can also be enabled with another setting. This is done by entering a corresponding byte value in the ASP Limit Properties and then in the file "applicationHost.config". Open the following folder as the Administrator:
c:\windows\system32\inetsrv
Then perform the following command line, for example for 100MB:
Appcmd set config /section:requestfiltering/requestlimits.maxallowedcontentlength:1000000001.3. Import
To use the application, you require at least Intrexx 8 with all Online Updates.1.3.1. Application
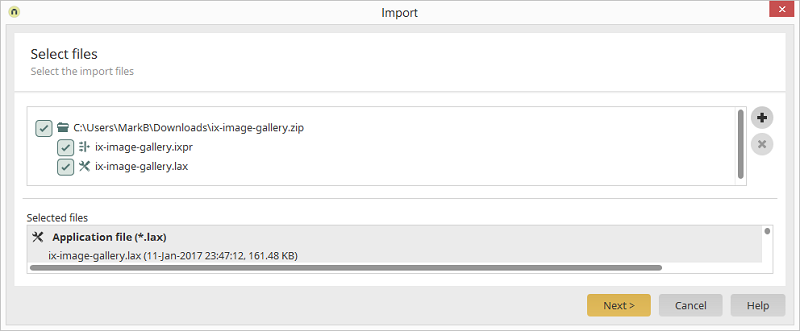
Import the file "ix-image-gallery.zip" downloaded from the Application Store, this contains the application and the process. Please keep the setting "Import with permissions" so that the predefined application permissions are transferred. Enter your license key for the application in the next step.
1.3.2. Permissions
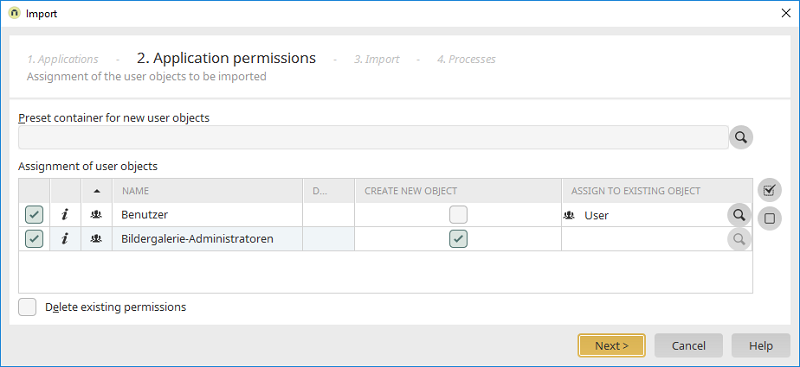
The application permissions can be assigned next. Usually, the default settings can be applied. The permissions can be modified later in the Users module.
User group "Benutzer" (Users)
Can be assigned to the user group "User" which can be found in every portal. Members of this group may view images, write comments and submit ratings.User group "Bildergalerie-Administratoren" (Image Gallery administrators)
Members may manage albums, galleries and images.1.3.3. Process
Import the included process in the final step.2. Using the application

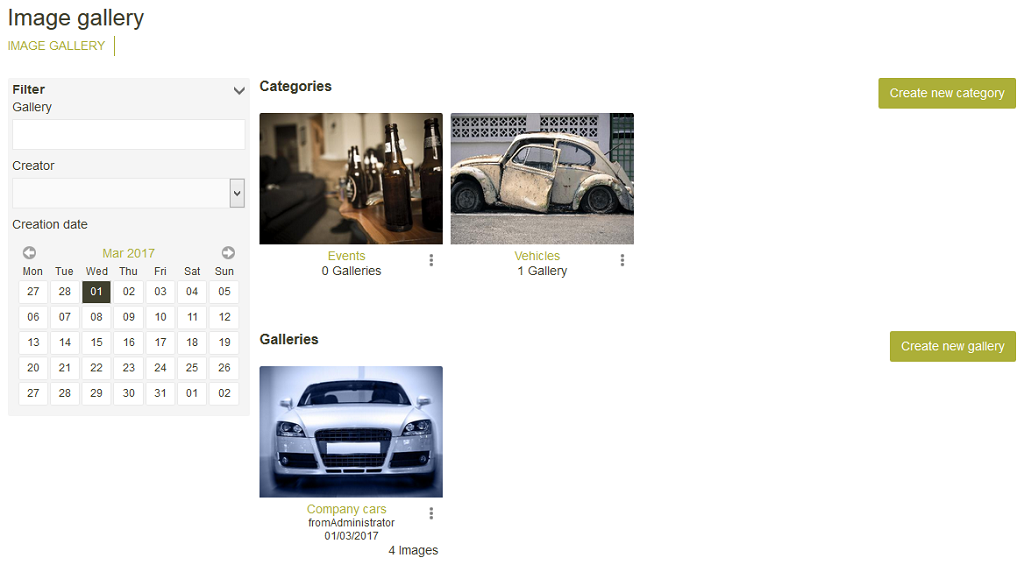
Bring your pictures into the spotlight! With the Image Gallery for Intrexx you can create any number of galleries. And so that your images are well organized, arrange your albums into categories. You can use the comment function to explain the graphics and pictures.
2.1. Create new category
On the application's homepage, members of the user group Bildergalerie-Administratoren have access to the button "Create new category".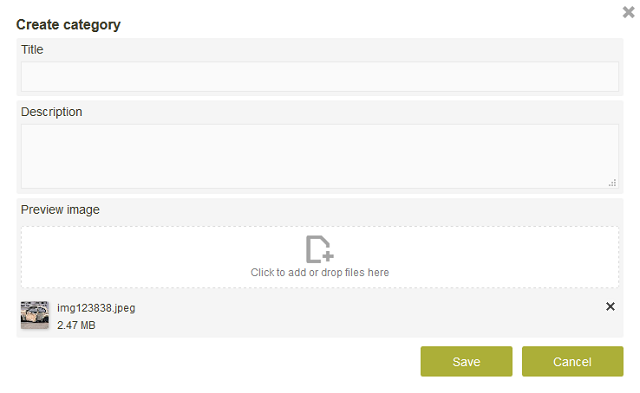
This button opens a page where you can enter a title and description for your new category. You can also upload a preview image.
The category is created when you click on "Save". To the right, beneath the preview image, you will find a
2.2. Create new gallery
Click on "Create new gallery".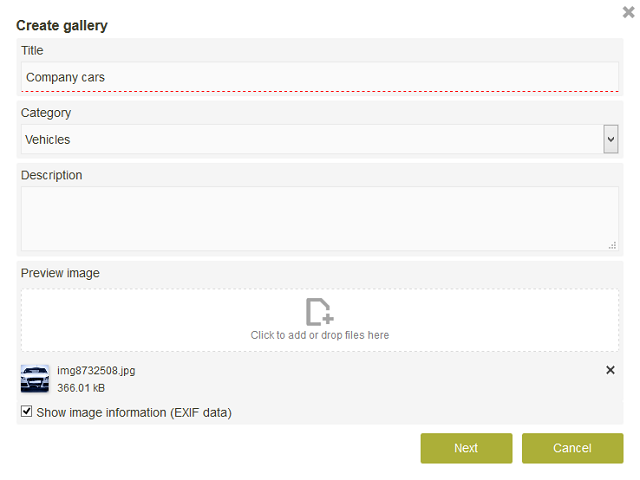
Define the title, description and preview image here. Select the category of your choice. You can also determine that the EXIF files of the images will be displayed here. Click on "Next".
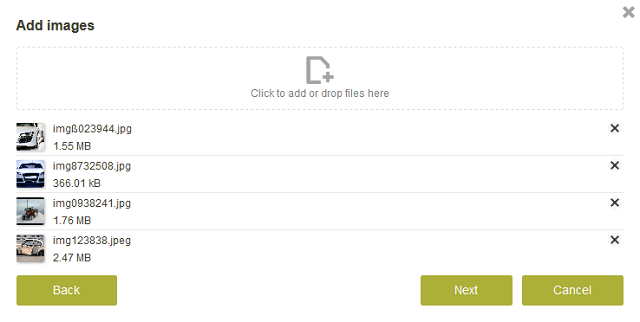
You can now add any number of images to your gallery.

Afterwards, you can adjust the sorting of the images and save the gallery. If Intrexx Share is installed in your portal, a Share post will be generated once the gallery has been created.
2.3. Edit existing galleries

If you would like to edit the properties of a gallery, click on the
2.4. View gallery
To view gallery, simply click on a preview image of name of a gallery on the application's homepage.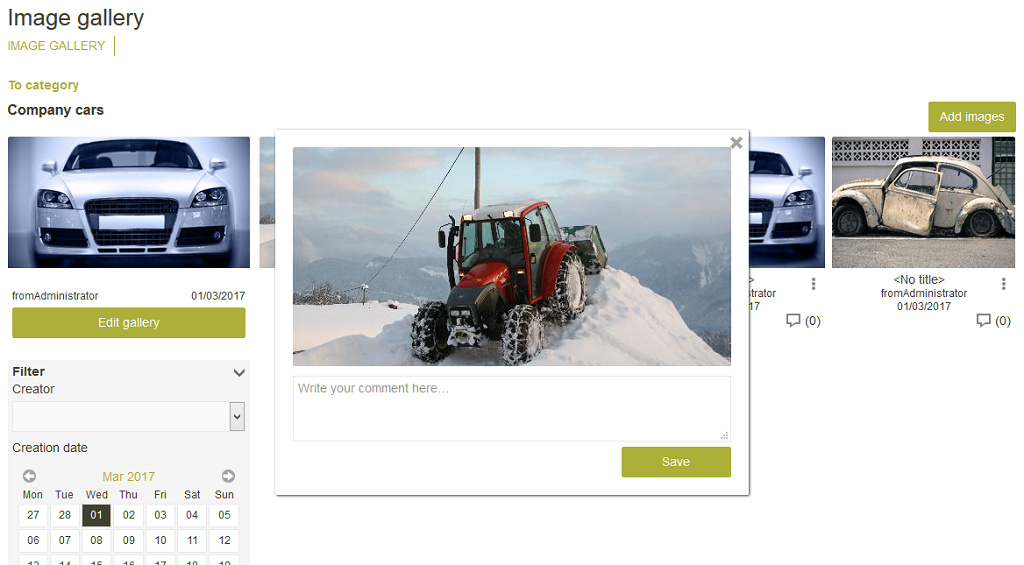
You can see each image of the gallery here. You can edit, delete or view more information about an image via the
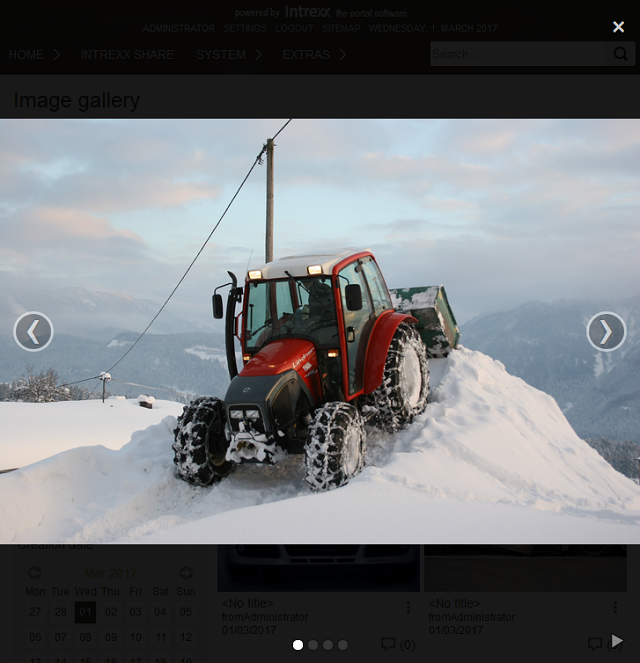
After clicking on an image, you can use the navigation buttons to switch between the individual images in a gallery. You can also start a slideshow from here by clicking on the play button at the bottom right.