Application Store - Intrexx Share 2.2 - Planner
With this add-on, appointments can be suggested and then released for voting to a selected user group. The Planner add-on can be imported into your portal as usual.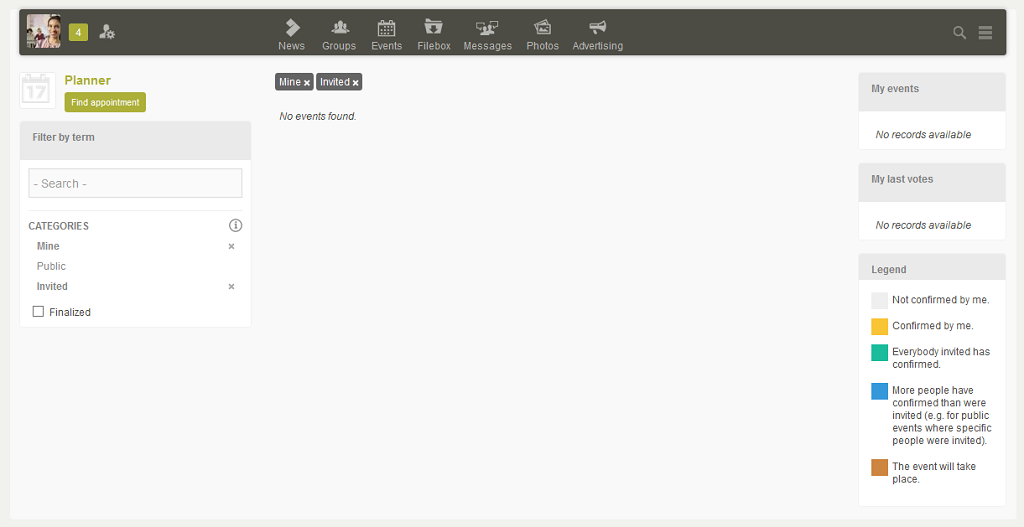
When you open the add-on in the browser you'll also find the navigation bar from Intrexx Share that enables you to directly switch to Intrexx Share. You can also switch to the add-on via the navigation bar from within Intrexx Share. In doing so, you'll barely notice that you have left Intrexx Share and are now in the Planner add-on. Intrexx Share and Intrexx Share add-ons flow seamlessly into one another.
1. Create appointment suggestion
To find a new appointment, click on Find appointment.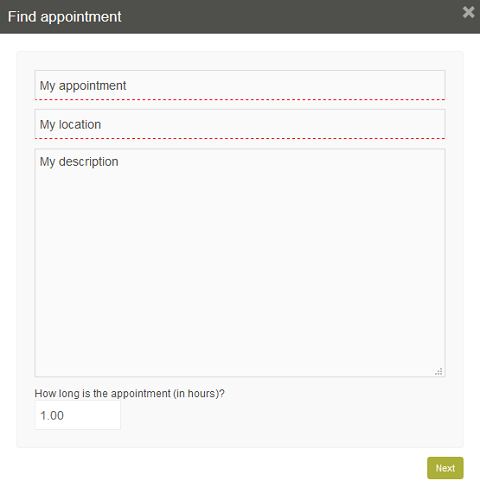
Title
Enter a title for the event here.Location
Enter the location where the appointment will take place.Description
Provide your appointment with a description here.How long is the appointment (in hours)?
Enter the duration of the appointment in hours here. Click on Next when you have filled in the form.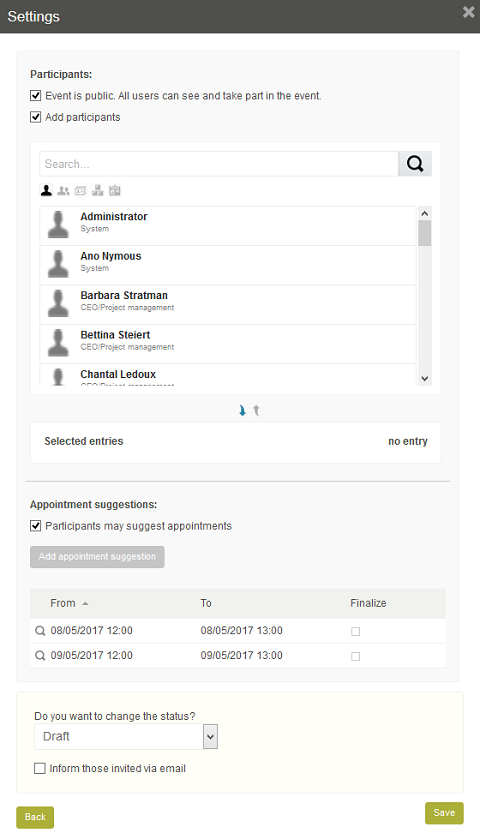
Event is public. All users can see and take part in the event.
With this setting, all Intrexx Share users can see the event.Add participants
Shows the lists Select entries and Selected entries. Move the users, who should see the event, to the Selected entries list by double-clicking on them.Participants may suggest appointments
The users selected as event participants can suggest their own appointments when this setting is activated.Add appointment suggestions
Opens a calendar where the appointment can be selected. All of the suggested appointments will be listed in the table beneath the setting can be edited by clicking onDo you want to change the status?
One of three statuses can be defined here:-
Draft
The appointment suggestion hasn't been released and is not visible to other users. -
Release for voting
The appointment is shown and can be voted on. -
Finalized
The users have voted and the appointment has been finalized.
Inform those invited via email
All of the users selected above will receive an invitation via email. For this to work, the Email service tool needs to be activated in the Tools module. Click on Save.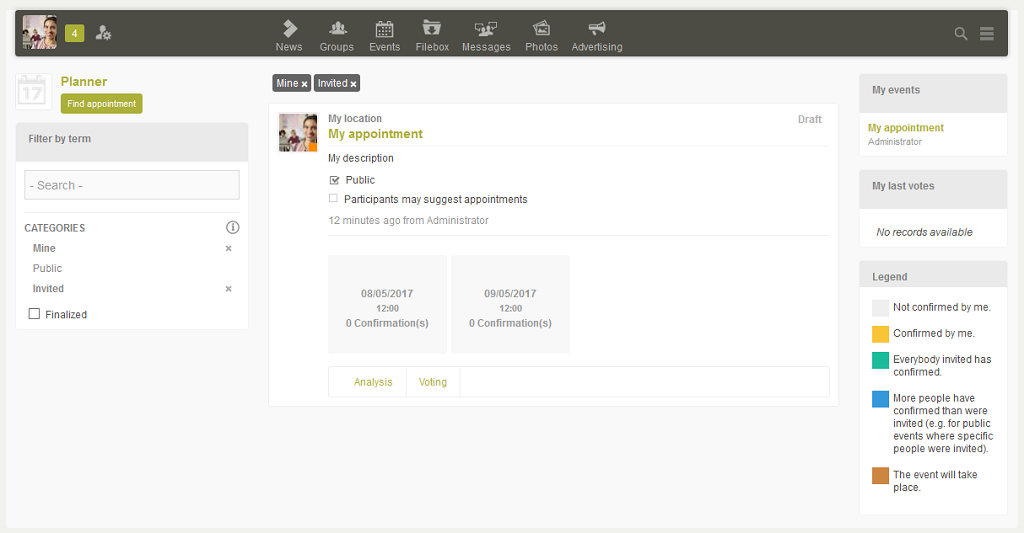
The event will now be shown in the middle of the overview page.
2. Edit appointment suggestion
Click on the title of the appointment suggestion to select it.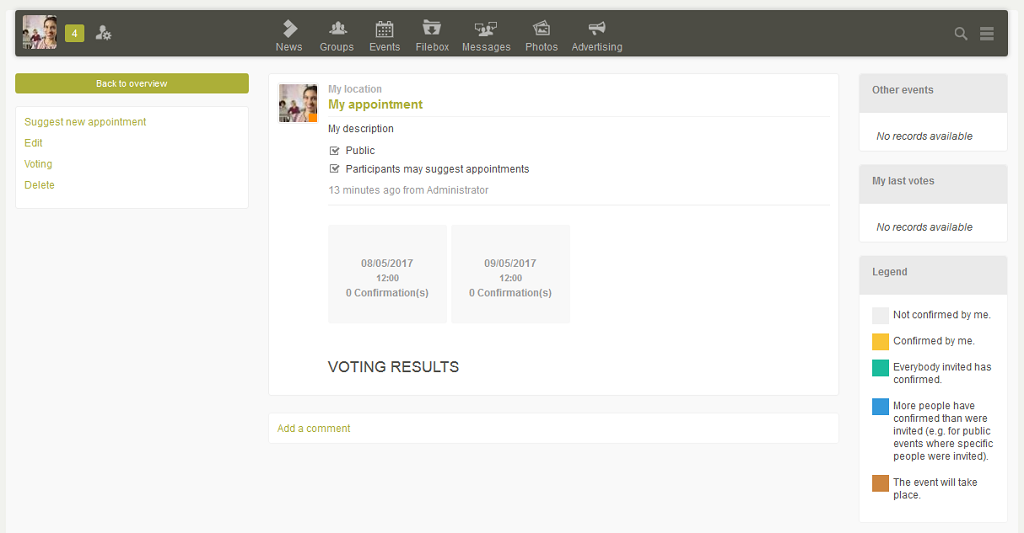
Provided the appointment is still in the draft phase, you will find four buttons in the left column.
Suggest new appointment
Opens a page where a new appointment can be suggested.Edit
Opens the edit page where the appointment details can be modified.Voting
Shows the current status of the voting.Delete
Completely removes the appointment.Click on Back to overview to return to the app's homepage.
3. Voting
Simply click on one of the dates to confirm.

The appointment will then change color and your confirmation will be added to the total of all confirmations.
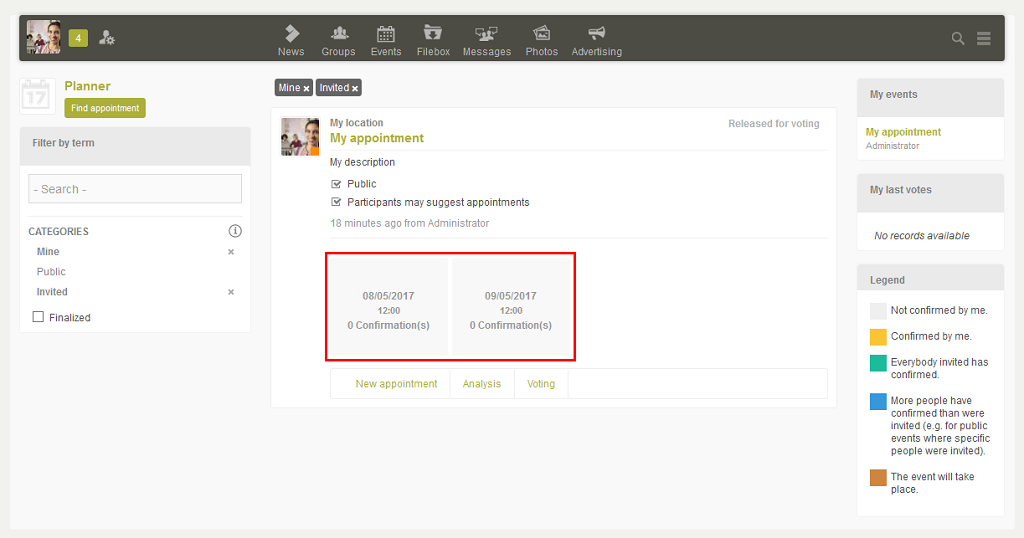
New appointment
If participants are allowed to make suggestions, you'll see the link New appointment beneath the appointment dates. You can added a new suggestion by clicking on this button.Analysis
Displays the results as a percentage.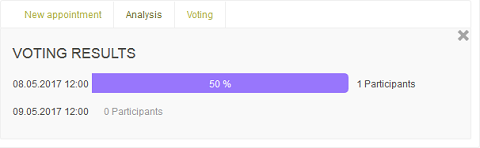
Voting
If the appointment has been Released for voting, the Voting link will be shown here.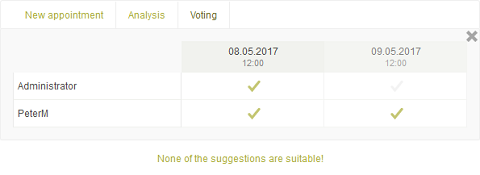
Clicking on this link will display an area where the current voting status for each participant is shown. Click on the None of the suggestions are suitable! link to reset your votes.
4. Filters
Filter by term
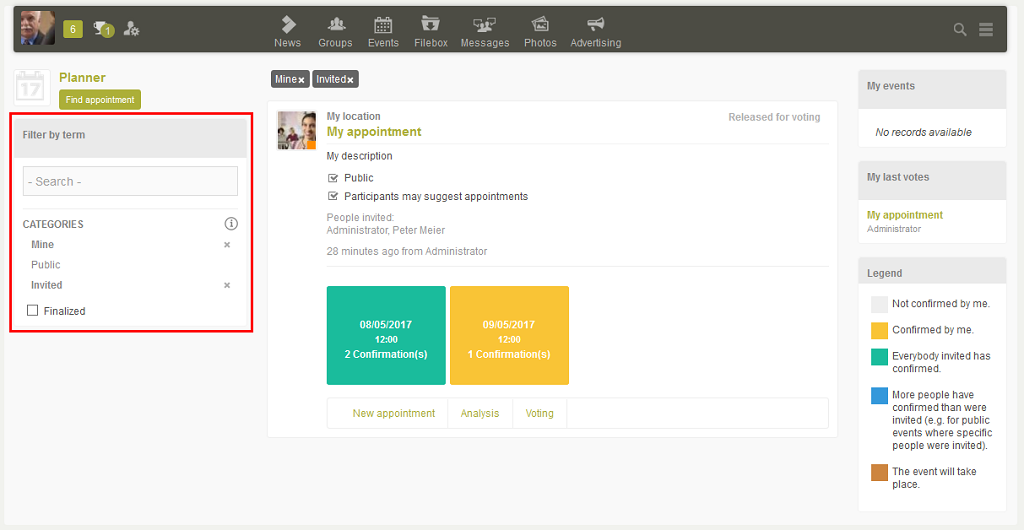
Enter a search term here. Only the appointments will then be shown in the middle area that contain the term entered.
Categories
-
Mine
Only shows the appointments that you have created. -
Public
Shows all public appointments. -
Invited
Only shows the events that you were invited to.
Finalized
With this setting, appointments that have already been finalized will also be shown.5. My events
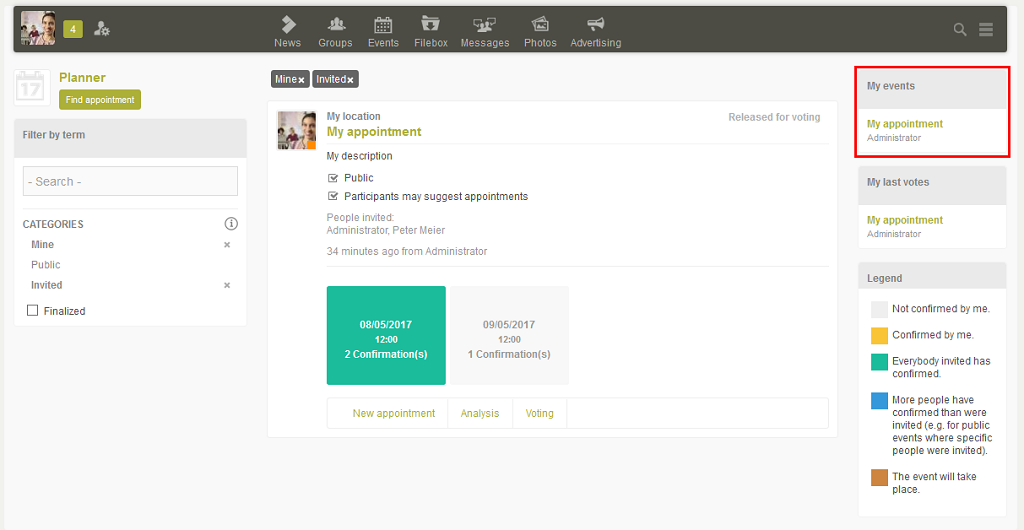
On the right-hand side, you can reach all of the events that you have created here.
6. My last votes
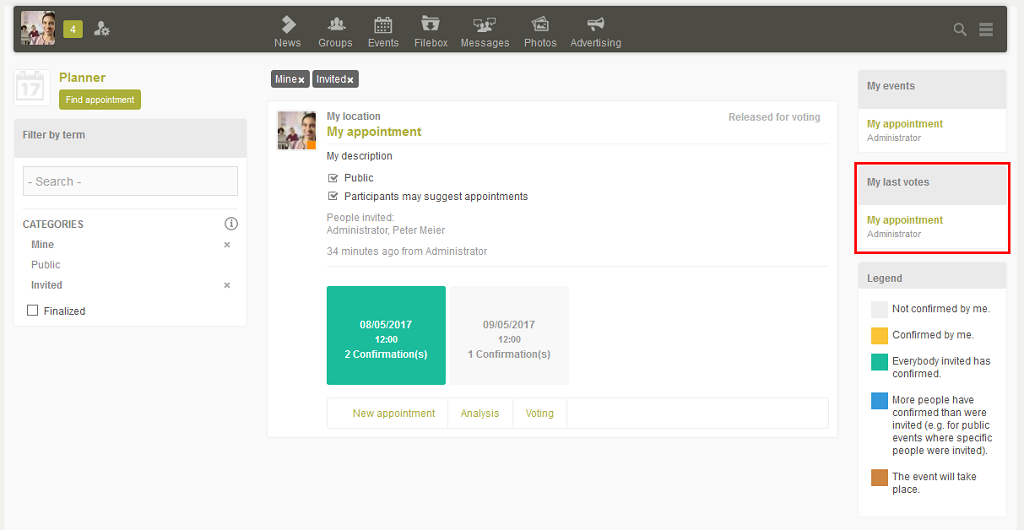
You can see all of the events that you have voted on here.
7. Legend
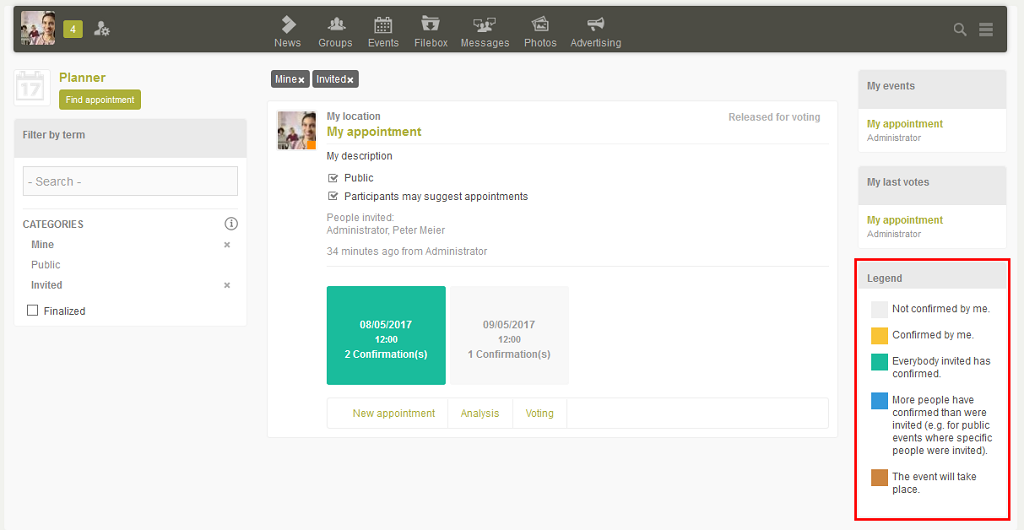
The legend explains the colors for the boxes for the dates, based on whether you or others have confirmed the date.
8. Permissions
So that the app Polls is available with all of its functions you need to give the users, who will create and contribute to the polls, the following permissions:-
Application
Use application -
Pages
Use page for all pages of the application. -
Data groups
Full access for all data groups.