Intrexx Share 2.2 - Events
1. Overview page
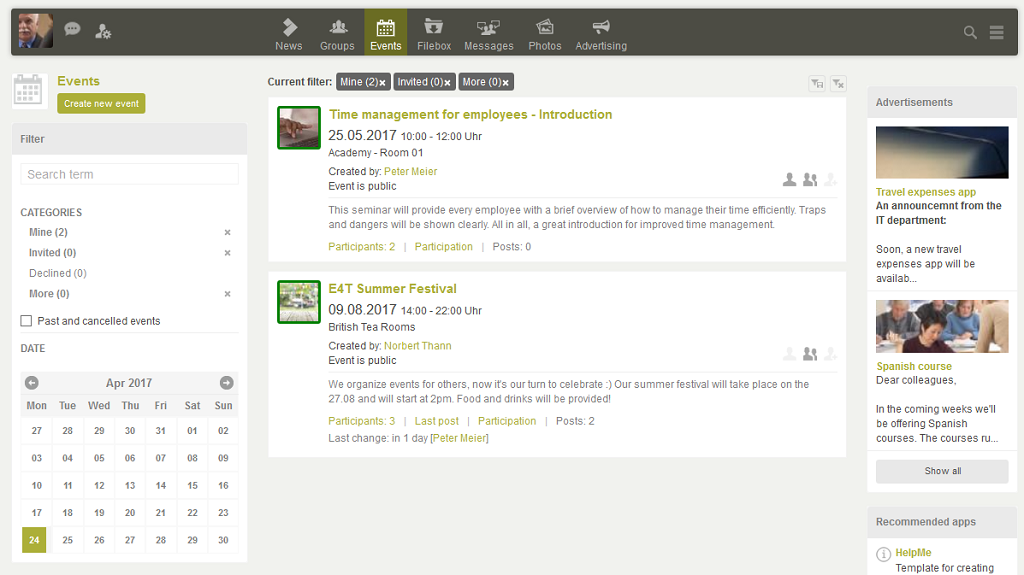
In the events overview you see all events to which you have been invited, or those that are public events or those that you have organized yourself.
By clicking on the Events symbol, the list of events in the middle of the page will be refreshed.
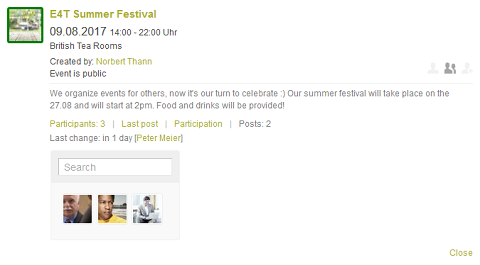
Beneath the title of an event in the middle column, you can see when and where the event is taking place, who created the event and whether it is public. By clicking on the name of the creator you can switch to their personal page. By clicking on the display of the number of participants, an additional area will be opened where you can see who has agreed to participate. You can also search for specific people within the group of participants. Click on one of the profile pictures to switch to the respective personal page.
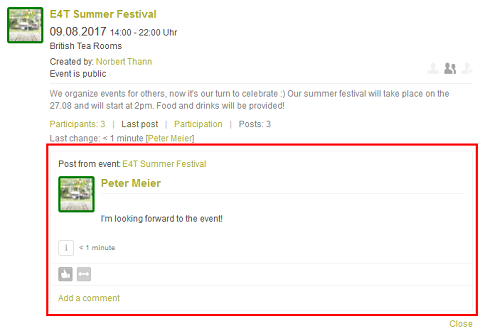
Click on Last post to see when the post when the post was last changed and by whom. The total number of posts from the current event will always be shown to the right of the link Last post. All information regarding the link Participation can be found here.
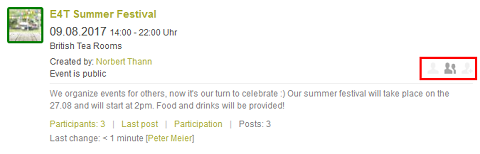
At the right-hand side of an event you can see three symbols which each represent a property. The symbol for a property is dark when that property is fulfilled and light when the property is not fulfilled. The meaning of the symbols will be displayed when the mouse hovers over the respective symbol.
 You are the creator
 You are a participant
 You have been invited
At this point you will be displayed as a participant even if you have only provisionally committed to attend the event.
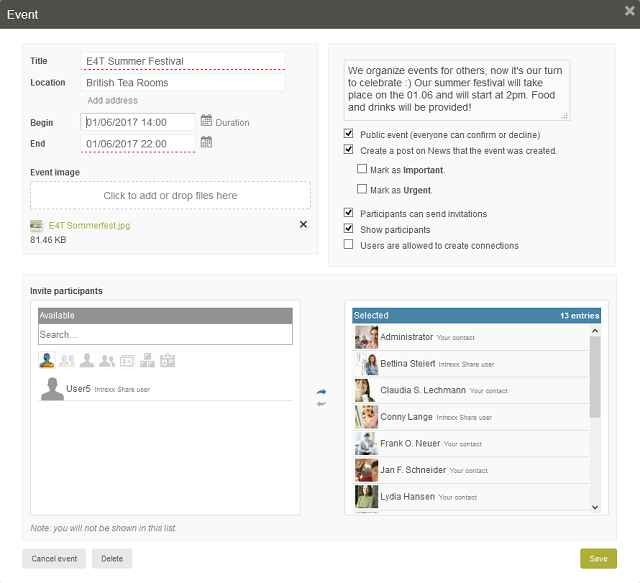
2. Create event
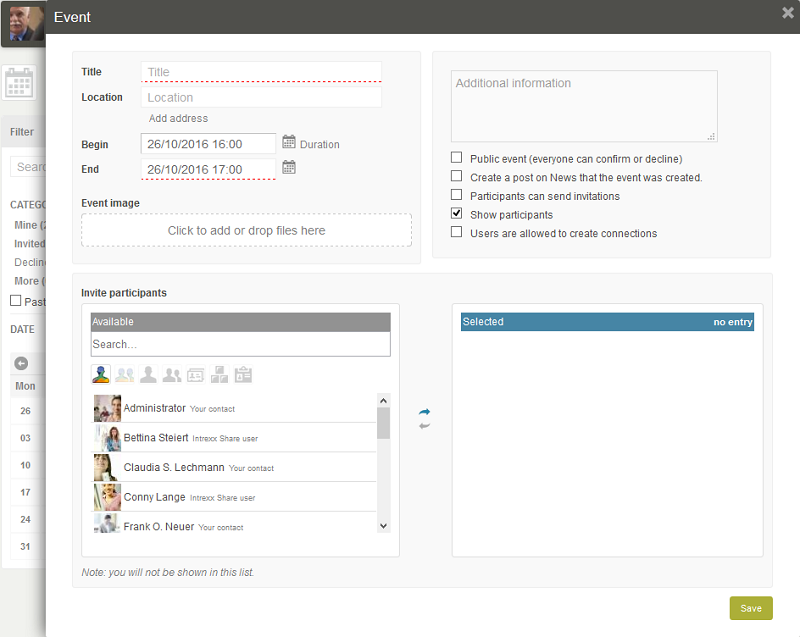
You can create a new event by clicking on the Create new event button at the top left of the display. Now you can set the master data for the event. As a minimum, the indication of the Start and End times, as well as a Title for the event is required. All other fields are optional. Any number of images can be uploaded as the event's image. In principle, we differentiate between two types of event:
Public events
With a public event, every Intrexx Share user can see the event in the overview and can directly confirm or decline attendance without a specific invitation.Non-public events
A non-public event will be seen just by the Intrexx Share users who have been included in the master data and thereby have been specifically invited. These users have the option to accept or decline the invitation.| A colored border will be shown around the event image - both in the event overview and the event posts - which depicts the event's status (public or non-public). |
Create a post on News that the event was created
With this option you can bring users' attention to a new public event. Subscribers to the Intrexx Share Event app will then see a post with notice of the event on their News page.Participants can send invitations
With this option you allow the participants who have provisionally or definitely confirmed to invite additional people to the event.Show participants
As the organizer of an event, you will always have an overview of the pending invitations, as well as the confirmations and declinations that have already been submitted by the invited participants. With this setting you provide all users, who can see the event, with a view of the guest list and information about who has confirmed provisionally and firmly or declined the event or has not yet responded.Users are allowed to create connections
All information regarding this topic can be found here.Invite participants
Move users, who you would like to specify as a participant, to the Selected list by clicking onClick on Save to create the event and the people invited will be informed of this in accordance with their personal settings. If one or any of the people invited does not have an Intrexx Share profile, they will be informed via email.
3. Being informed about events
You will be informed about public events on your News page. A prerequisite is that you have subscribed to the Intrexx Share Events app, and that the organizer of the event has selected the option Create a post on News that the event was created. If you are specifically invited to a public or non-public event, you will receive a notification. If you do not yet have a profile in Intrexx Share, then you will be informed of invitations to events via email.4. Event data
On the view page, click on the picture or title of an event to switch to its page.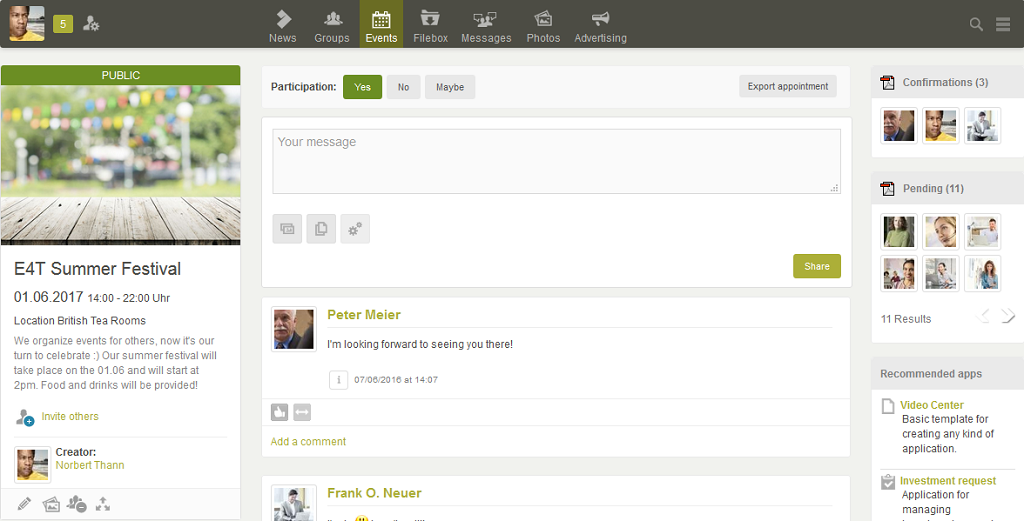
In the left column, you'll see whether the event is public or not above the event image. Click on the image to refresh the event data in the middle column. You can find the date and location of the event, as well as a description, beneath the image.
5. Export appointment

By clicking on Export appointment the relevant event data will be exported as an ics file to be imported into Outlook or other calendars.
| Please note that changes made in the calendar will have no effect on the Share event and that these do not synchronize. |
6. Invite more participants
You can invite more people by clicking on the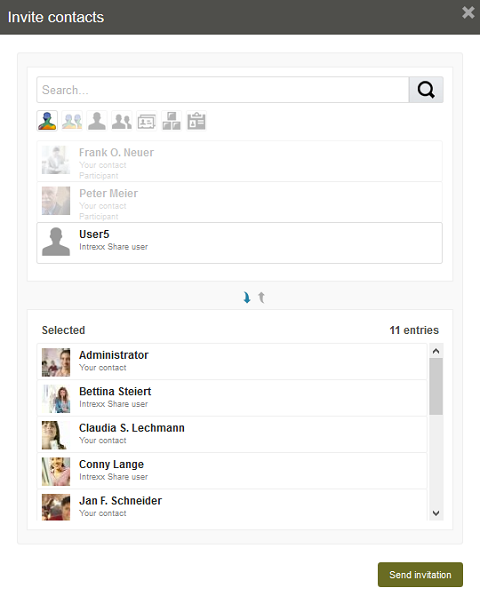
Move the people you would like to invite to the Selected list by clicking on the
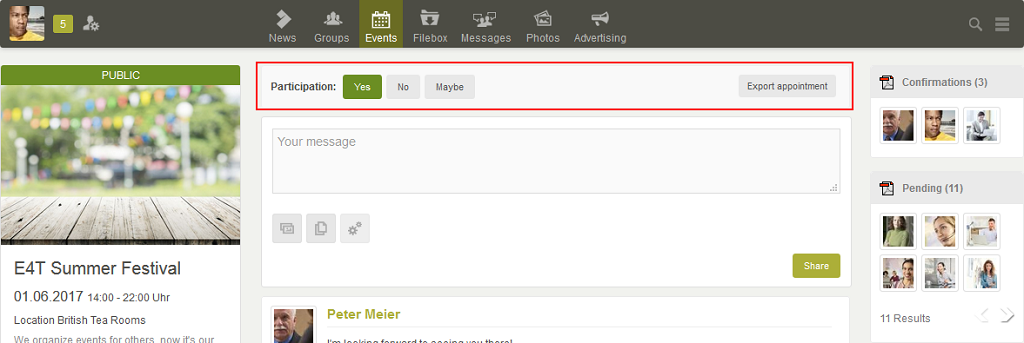
7. Participation
Here, you can decide if you will participate in the event or not, or provisionally accept by clicking on Maybe. Provided you have already specified whether you will attend the event or not, you can create a post for this event. An event's posts are visible to all users who can also see the event. All documents which you upload as a post attachment will be shown in the Documents element.
As the creator of the event, you can modify the event's master data and privacy setting by clicking on
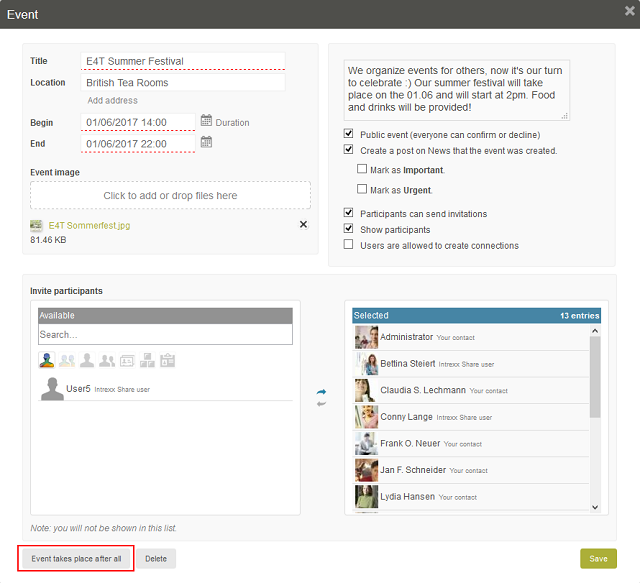
8. Cancel event
You can also use this dialog to cancel or delete existing events. If an event is cancelled, all of the information about the event will be retained. The participants of the event will receive a notification to inform them that the event has been cancelled. In the events overview, cancelled events will be marked if the category filter is set accordingly.
Participants will be informed about the cancellation of the event. The cancellation of an event can be reversed by editing the master data of the event again. For cancelled events, you can select the option Event takes place after all.
9. Delete event
When an event is deleted, the participants are not informed.10. Delete participation

If you wish to not only decline the invitation, but wish to completely delete the participation, select the option
11. Withdraw invitation
As long as the invited user has not confirmed or declined, you can withdraw the invitation. You can do this in the same way as when inviting people while creating an event or while inviting more participants
Move the entries for people, whose invitations you wish to withdraw, to the Available list. Then click on Save. The person whose invitation has been withdrawn will be notified of the withdrawal by a notification. If the invited person had not yet created a profile in Intrexx Share, they will be informed of the withdrawal of the invitation by email.
Participation status

If the organizer of the event has selected the option Show participants in the master data, all users who have access to the event will see the people who have been invited, and their respective status, at the right hand side of the display. They will therefore always have an overview of the guests to be expected.
| Please note that only Intrexx Share users who have received an explicit invitation will be displayed in the Pending section. In the Confirmations, Unsure and Declinations areas, you see users who have received explicit invitations, and users who have confirmed or declined attendance at public events. |
Click on the
12. Filters
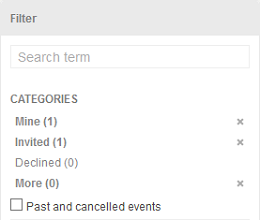
The filter Mine shows you all events that you have organized or to which you have provisionally or definitely confirmed attendance. From Invited you will see a list of the events to which you have been invited, but have not yet indicated whether you will attend or not. Events which you have declined invitations to, can be seen from the filter Declined. Public events will be displayed by selecting the filter More. If all of the categories are selected, all of the events to which you have access, according to the privacy settings, will be displayed. If one or more categories are selected, the events displayed will be those with a status matching one of the selected categories. By default, only events that have not yet passed are displayed on the events overview page. If Past and cancelled events is selected, then the past events will also be displayed. If no category has been selected, all past and all future events, for which you have access according to the privacy settings, will be displayed. If one or more categories are selected, all visible past events, and all visible future events, will be displayed where they have a status matching one of the selected categories. Additional information on this subject can be found here