Intrexx Share 2.2 - Messages
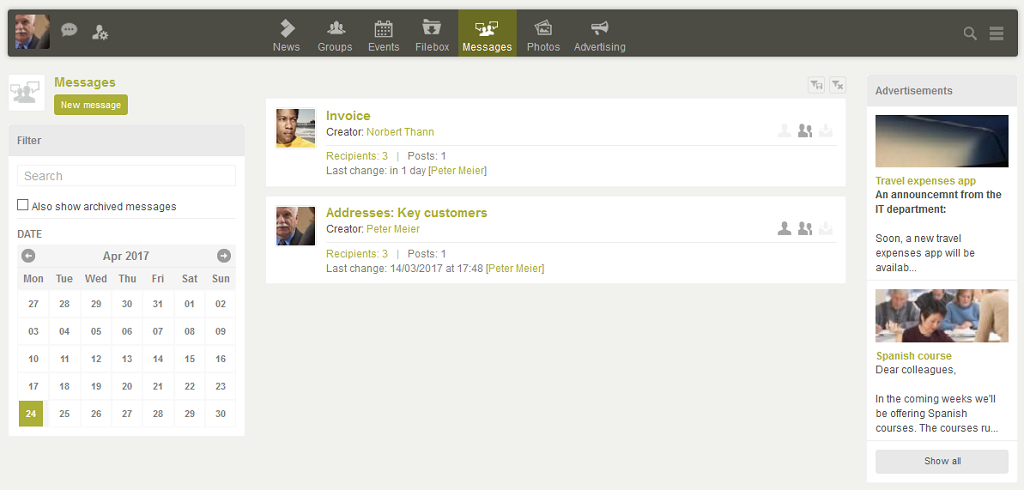
A message is always sent to a specified group of recipients. As the creator of a message, you will automatically be added to the recipients group. In the overview you will therefore see all of the messages where you belong to the recipient group. Click on
1. Information
By clicking on the
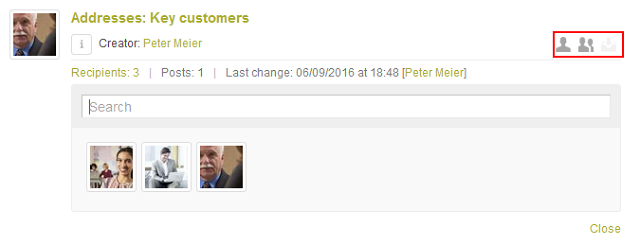
You can see three different symbols at the top right:
 Your are the creator
 You are a recipient
 Archived
A symbol is grayed out if you do not meet its requirements. The meaning of each symbol is shown in a tooltip when you move the mouse over them.
2. Create a message
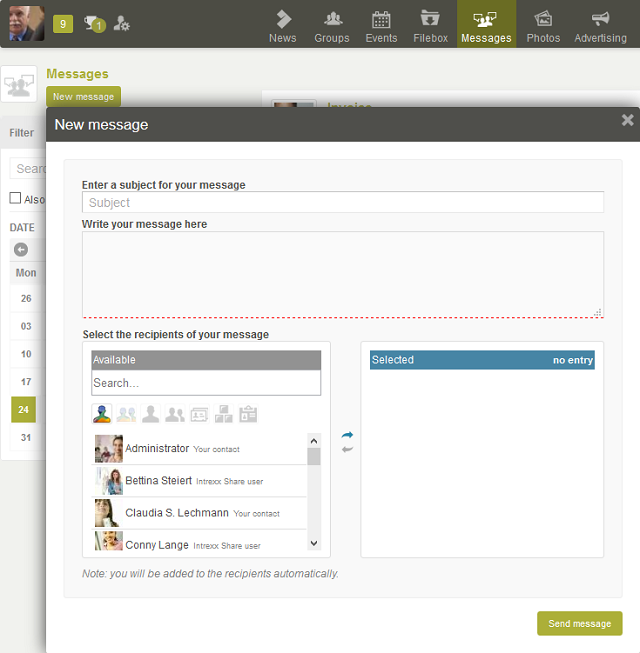
To write a new message, click on the New message button at the top left of the display area. Alternatively, if you are on the personal page of a colleague, you can select
 Write a new message from there, to create a new
message.
Write a new message from there, to create a new
message.

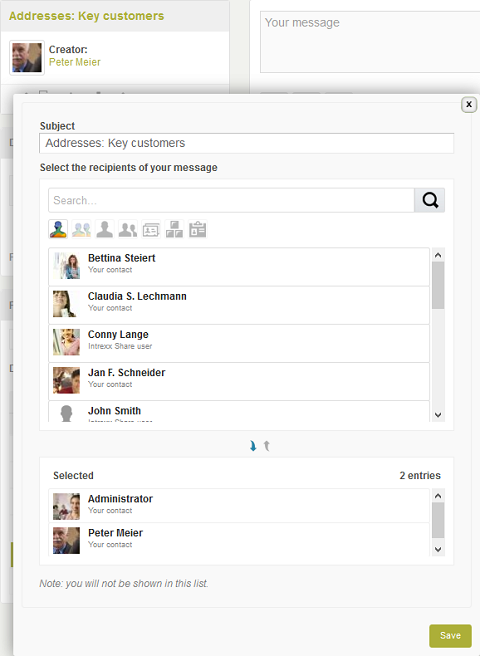
In both cases, a tooltip containing the master data of the message will be opened.
Enter a subject and the text of the message, and select the recipient(s). If you have created the message from the personal page of a user, then this user will be pre-selected as a recipient. You can, however, change the recipient group as required, just as you can in general with a new message. If you select a group as a recipient, the individual members of the group will be added to the recipient group when Send message is clicked on, rather than posting the message in the group. This procedure also applies to distribution lists, organizational units and roles. The recipients will be informed when you click on Send message.
3. Receive a message
The navigation bar will inform you about new messages. As long as you have not blocked the sender of the message, you will also see the new message on your News page.4. View a message

Click on the profile picture or the heading to open the message.
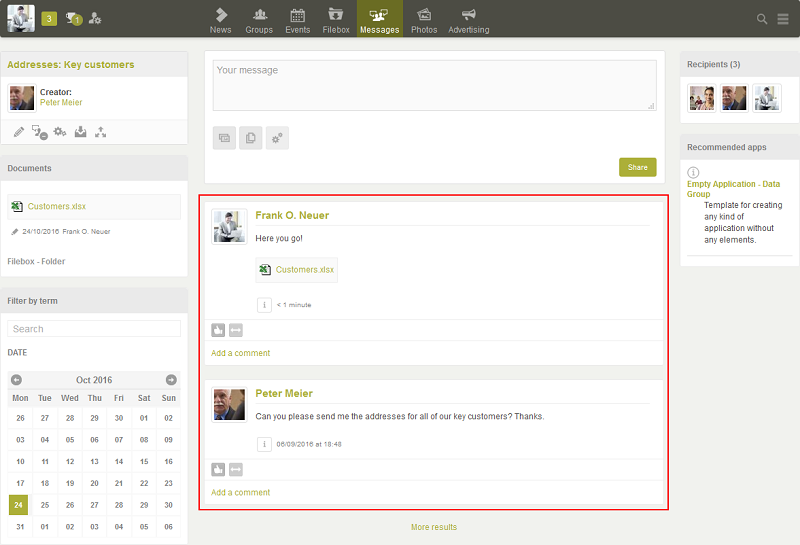
In the middle column, you can see all of the message's posts, provided you have not hidden them. You can find out more about this topic here.
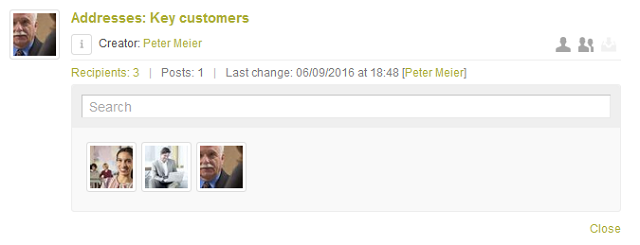
5. Recipients
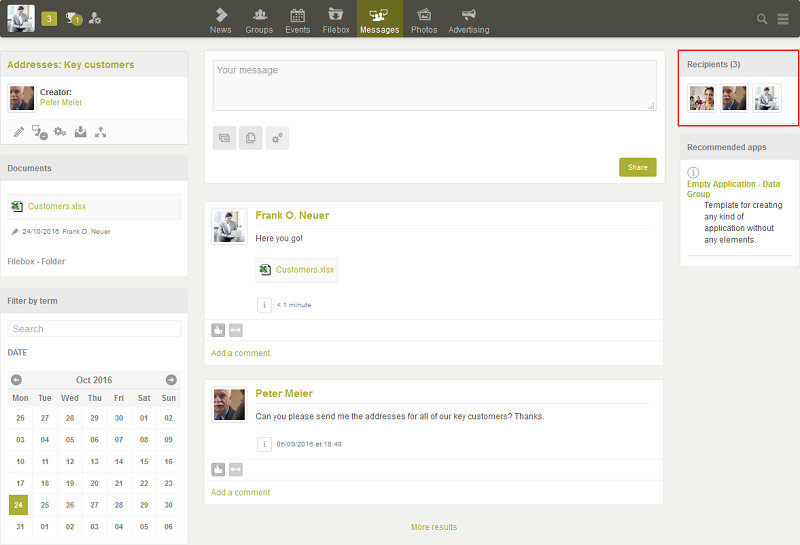
In this element, the number of recipients and their profile pictures are shown. Click on a profile picture to open the personal page of the recipient.
6. Manage a message
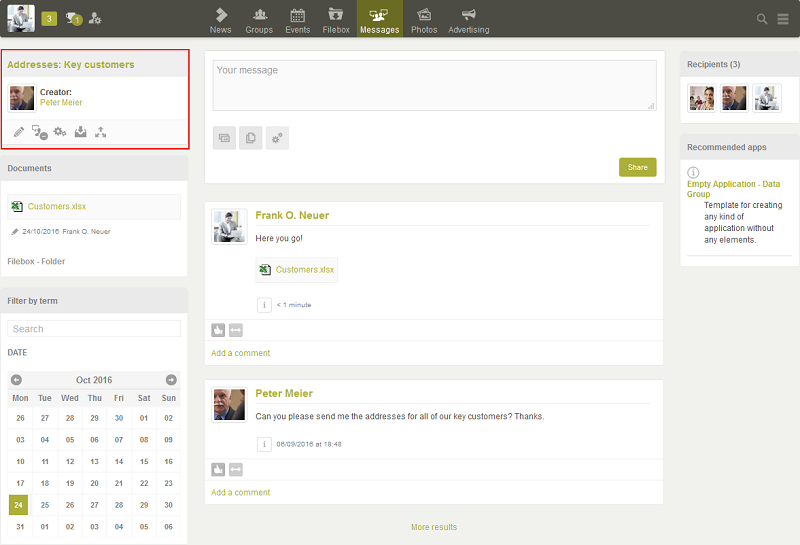
At the top left beneath the creator's profile picture, you can use the various functions to manage the message.
7. Edit a message

Click on
| Please note that you cannot remove yourself from the recipient group from this point. |
Delete message

To withdraw from the recipient group of a message, select the option
Settings

Via
Archive message / Remove archive flag

Messages, which you do not necessarily need to see on the overview page, but which you do not wish to delete, can be archived. Select
Remove archive flag.
8. Filters
All information regarding the general filters on the left-hand side on the overview page of the Messages module can be found here.
There is an additional option in the filters area for messages, Also show archived messages. This will mean that archived messages are shown in the overview.