Advanced Techniques - Set and read cookies
This workshop demonstrates how cookies can be created and how values can bed saved and then read with JavaScript. To do this, a welcome screen will be created where users can decide whether they want to see this again, when they open the start page the next time. The example application for this workshop can be downloaded here and imported into your portal as usual. Make sure the expert options have been activated so that all of the dialogs explained in this example are available. Knowledge of JavaScript is an advantage.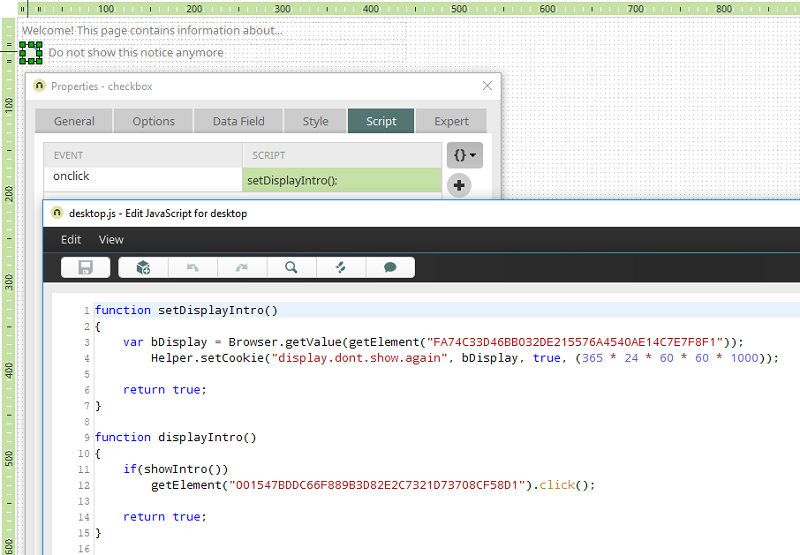
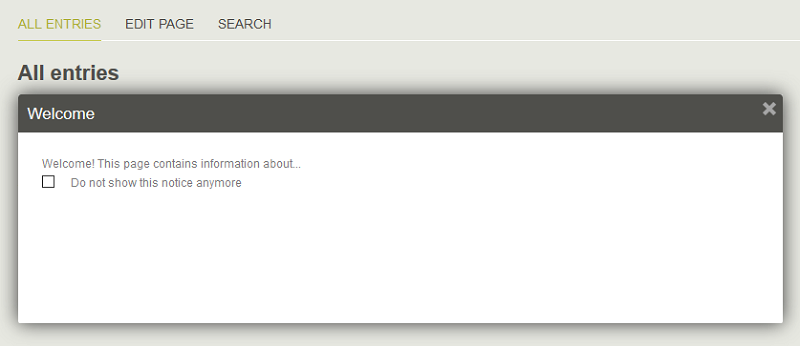
The application contains a page called "Welcome". This page should be loaded in the browser in a tooltip as a welcome screen. Beneath the information, which you can define as you like, there is a checkbox that is not linked to a data field. Its title is "Do not show this notice anymore". If you open the properties dialog of the checkbox and switch to the Script tab, you will find the following script when you open the JavaScript editor:
function setDisplayIntro()
{
    var bDisplay = Browser.getValue(getElement("FA74C33D46BB032DE215576A4540AE14C7E7F8F1"));
	    Helper.setCookie("display.dont.show.again", bDisplay, true, (365 * 24 * 60 * 60 * 1000));

    return true;
}

On the application start page, you will find the button "Show welcome screen" in the hidden area. The checkbox in the "Web" column is active so that the element is available in the web and not just on the server side. The "Welcome" page has been selected as the target destination for the button.
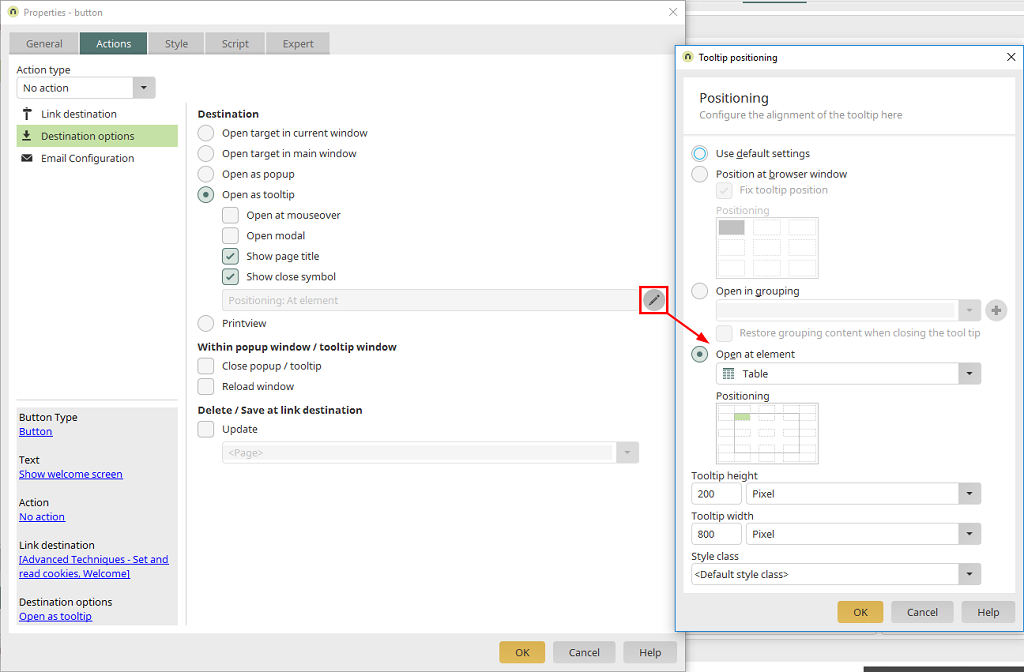
The positioning and size of the tooltip can be defined in the destination options.
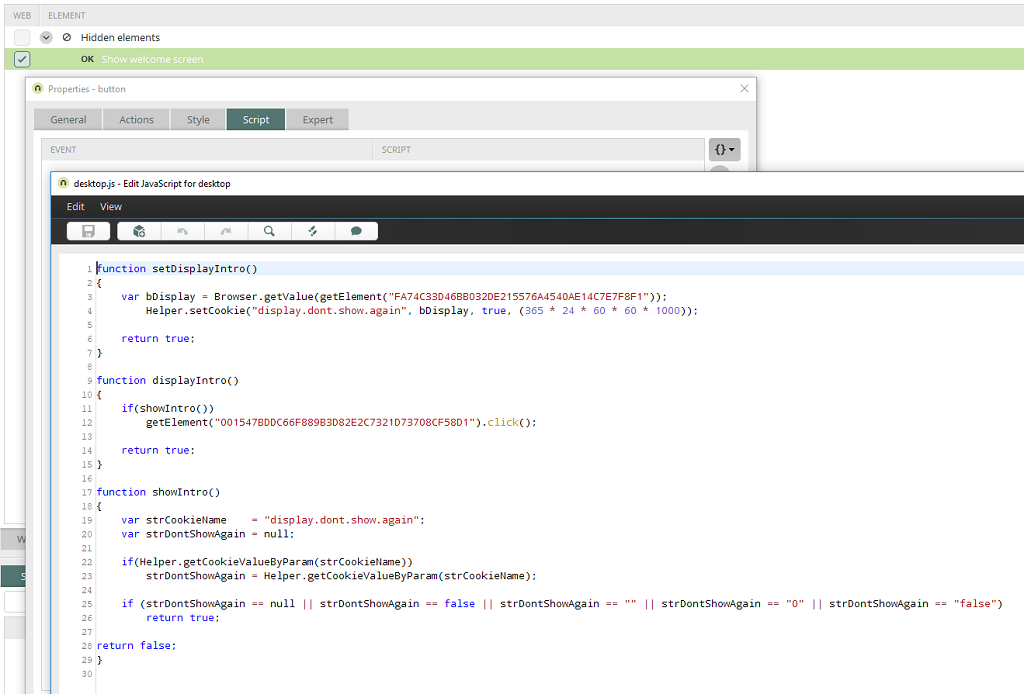
If you open the script editor on the Script tab, you will see the following functions:
function displayIntro()
{
    if(showIntro())
        getElement("001547BDDC66F889B3D82E2C7321D73708CF58D1").click();

    return true;
}

function showIntro()
{
    var strCookieName    = "display.dont.show.again";
    var strDontShowAgain = null;

    if(Helper.getCookieValueByParam(strCookieName))
        strDontShowAgain = Helper.getCookieValueByParam(strCookieName);

    if (strDontShowAgain == null || strDontShowAgain == false || strDontShowAgain == "" || strDontShowAgain == "0" || strDontShowAgain == "false")
        return true;

return false;
}
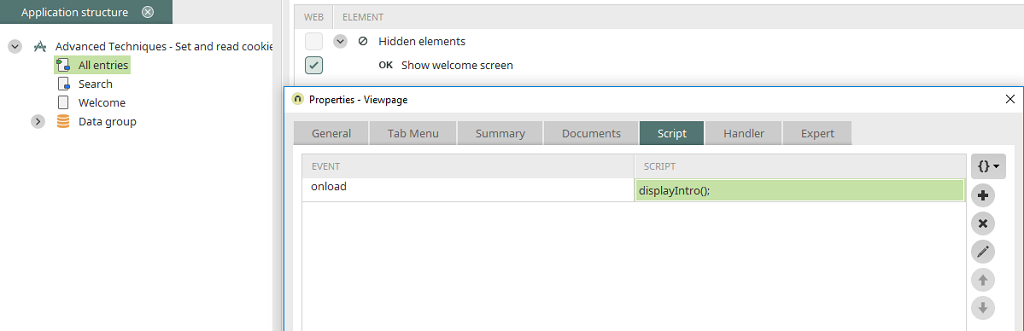
On the Script tab in the properties of the start page, the method displayIntro() has been assigned to the onload event of the page.
When the application is loaded in the browser, the desired notice is now shown. Please note that database entries are not involved here but rather persistent cookies. That means the preferences are lost if the user deleted the browser cookies.