Tipps & Tricks - Duplicate check
This Advanced Techniques post demonstrates how you can prevent certain values, e.g. email addresses or titles, from being recorded doubly before they are saved.1. Create application
Create an application based on the Basic application template. You can modify the application's title to a title of your choice by double-clicking on the Application node.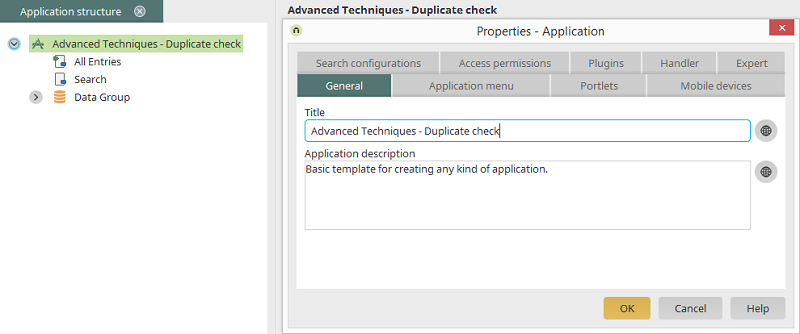
Click on OK and save the application with the keyboard combination CTRL + S. Assign the application to a position in the portal menu structure and then open it in the browser.

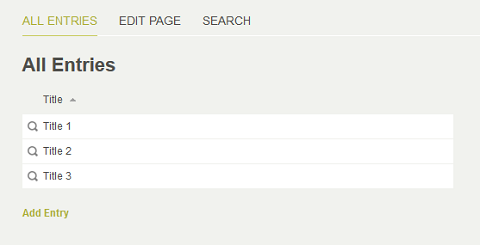
On the edit page, record the following titles:
- Title 1
- Title 2
- Title 2
2. Modify custom.js
To modify the custom.js file, please proceed as follows:- Open external/htmlroot/include/custom in the Portal directory.
- Open the file samples.js with a text editor (e.g. Notepad ++).
- Copy the JavaScript function checkUpForDatabaseConflictBySysidentAndObject and then close the file.
- Open the file custom.js in the same directory and insert the JavaScript function copied in the previous step. Then save the file.
3. Replace getconflictBySysidentAndObject.vm
For the modification of custom.js please carry out the following steps:- Open orgtempl/blank/internal/system/vm/html/misc in theInstallation directory.
- Copy the file getconflictBySysidentAndObject.vm.
-
Open internal/system/vm/html/misc in the
Portal directory
and paste the copied VM file. If the file is already here, please
replace it.

Please note that existing modifications in getconflictBySysidentAndObject.vm in your Portal directory may be lost upon replacing.
4. Create sysident
The database field Title, that is to be checked in our example, will now be provided with a sysident that is unique in the data group. To do that, select the option to show the data group's data fields from the context menu in the application structure.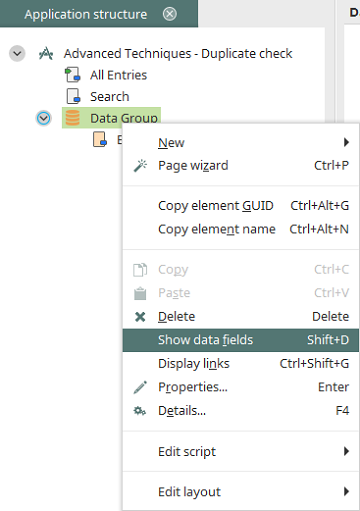
Open the properties dialog of the Title database field by double-clicking on it. Then switch to the Expert tab. If this tab is not available, please activate the Expert options.
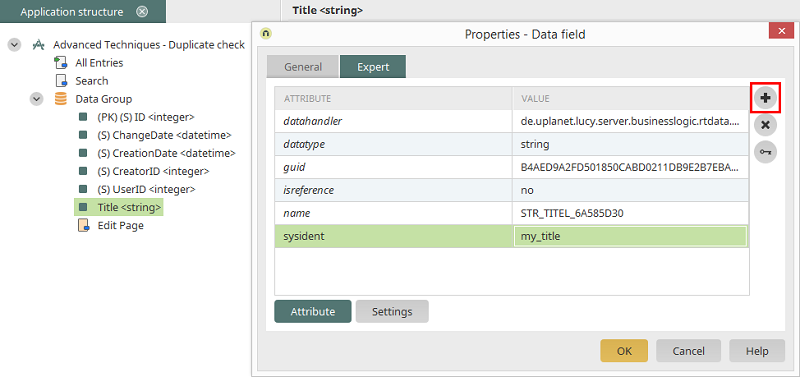
Here, click on
| Please note the attribute sysident should be written in lower case. |
Click on OK.
5. Write JavaScript
Now switch to the edit page and open the properties dialog of the OK button, which saves the data record, by double-clicking on it.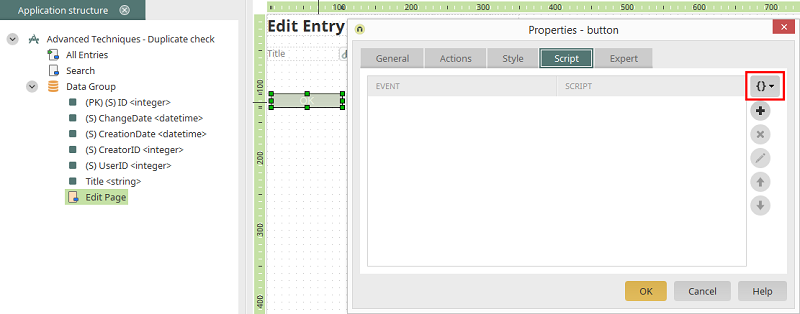
Switch to the Script tab and click on
function checkTitle()
{
var l_oCheckUpResult = checkUpForDatabaseConflictBySysidentAndObject("sysident name", getElement("Edit field GUID"), false);
if(l_oCheckUpResult.bError)
{
alert("An error occurred!\n"+l_oCheckUpResult.iErrorId+": " + l_oCheckUpResult.strErrorDesc)
}
else
{
if(l_oCheckUpResult.bConflict)
{
// a conflict was found
// Option 1: Inform the user that the data record cannot be saved and cancel the saving process with return false;
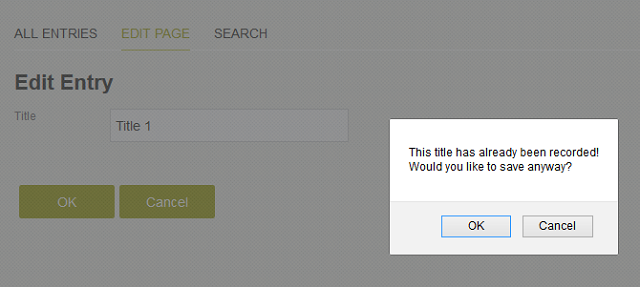
//alert("This title has already been recorded!")
//return false;
// Option 2: Ask user if they'd like to save anyway
Check = confirm("This title has already been recorded!\nWould you like to save anyway?");
if(Check)
return true;
else
return false;
}
else
{
// No conflicts were found
return true;
}
}
return false;
}
var l_oCheckUpResult = checkUpForDatabaseConflictBySysidentAndObject("sysident name", getElement("Edit field GUID"), false);
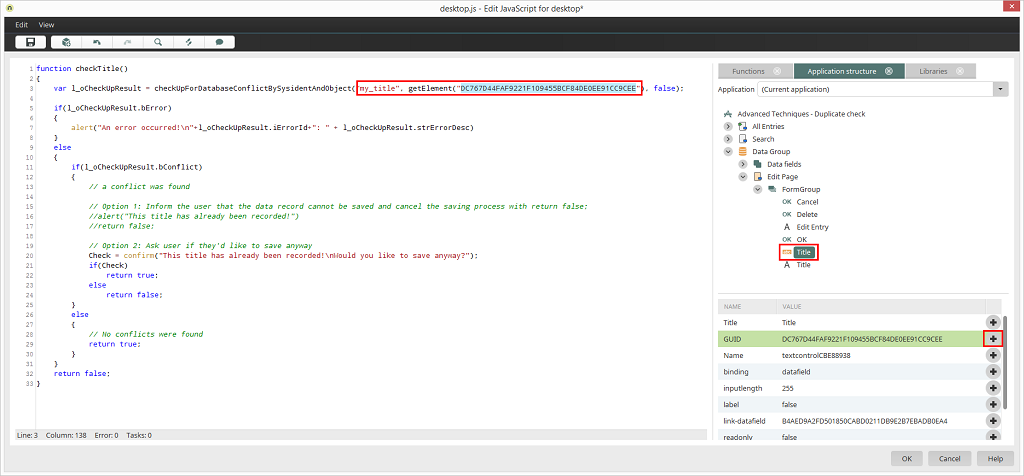
The GUID of the Title edit can easily be identified by switching to the Application structure tab on the right-hand side of the editor. The levels of the structure beneath the edit page can be shown by double-clicking on them. You'll find the Title edit field in the Form group. In the bottom-right area, the GUID of the edit field will be shown alongside other properties. By clicking on
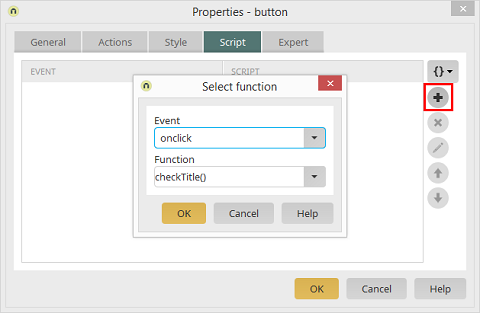
Here, the JavaScript function can be assigned to the button event onclick. This is done by clicking on
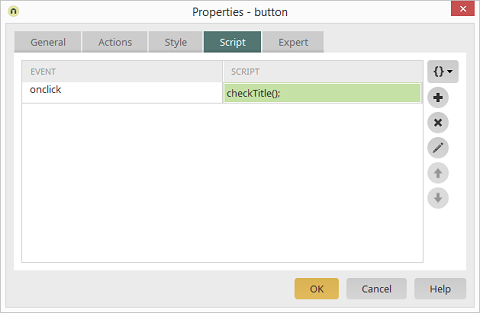
Click on OK and save the application. If a title is entered for a second time in the browser, the user is informed accordingly.
| Please note that this conflict check only works if the corresponding data records are not created in the same millisecond range. |